The Mancave Project: Tutorial and WIP Showcase
Posted by RazorsKissOct 15
Introduction

Nearly a decade and a half ago, when we moved into this house, I had one of the carport’s add-on rooms earmarked for myself.
We have a large, 4-car carport, where the previous owners built two rooms in the rear, which returned it to a “normal” 2-car size. These rooms are both 9.5×8.5×15.5 feet. The second room has been a spare bedroom for a couple of our boys now – but will eventually be my wife’s room to do with as she wills.
Previously, I had built an L shaped plywood desk, but had never finished the project. The room had become a bit of a storage room – because I went on the road as a truck driver for 6+ years. I didn’t even have a desktop for most of that time, and my plans for building a workbench for my PC repair side job went by the wayside.
I returned home in 2018, but the room had decayed so much in that period that the desk was no longer salvageable, and I was going to have to start over. The room continued in its role as storage catch-all, and it was basically ignored. I have a rather nice study with 3 workstation areas, after all – and I still didn’t have a desktop.
Disaster
In May of 2019, the creeks that bracket our property (and much of the county) flooded catastrophically. We had 28 inches of water in our house (I kayaked through my front door at one point, in the process of trying to salvage additional items and place them upstairs in our 2nd story bedroom), and practically everything downstairs suffered water damage.

The carport rooms were hit just as hard. I lost my entire collection of discs, all my parts computers, most of my spare and specialty cables, all my specialty tools and instruments, and practically all of my peripherals.
Inside, the kids lost two laptops that were getting old, and typically stored in the bottom study cabinets. I lost two older laptops I was working on, a nearly new Saitek X52 I got for the previous Christmas. We simply forgot they were there in the rush. We were trying to save furniture, packing up clothes, bedding, toys, – and not least, making sure the babies got to the vehicles and stayed there while we hurriedly salvaged as much as we could.
All we lost was stuff when you come down to it. That can be replaced – and much of it had to be. Initially, only the smaller creek flooded – that only put about 18 inches of water in the house. Overnight, however, the larger creek flooded, to a degree that hasn’t been seen in a century. When I got to the house the next morning, the water was above my waist while wading down the road. I retrieved our kayaks on that trip, and we made a couple of trips that day, seeing what else we could salvage, or move out of danger.
Cleanup
Once the water receded, we had to do a very fast job of gutting the downstairs. We knew, from the cleanup work everyone in this area did after Hurricane Katrina, that once things get wet, if you don’t dry them out, you grow mold in a wet climate like ours – and you will never get that stuff out. We had to chuck everything out of the downstairs part of the house, triage whatever was salvageable – then gut everything. In the mancave, we basically had to shovel it all out. The cheap MDF that used to be a partially completed desk had become sludge.
After cleanup, we had an entire summer, and into the fall, of putting it all back together. Everything except the studs, the polyurethaned hardwood study shelves, our stained and polyurethaned furniture items that survived, and our treated wood bathroom cabinets had to go. The lower kitchen cabinets didn’t make it. The floor tiles were damaged by water undermining them, and large objects being repeatedly smashed into them as they floated. Practically everything, from 32 inches and below, was torn out and replaced.
After that all hands on deck renovation project was done, and we took a bit of a breather, it came to me: What better time would there be for me to re-do my mancave? It was already down to bare studs, I still had leftover paneling – why not? So, in the aftermath of a disaster, I took my room back. This is going to be my way to document that project for anyone that wants to do something similar with a space in their house.
Starting from Scratch: Phase 1
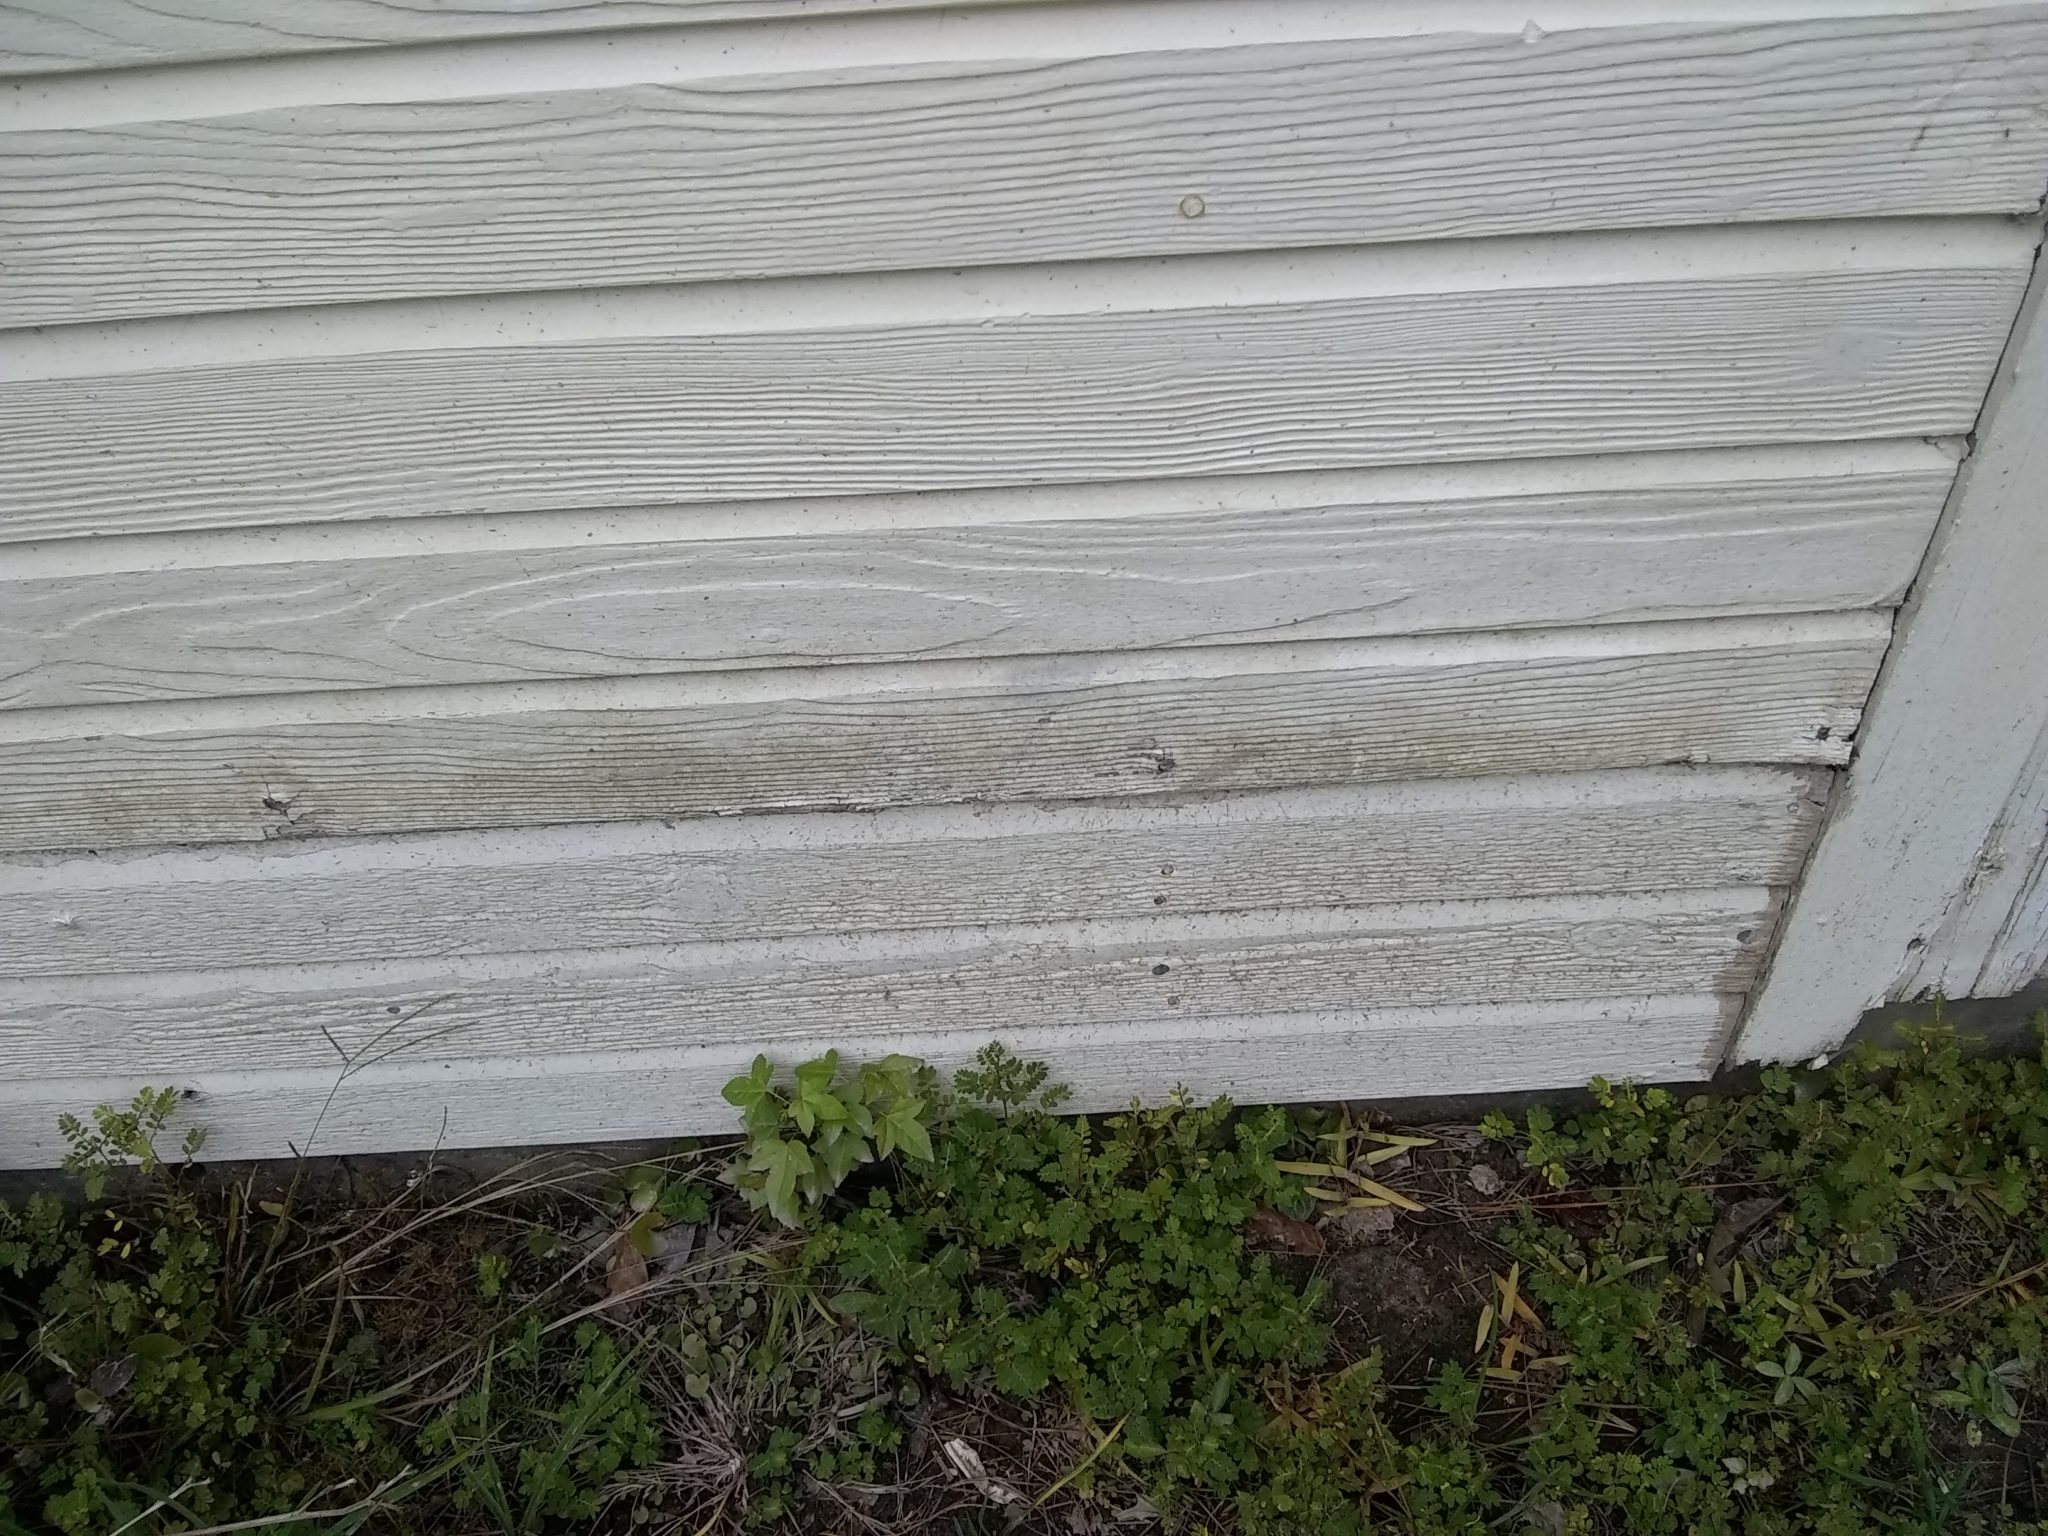
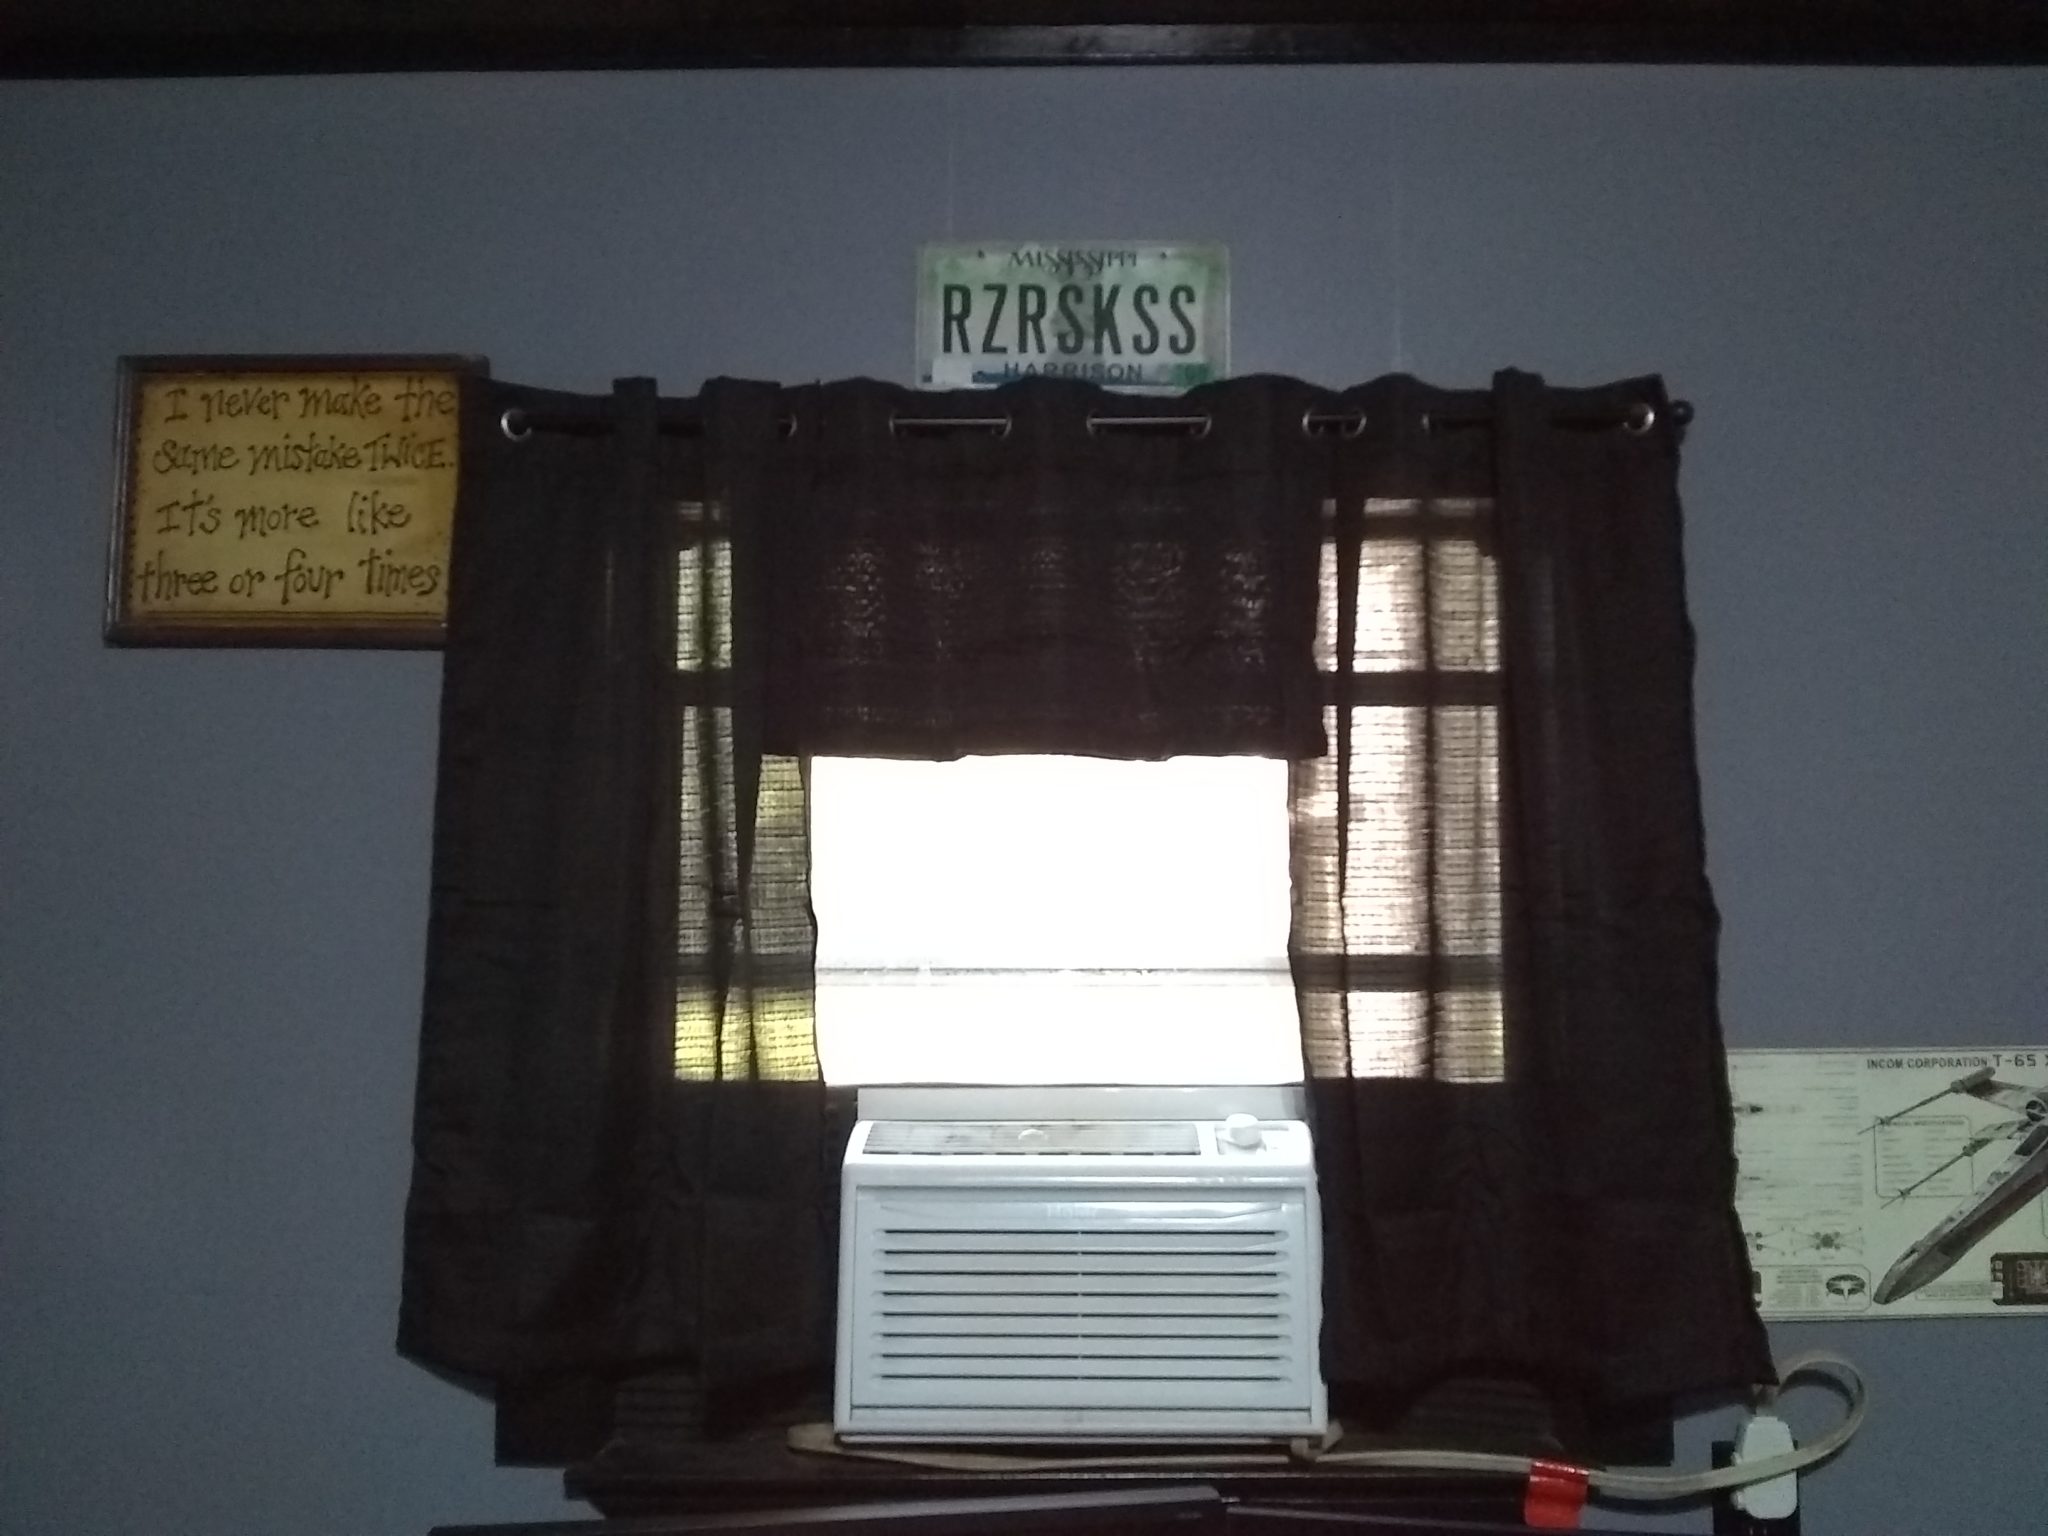
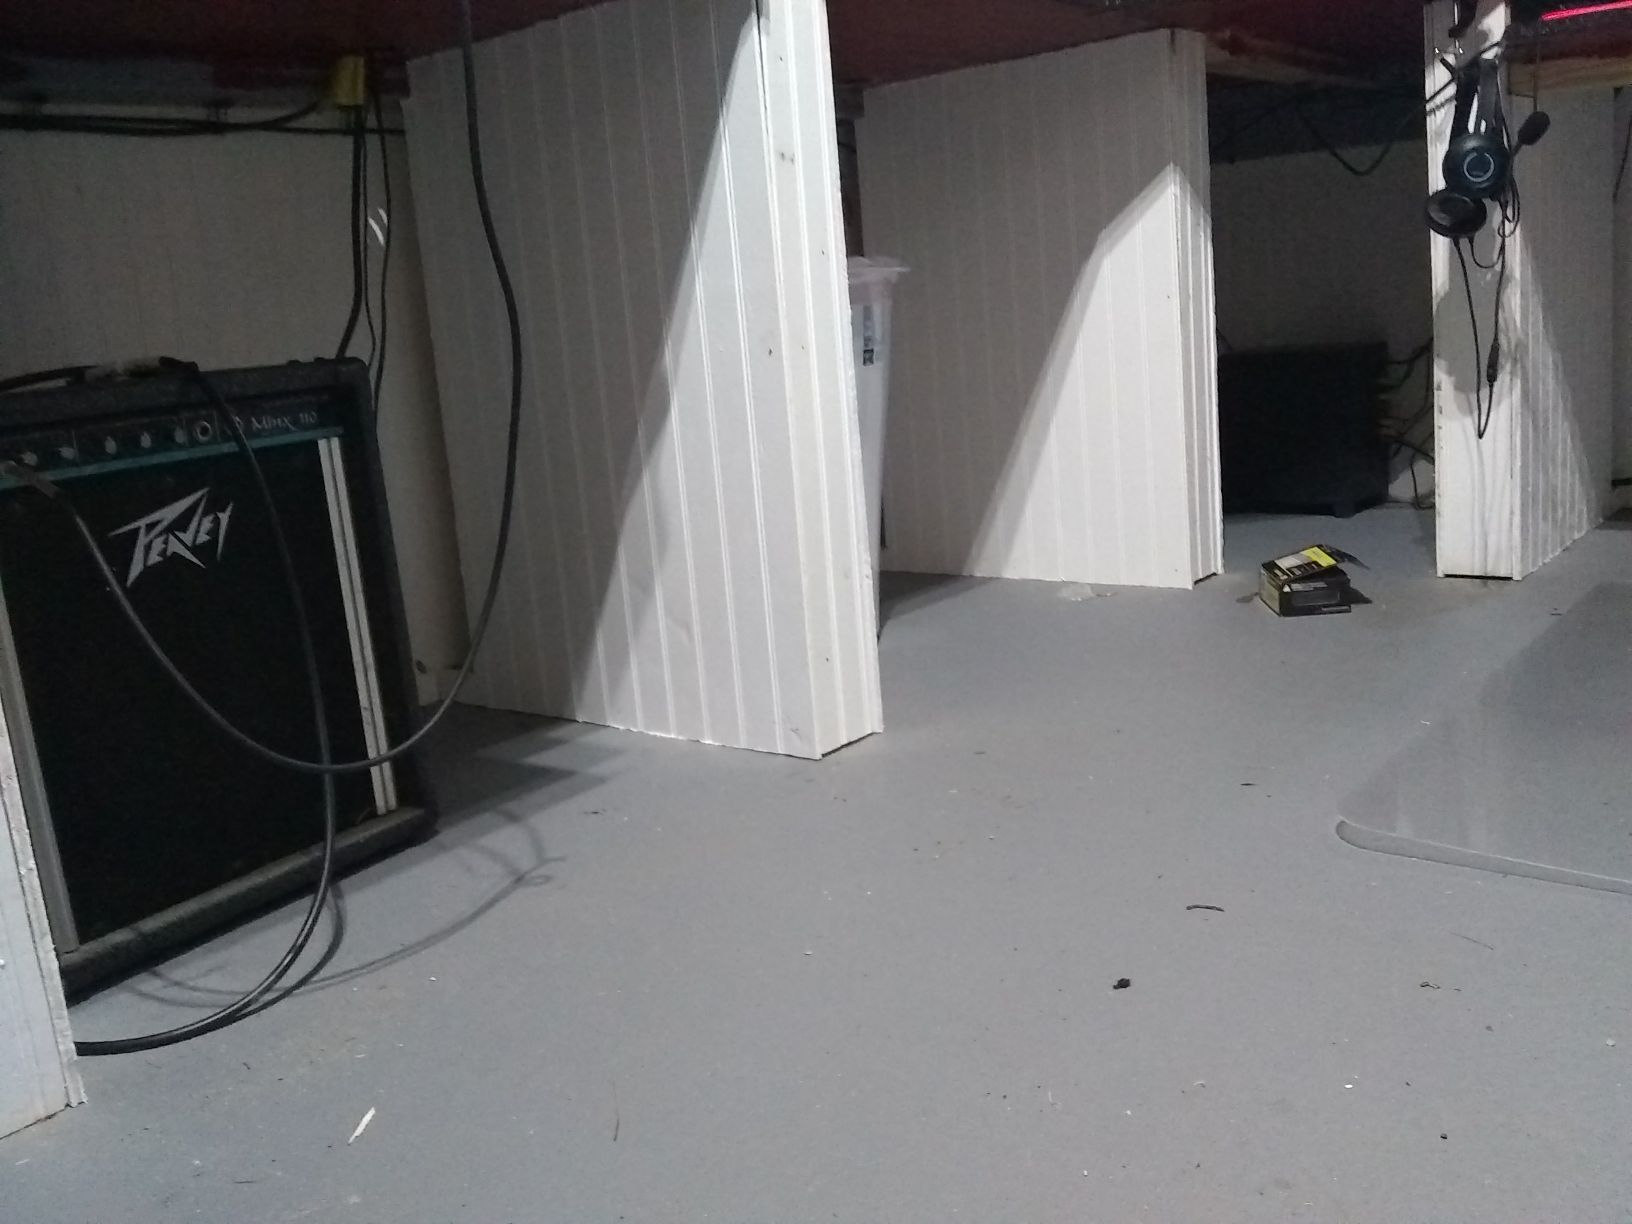
Starting this project, all I had left was bare studs and a door, up to about 32″. The whole room was previously paneled in bare plywood by the previous occupant – it was intended as a workroom/workout area. As such, all the outlets were installed around 48″ (they were not all installed at the same time, and they weren’t put at the same height, either – they vary from 45″ to 50″), presumably for use at workbenches. It has a single 32″ wide window, directly opposite the door. I’d bought a window A/C unit for it 10 years before – and I put the same one right back in now after I’d moved it upstairs to a bedroom for a time. I had replaced it the year before, but it was still operational, just not as good as its replacement. It had yellowed with age (and smoke damage – I used to be a smoker, I admit) – so I used some white appliance paint leftover from a refrigerator makeover to freshen it up.

The outside siding was still (mostly) good, except for one large hole near the front left corner where the siding had been damaged. It had two salvaged cabinets near the rear left corner that had held the previous occupant’s junk for the last 15 years, because I always planned on junking the cabinets, but hadn’t gotten around to it. I had what amounted to a blank slate – but a limited budget: I only had about 100-150$ per month that I could allot to it.
The primary concern I had was weatherproofing the room, at least on a macro level. It wouldn’t be airtight for quite some time, but it was actually letting rain in, in the one corner! We had just finished up replacing the front porch siding, and all the front windows – it had taken a beating from things floating into and battering the house – so I took one of the better scraps from the demolition, and patched that hole.
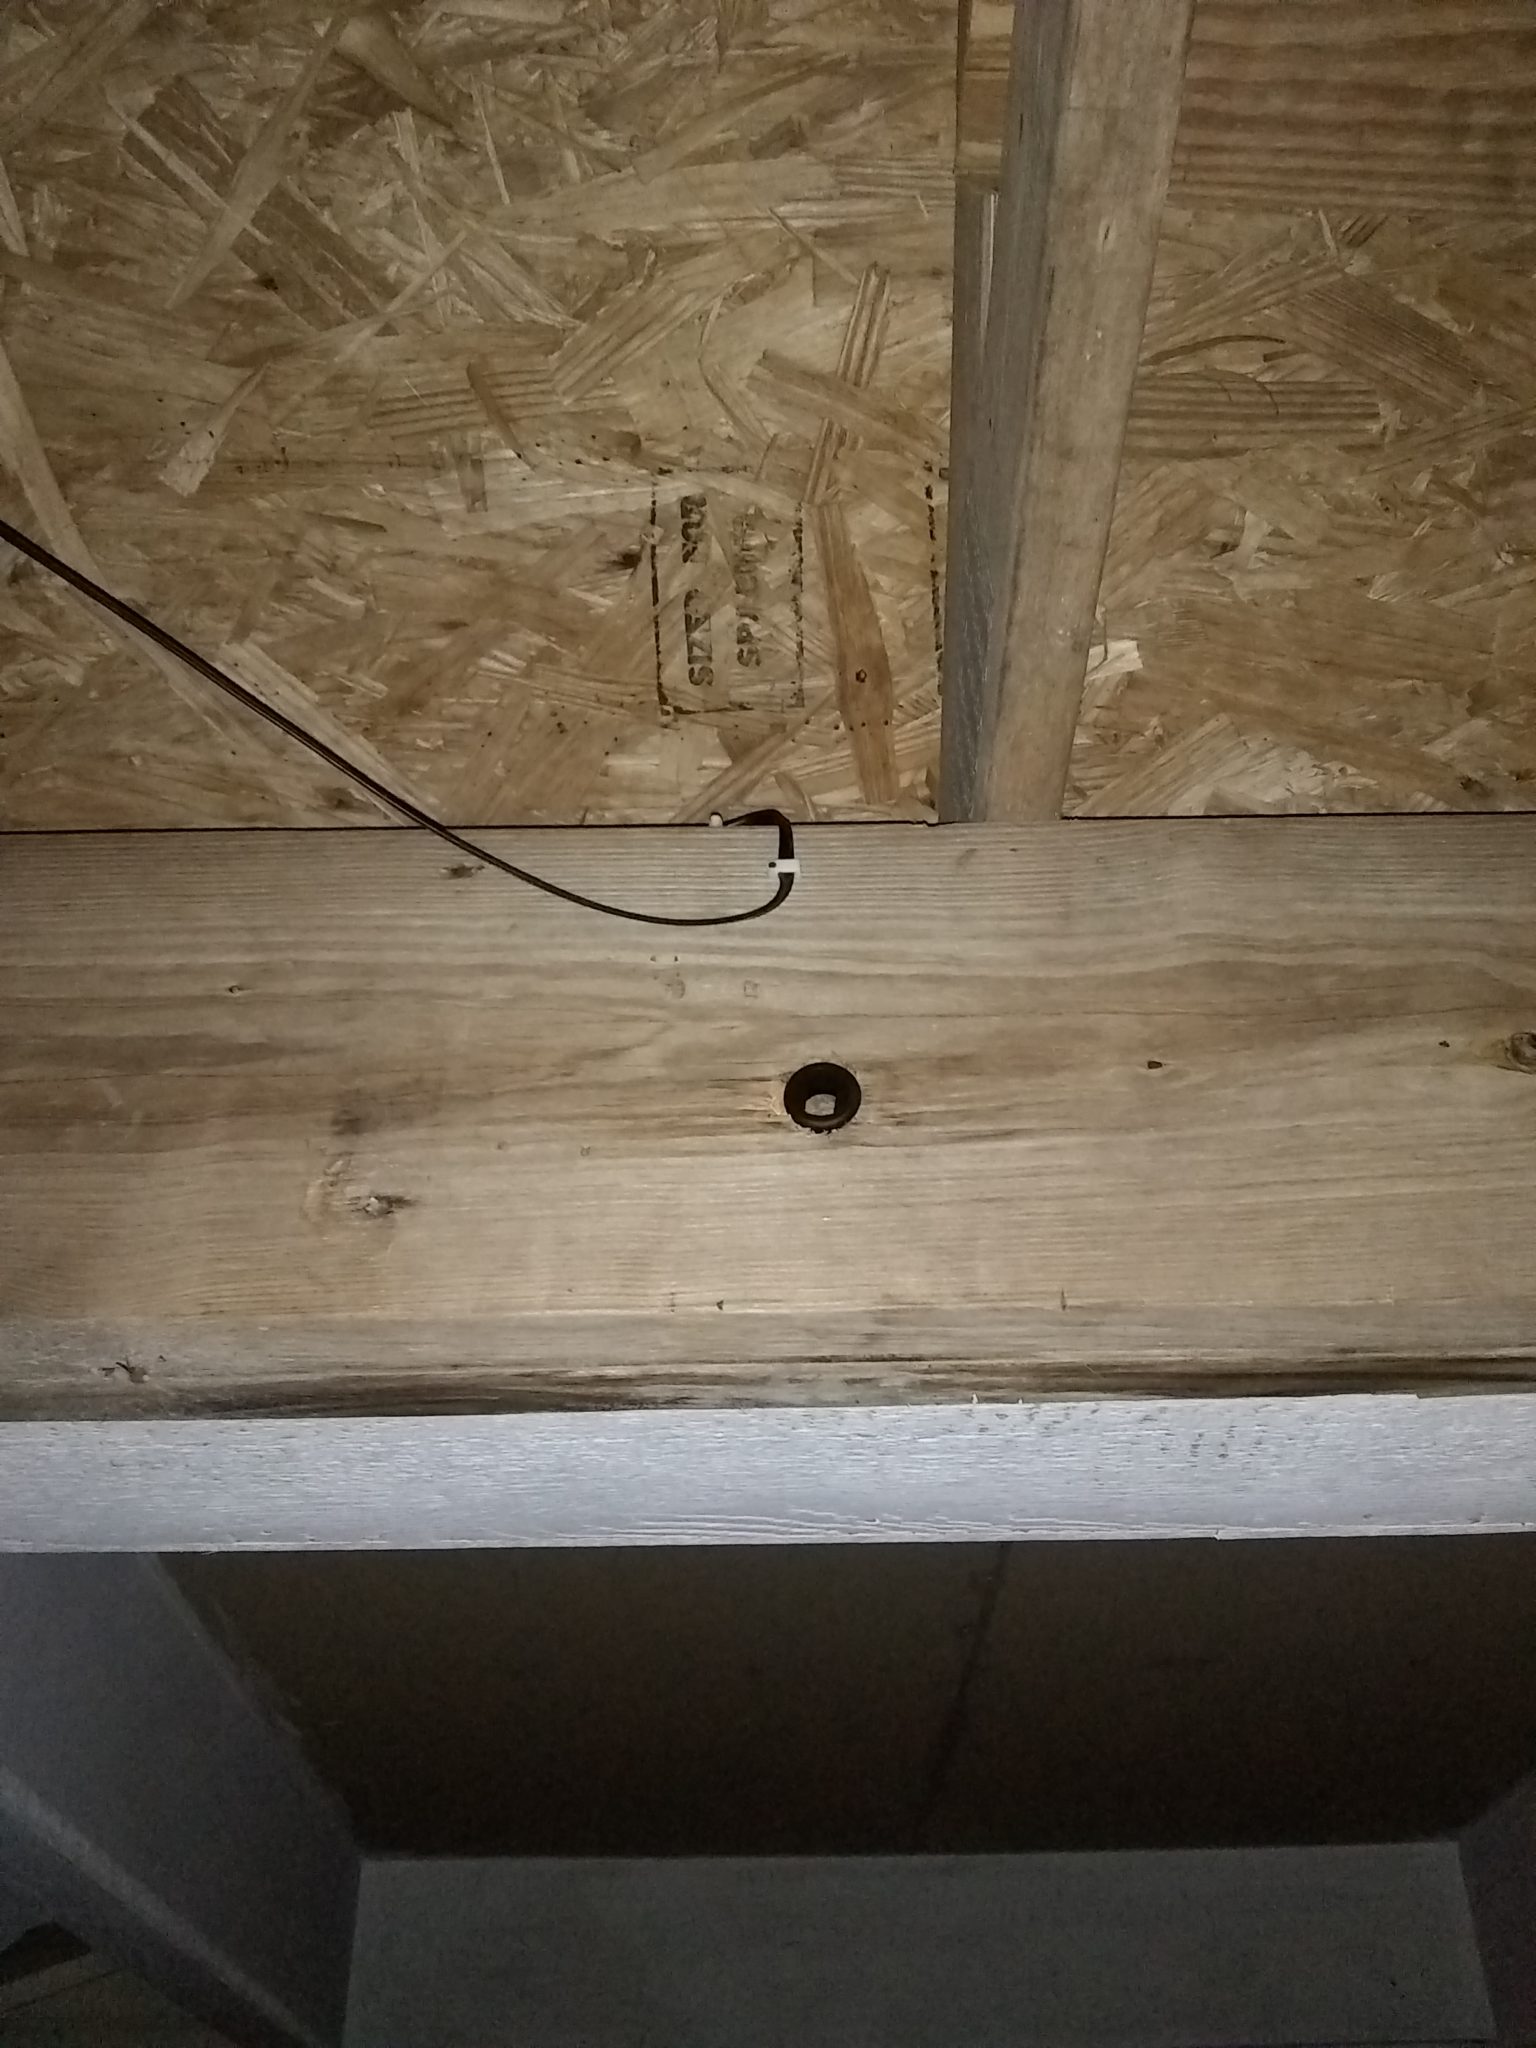
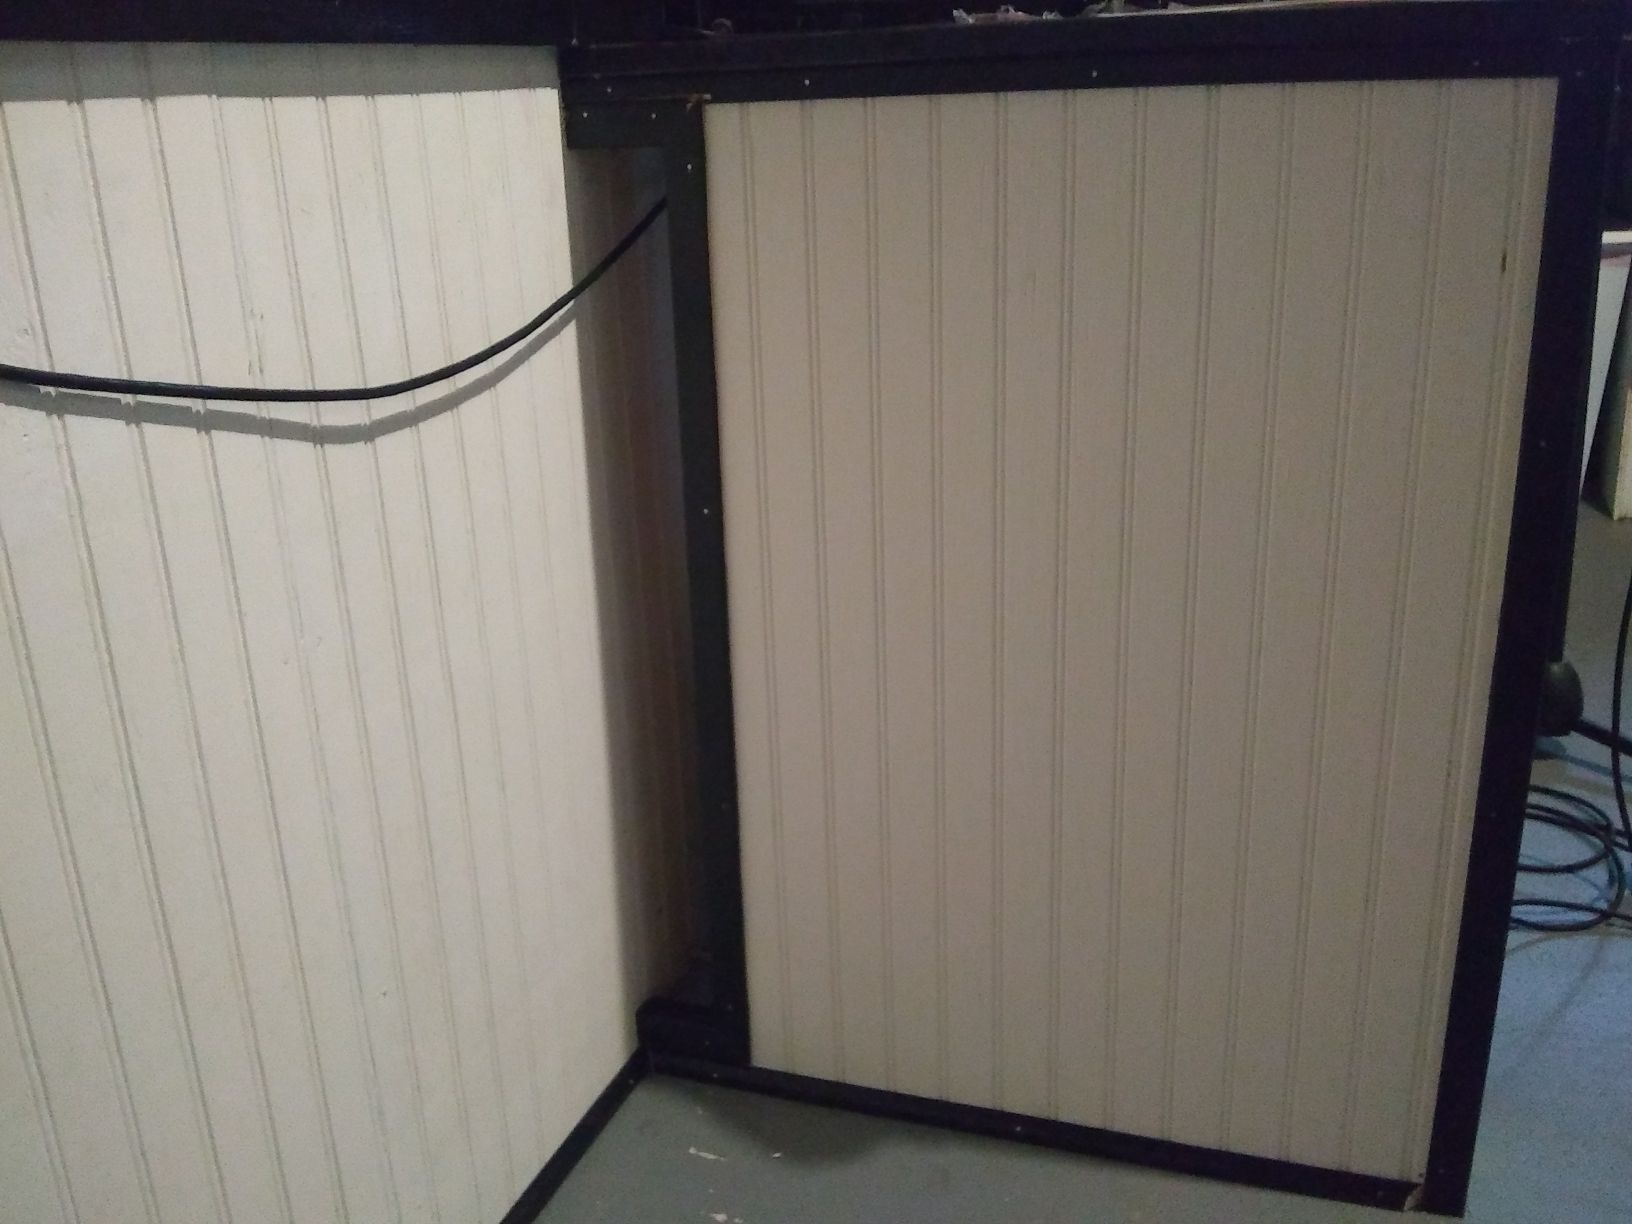
The siding around the carport wasn’t slated for replacement anytime soon. The first thing I bought for this project was insulation, from Jack’s locally. I had put in insulation previously, but obviously, it had all been dunked. I bought two rolls, and replaced everything up to 32″. The second thing I bought was several sheets of plywood. The plywood used in here was of varying thicknesses and types – which left the walls a bit of a patchwork. Further, at one point, some rodents had got into the walls and shredded the insulation at several places. I removed each and every panel, checked all my wiring, and replaced bad insulation out of the remainder of those two rolls, then replaced the odd-sized plywood sections, also with sheets from Jack’s. I left the right rear panels down, however. I had some wires to run in the walls first.
Cable Runs
Because this room is on the carport, I had to run some cables to get internet access out here. I had done that previously, with Cat-5 – but I really don’t want to run wires again anytime soon. This time, I ran Cat-7, which can run at multi-gigabit speeds (10gb). I could have gone with Cat-8 – but the price difference is significant – and there are length considerations. The run from the carport to the attic above the living room is just under 100 ft – I used this cable for that run. That’s close to the limit for Cat-8 (or Cat-6) – but that’s just fine for 7. From the attic, there is another 50 foot run (using this cable) to the modem & router in the study. For these runs, I tried to keep them especially neat, both while they were in the walls, and while running rafters; I stapled each cable to every other stud (using plastic d-clamp single-nail staples, which came with the cable sets I ordered). At the carport transition to the covered walkway (where I grommeted both sides of the hole through the header with these), I put both cables into a raceway, which terminates in another grommet, inserted into the hole I drilled into the siding, and into the attic space. The cables are again stapled in the attic and go to a switch that I installed in a weatherproofed utility box. I used the box simply because I don’t trust a vented attic to keep the switch dry enough. From the switch, I made another run to the top of the nearest study wall, where my old cable drop had likewise gone, and then down through several shelves to the new raceway I had built (out of trim) into my replacement wall panels behind the study shelves – and thence to the modem & router. One other thing to note is that I utilized keystone connectors (and plate) so that I could run pre-terminated cables. Cat-7 cables are a pain to terminate yourself, IMHO. Plus, it makes everything modular; everything in the system is easily replaceable.


Why two cables? Well, first, for redundancy’s sake. These were very time-consuming to do. It never hurts to have a backup. Second, I only have DSL internet, and no prospect of getting anything faster, anytime soon, as we’re fairly rural. So, if I end up getting satellite ‘net as secondary, or mobile broadband, I have an xmit as well as rcvr line, which can both be routed through the switch in the attic, as needed. I plan on at least a 16-port switch in here, and I plan on running the network for the whole house from this room if I can. The other use for the attic switch is to send Cat-7 runs to my upstairs bedroom and the living room – so that my wife’s desk in our bedroom (that doubles as a TV, with a monitor able to swivel around to be viewable from bed) and our multimedia center in the living room are both on a wired connection. We have a large house, and WiFi just doesn’t seem to cut it when sharing a DSL line while streaming. Wired seems to be much better in that regard.
The Walls
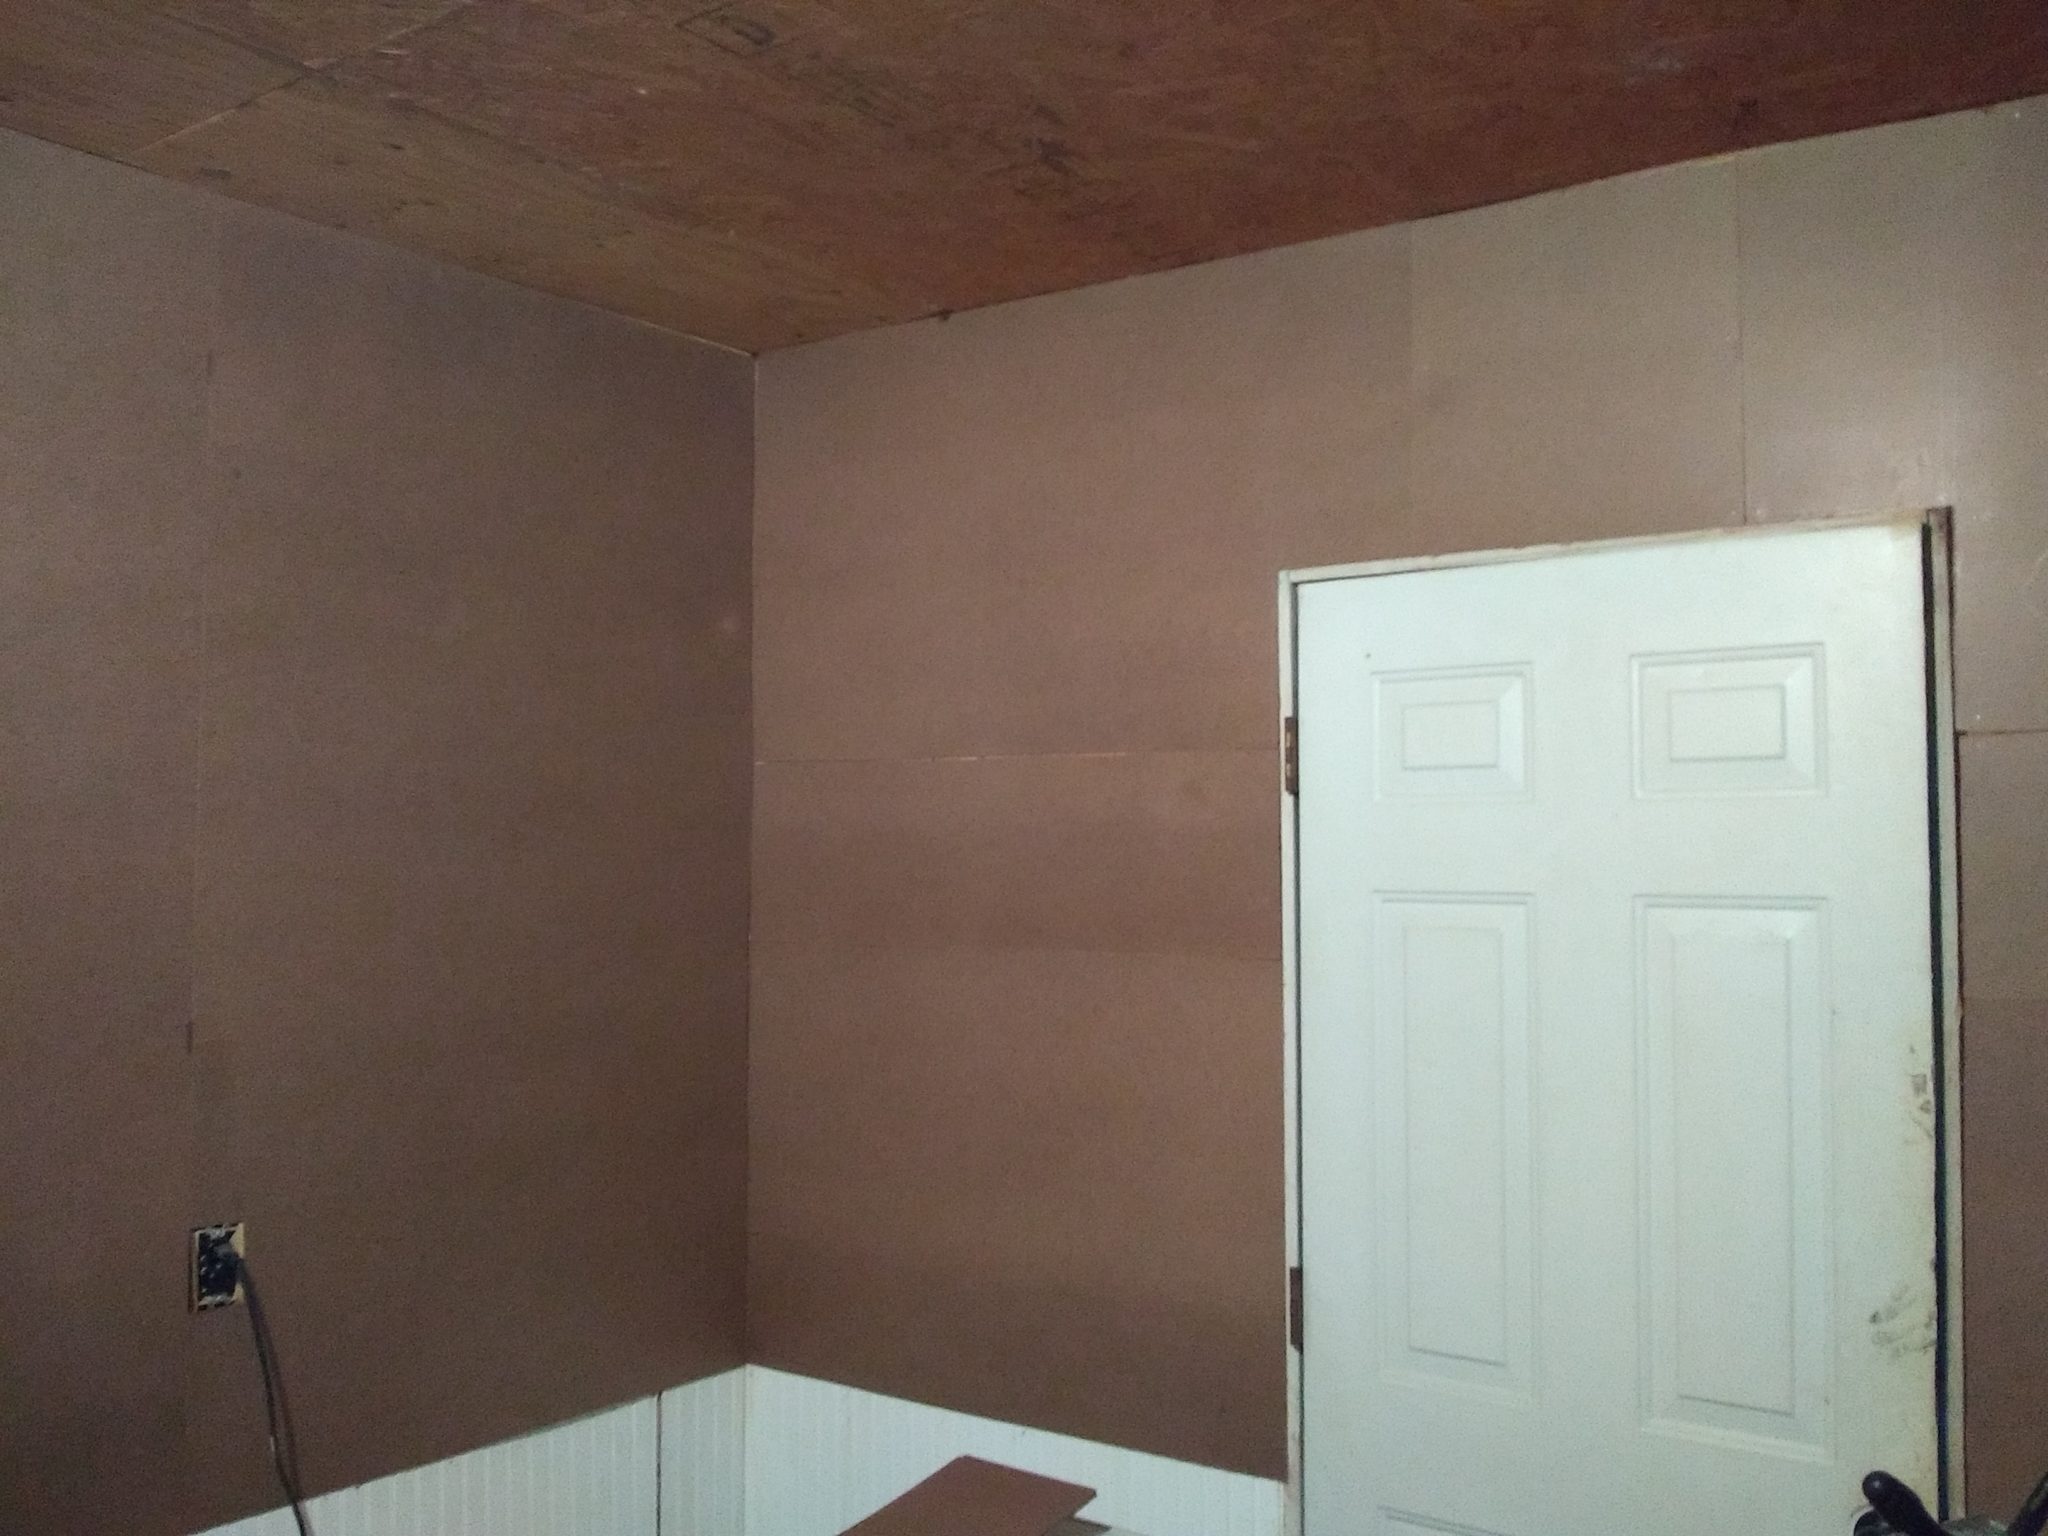
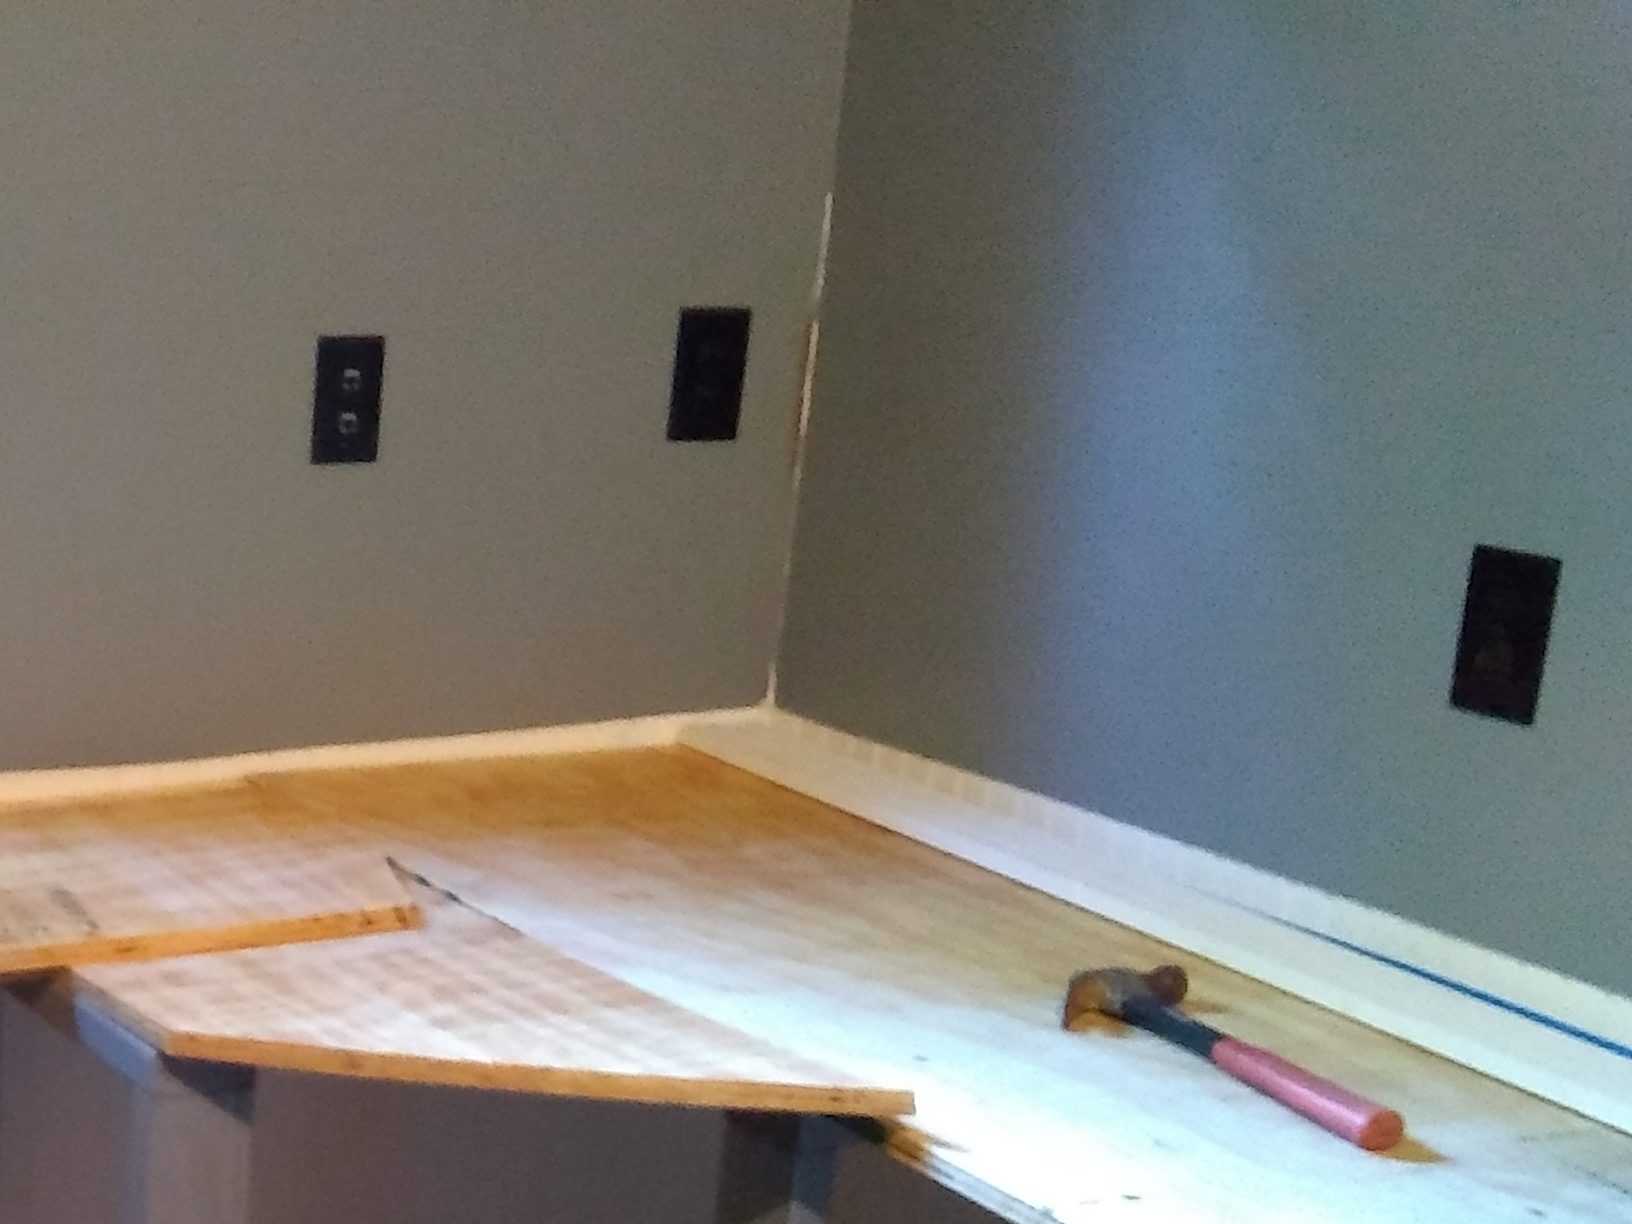
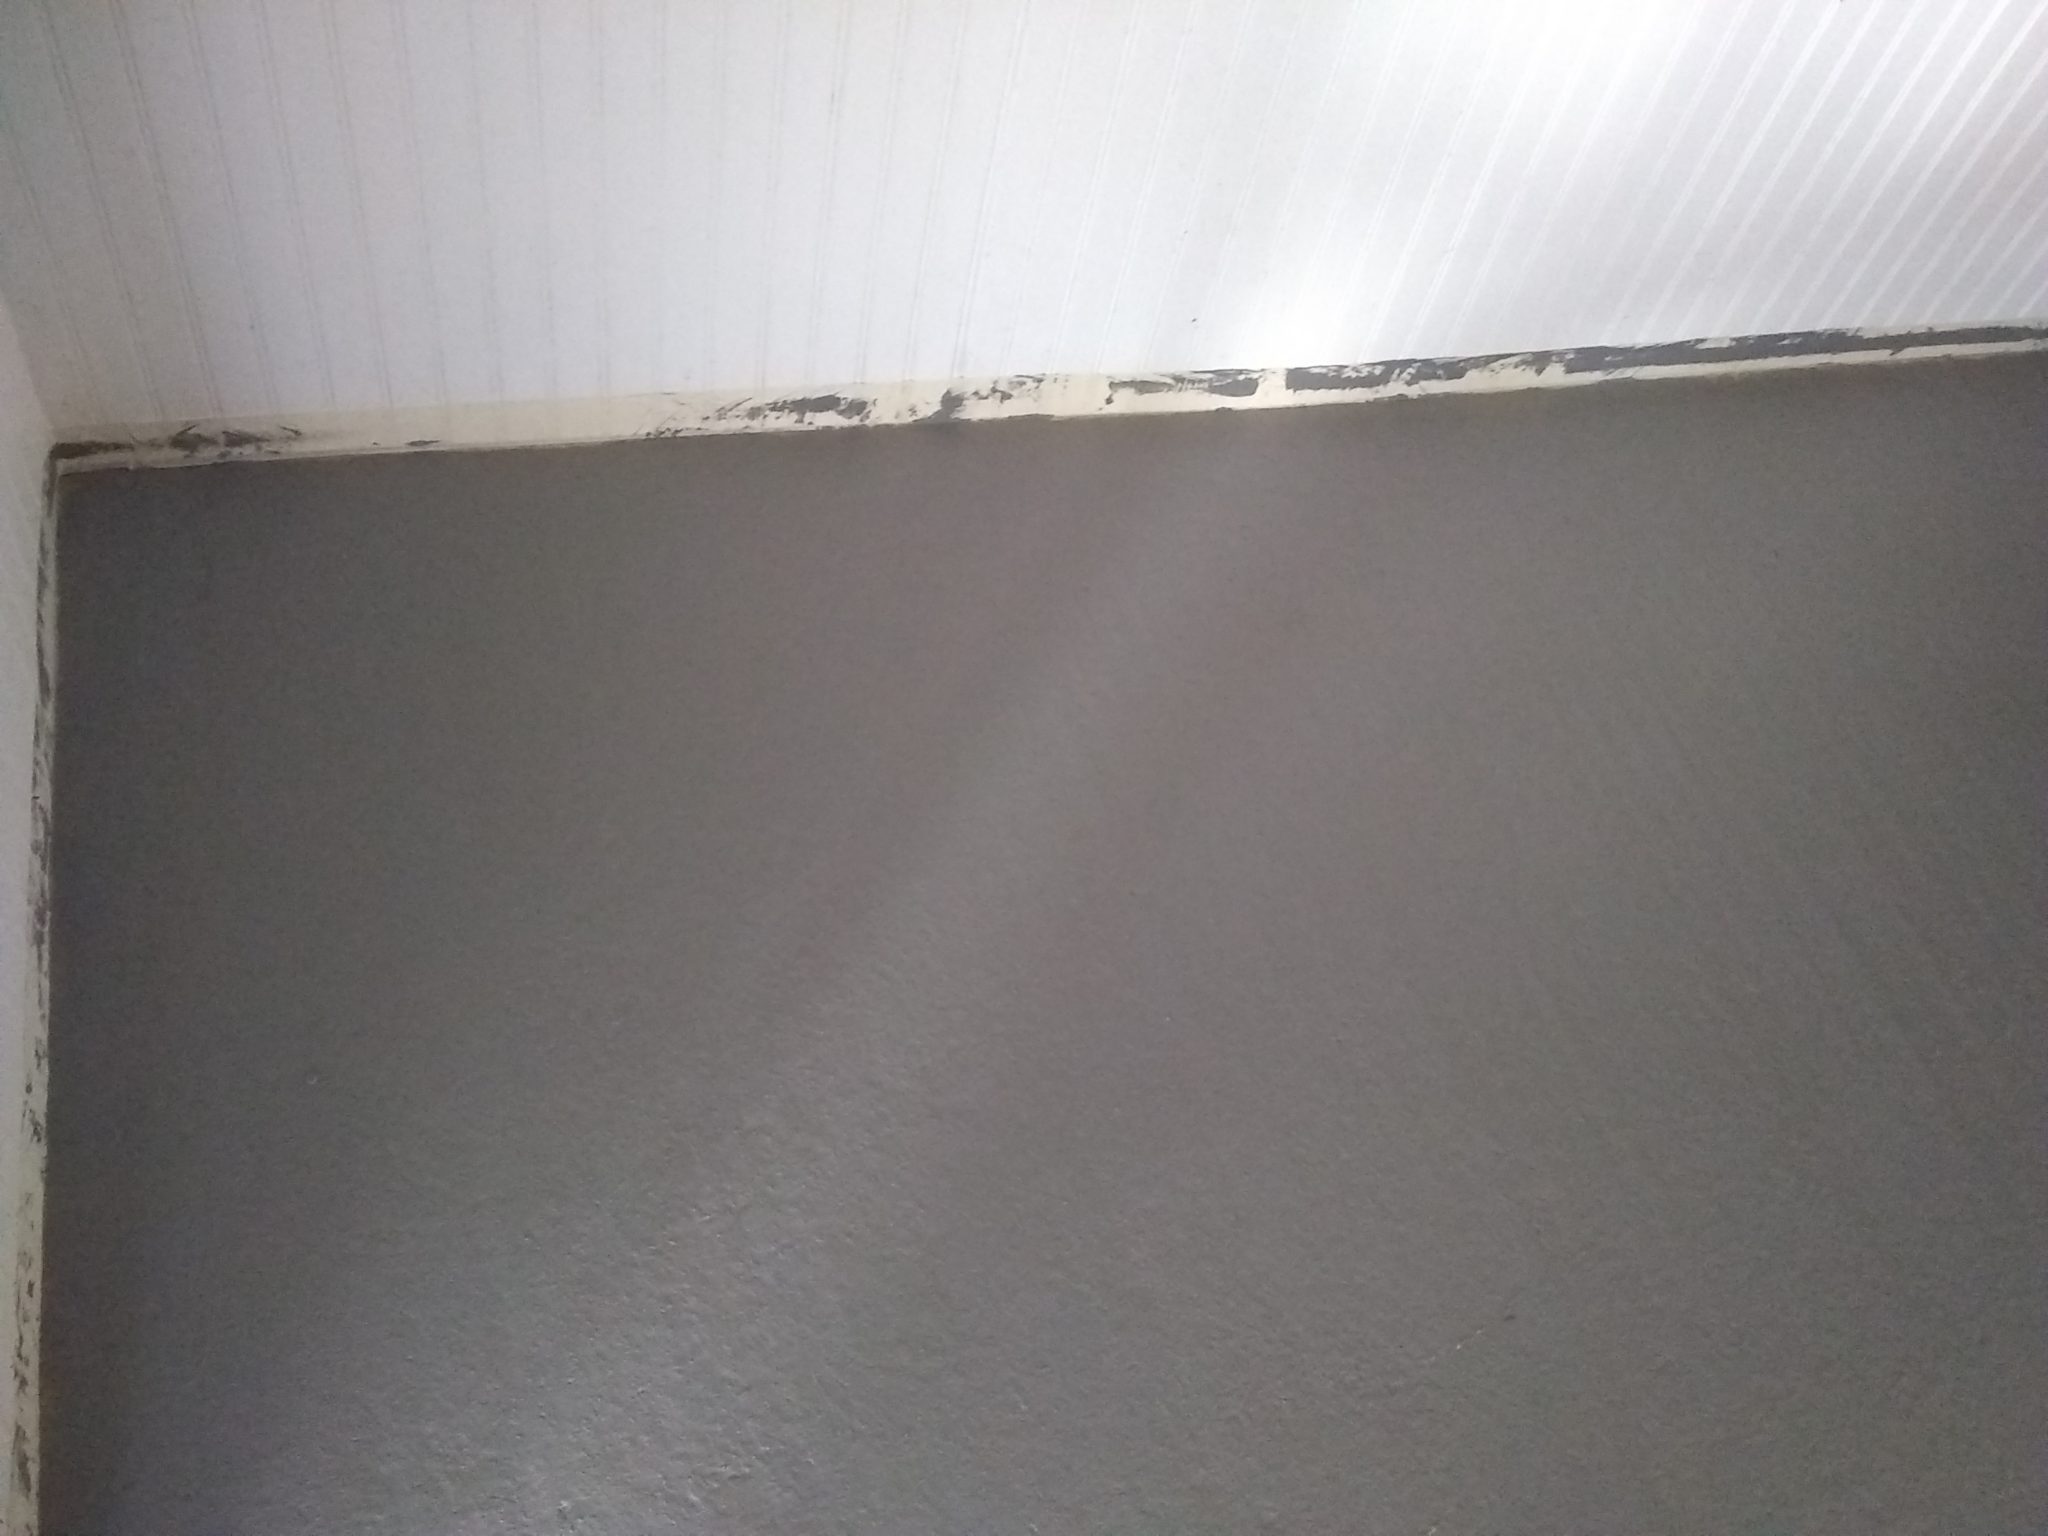
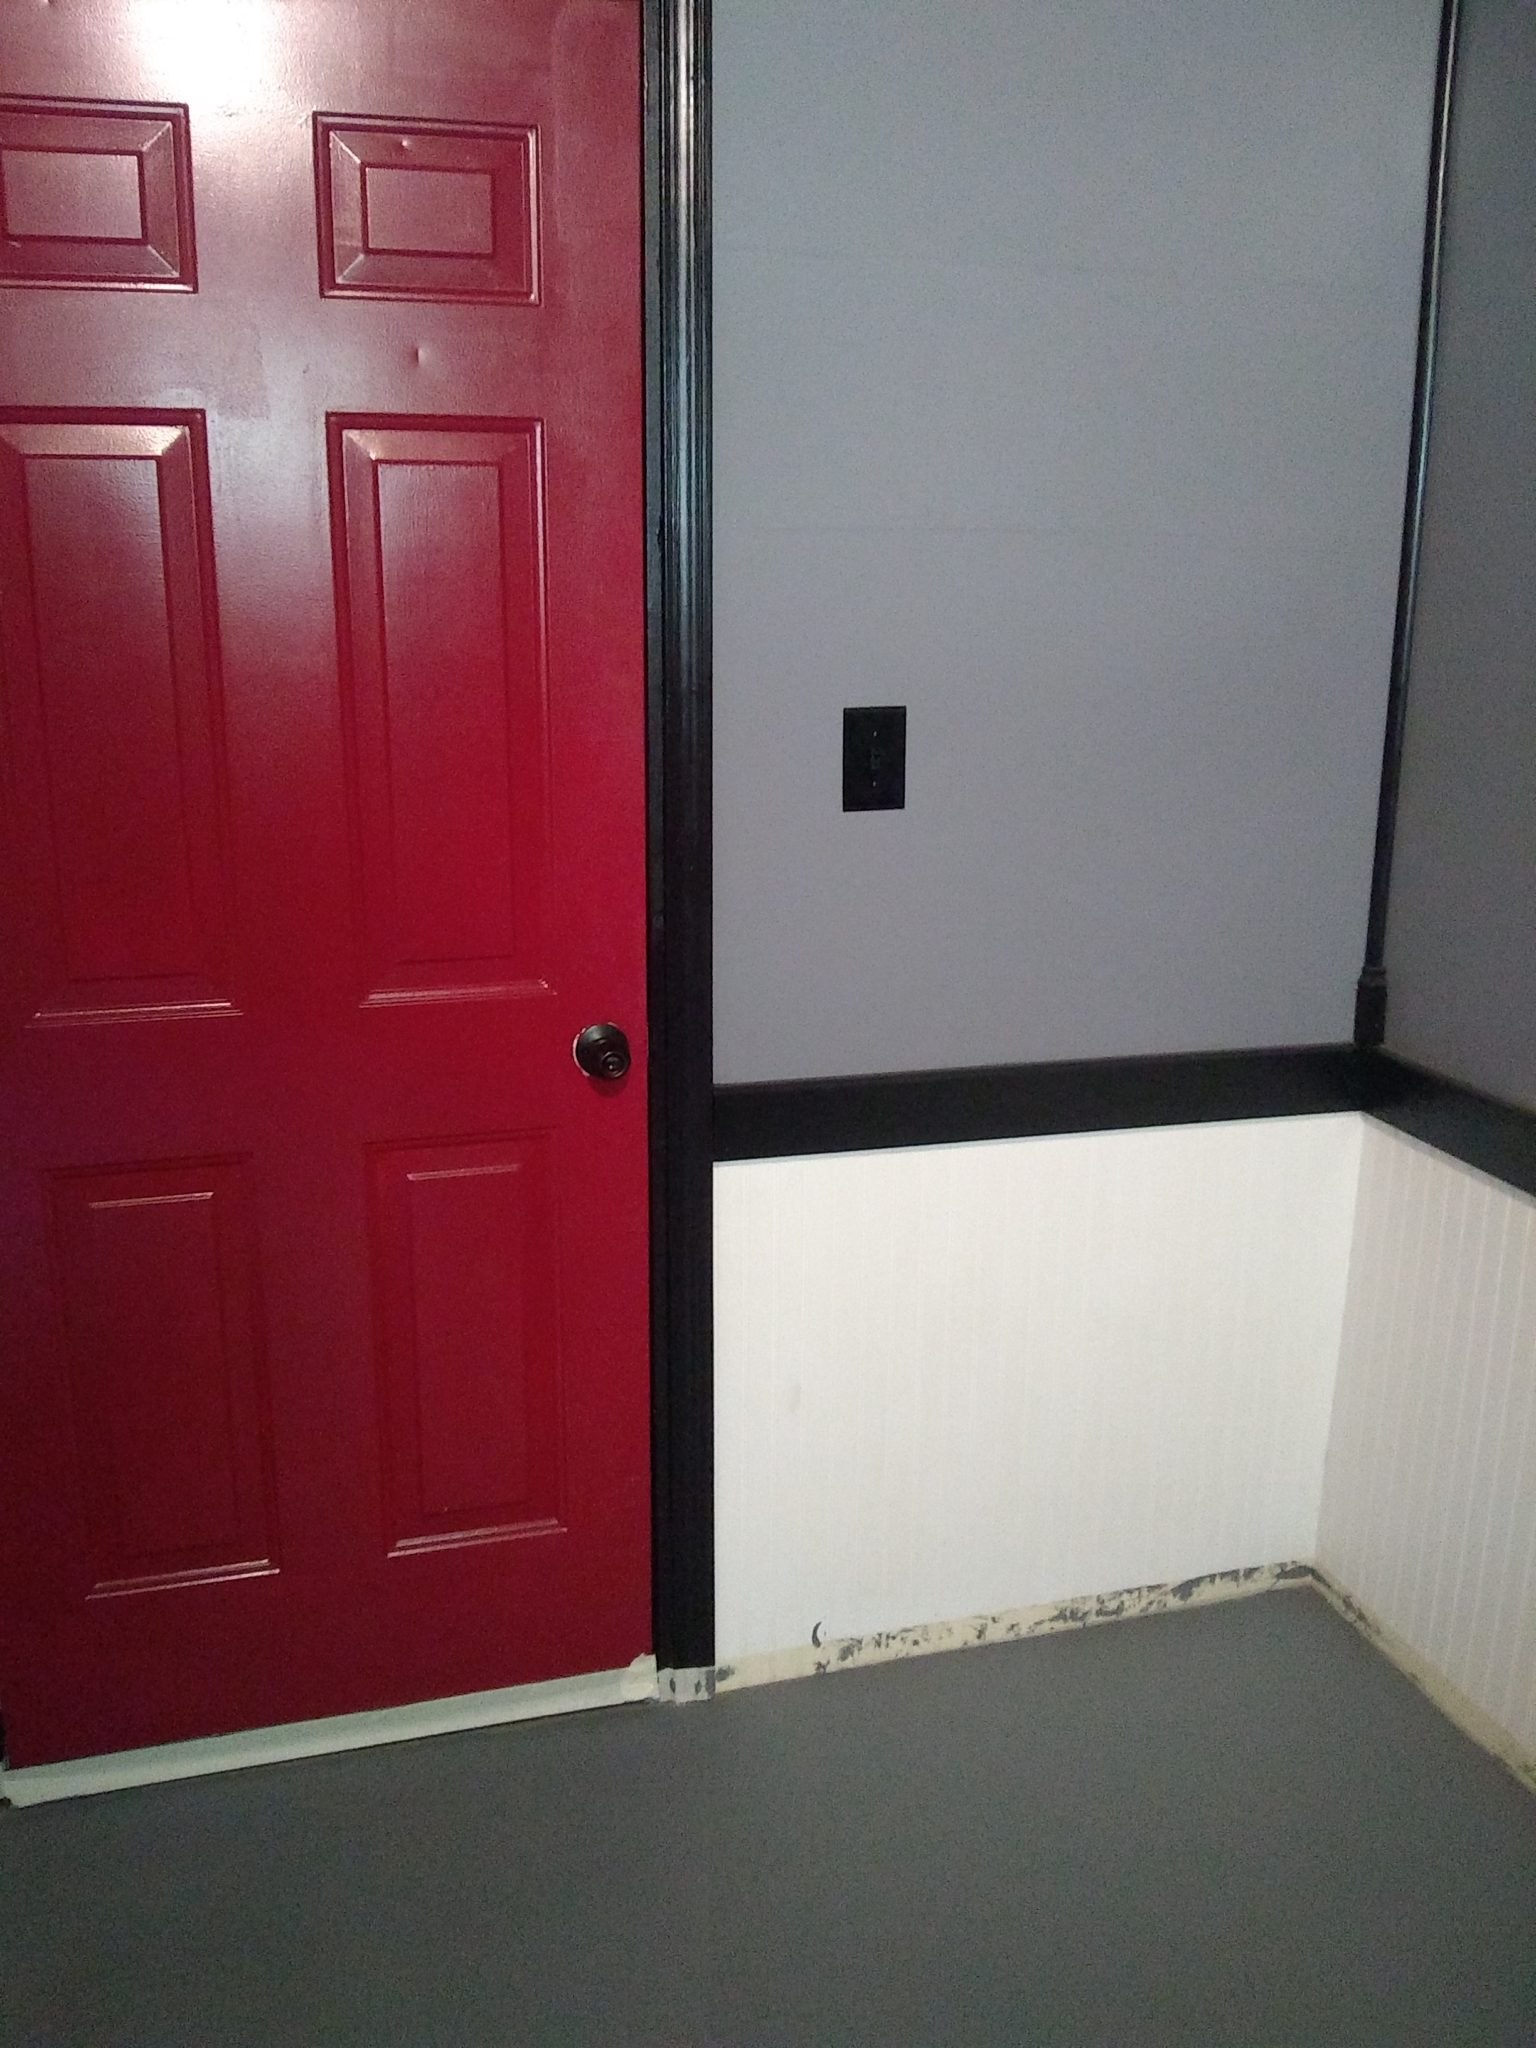
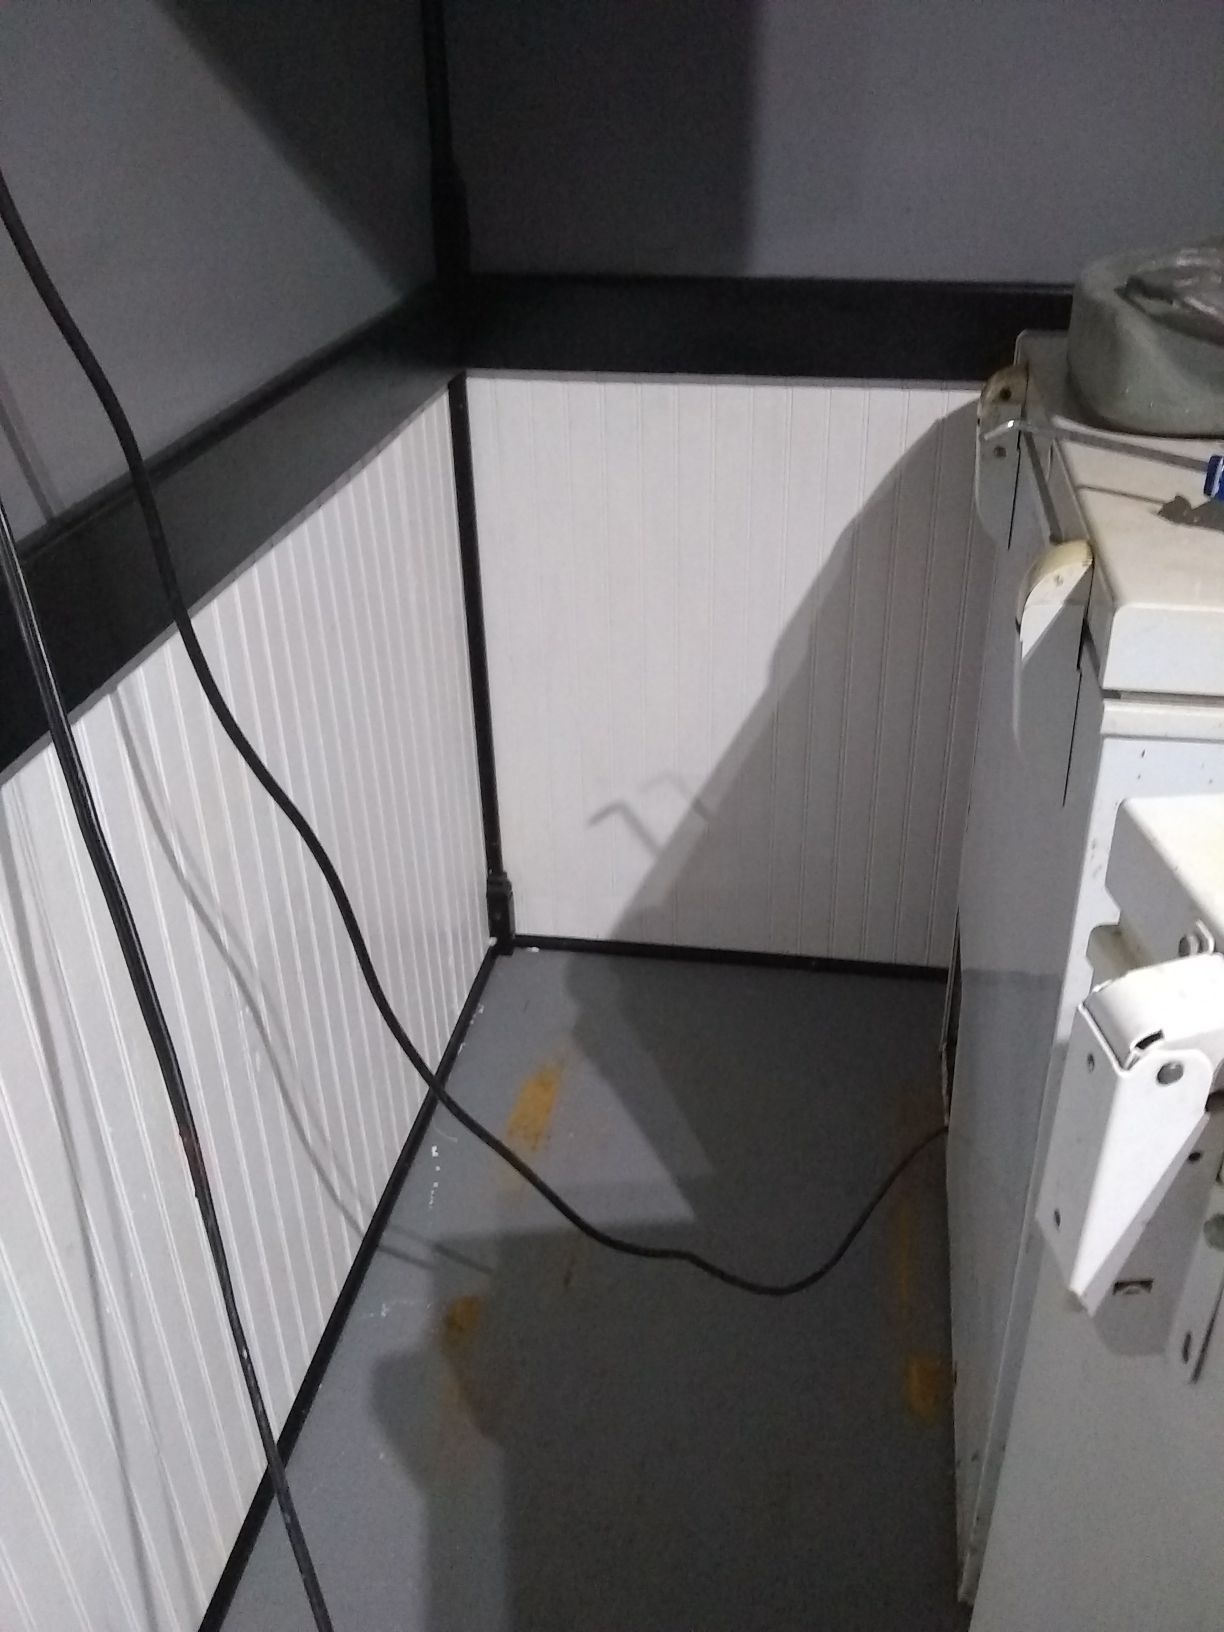
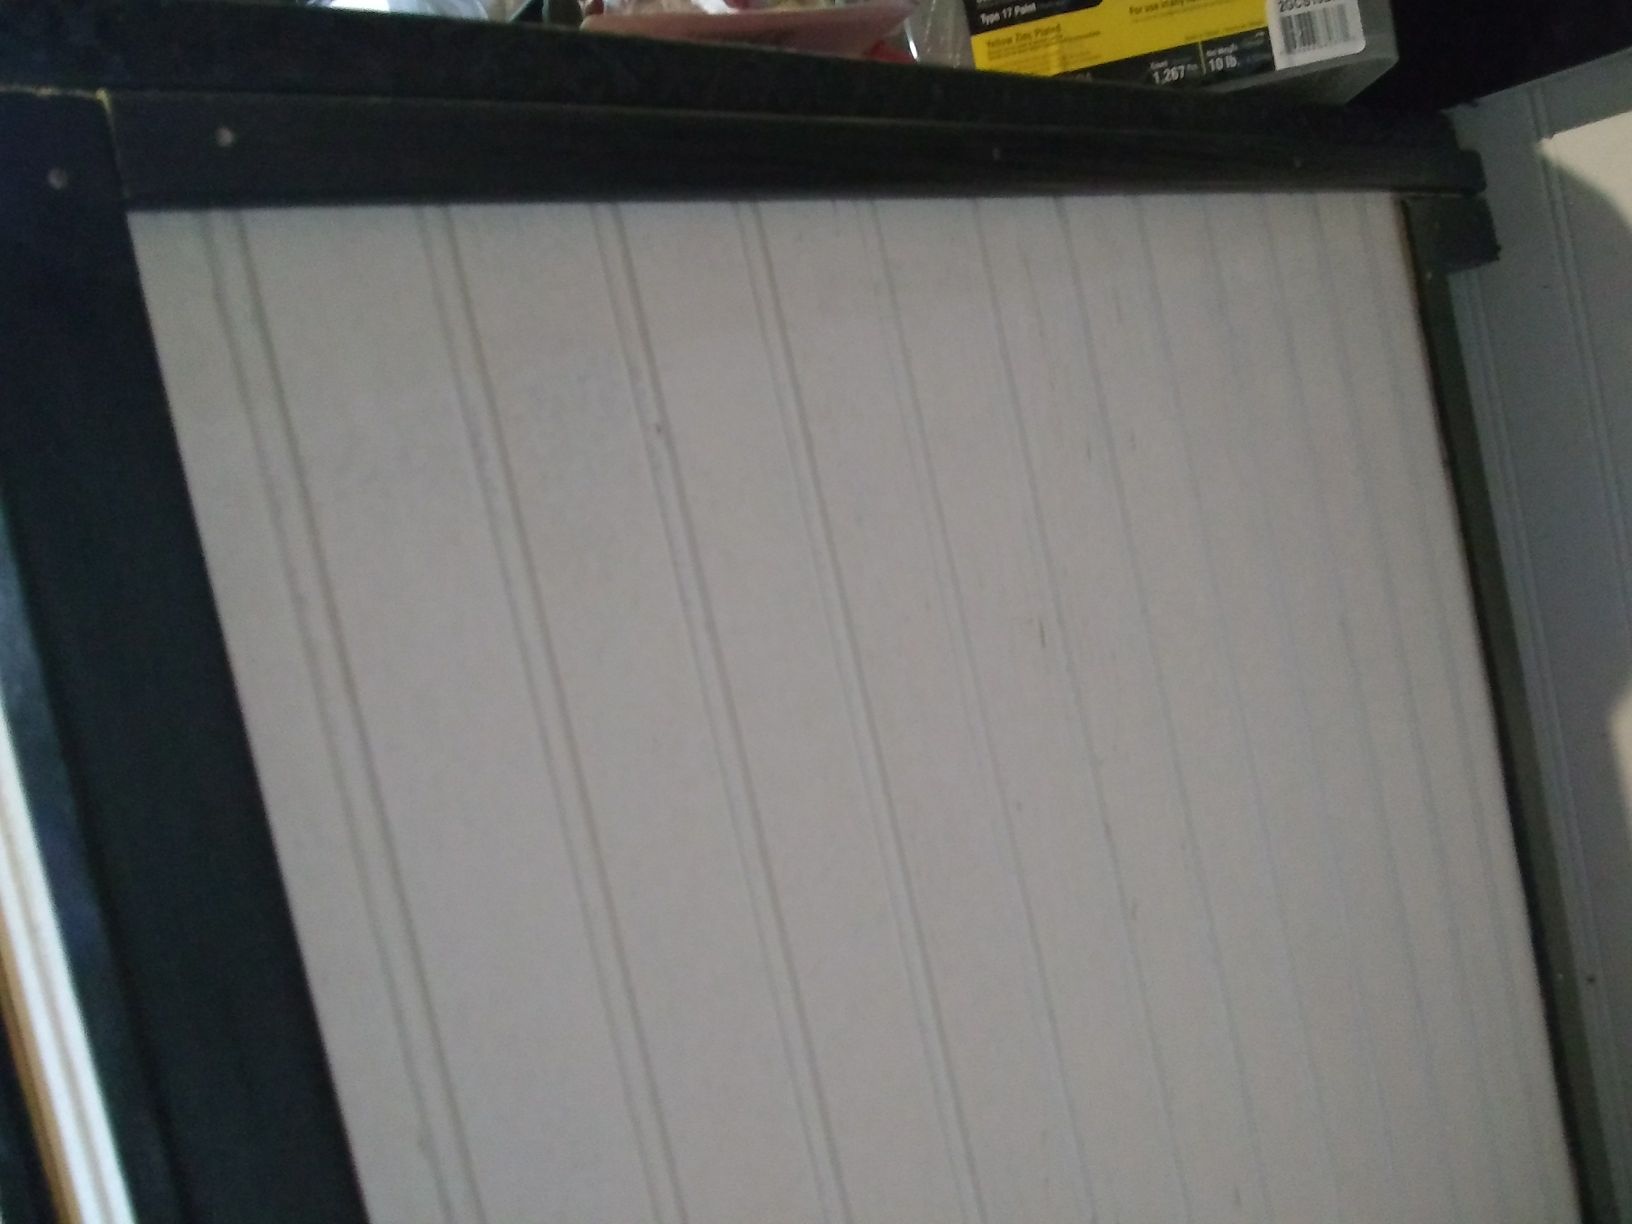
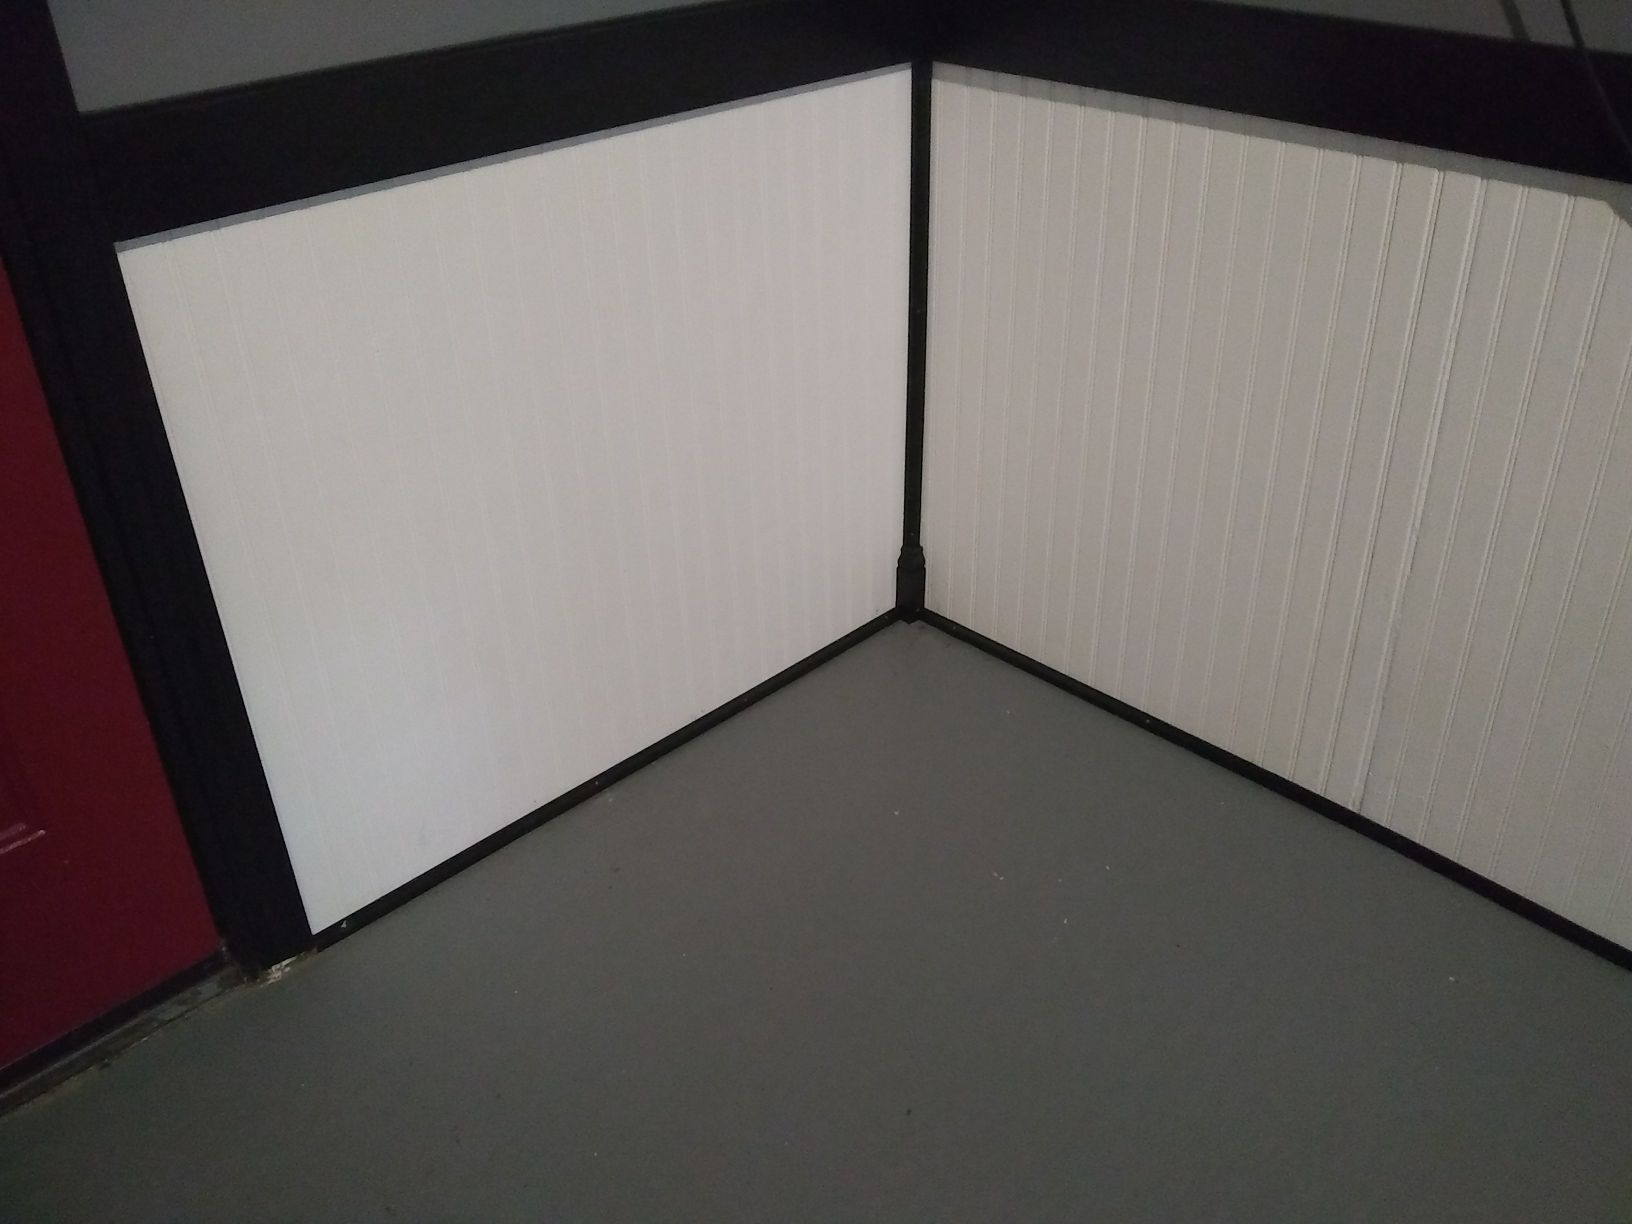
Once I had the cables run, I replaced the panels. At some point while I was working on those runs, I installed tongue-in-groove beadboard wainscoting panels (the same ones we used inside our house, during the renovation) in the bottom 32″ from the floor. These are painted in Glidden Pure White (also matching the inside of the house). As the slab in this room is not quite level, I had to do a bit of cheating at places, to get them all to fit together. White silicone is your friend, ladies and gents. They were all hand-nailed with 4d 11/4” finish nails, 3 per stud. I don’t have a nailer and didn’t feel like buying one. I was a carpenter as a young man, and I’m still decent with a hammer. I also just like the feel of hammering nails in by hand.
Once those were all up, I purchased some 1/8″ smooth finish paneling, and installed that (this time, with 1″ wire nails) over the plywood, from the wainscoting join to the ceiling. The plywood was perfectly serviceable; this paneling is purely aesthetic. I wanted a smooth, semi-gloss painted surface.


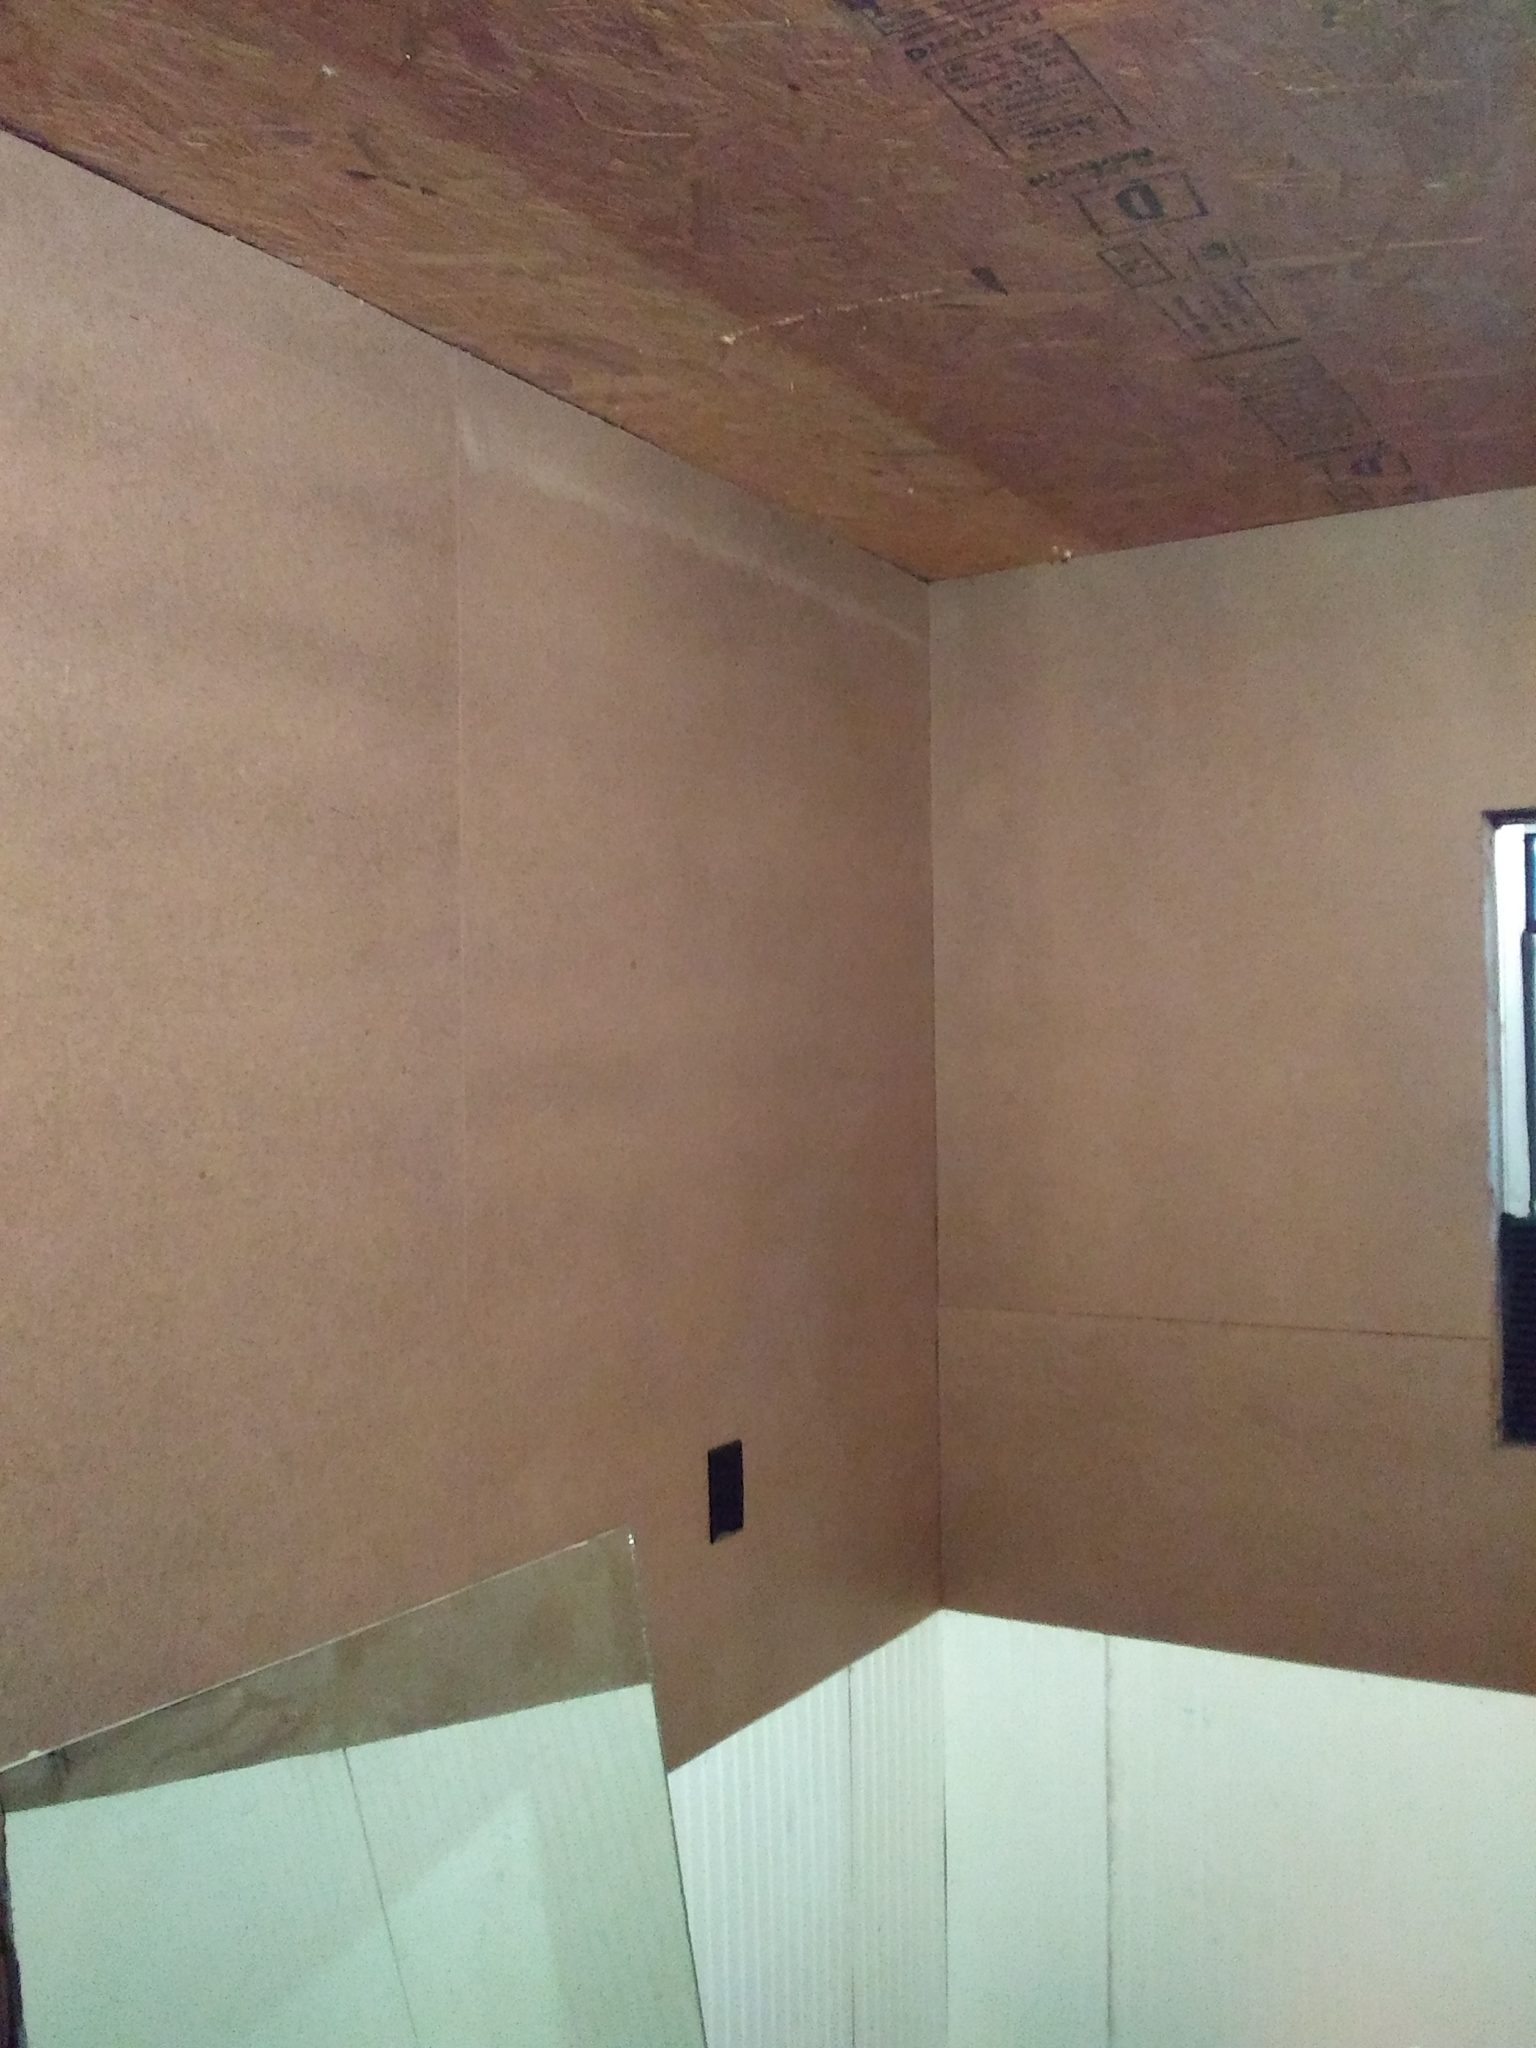


The upper panels are painted in a Glidden Slate Grey Semi-Gloss.
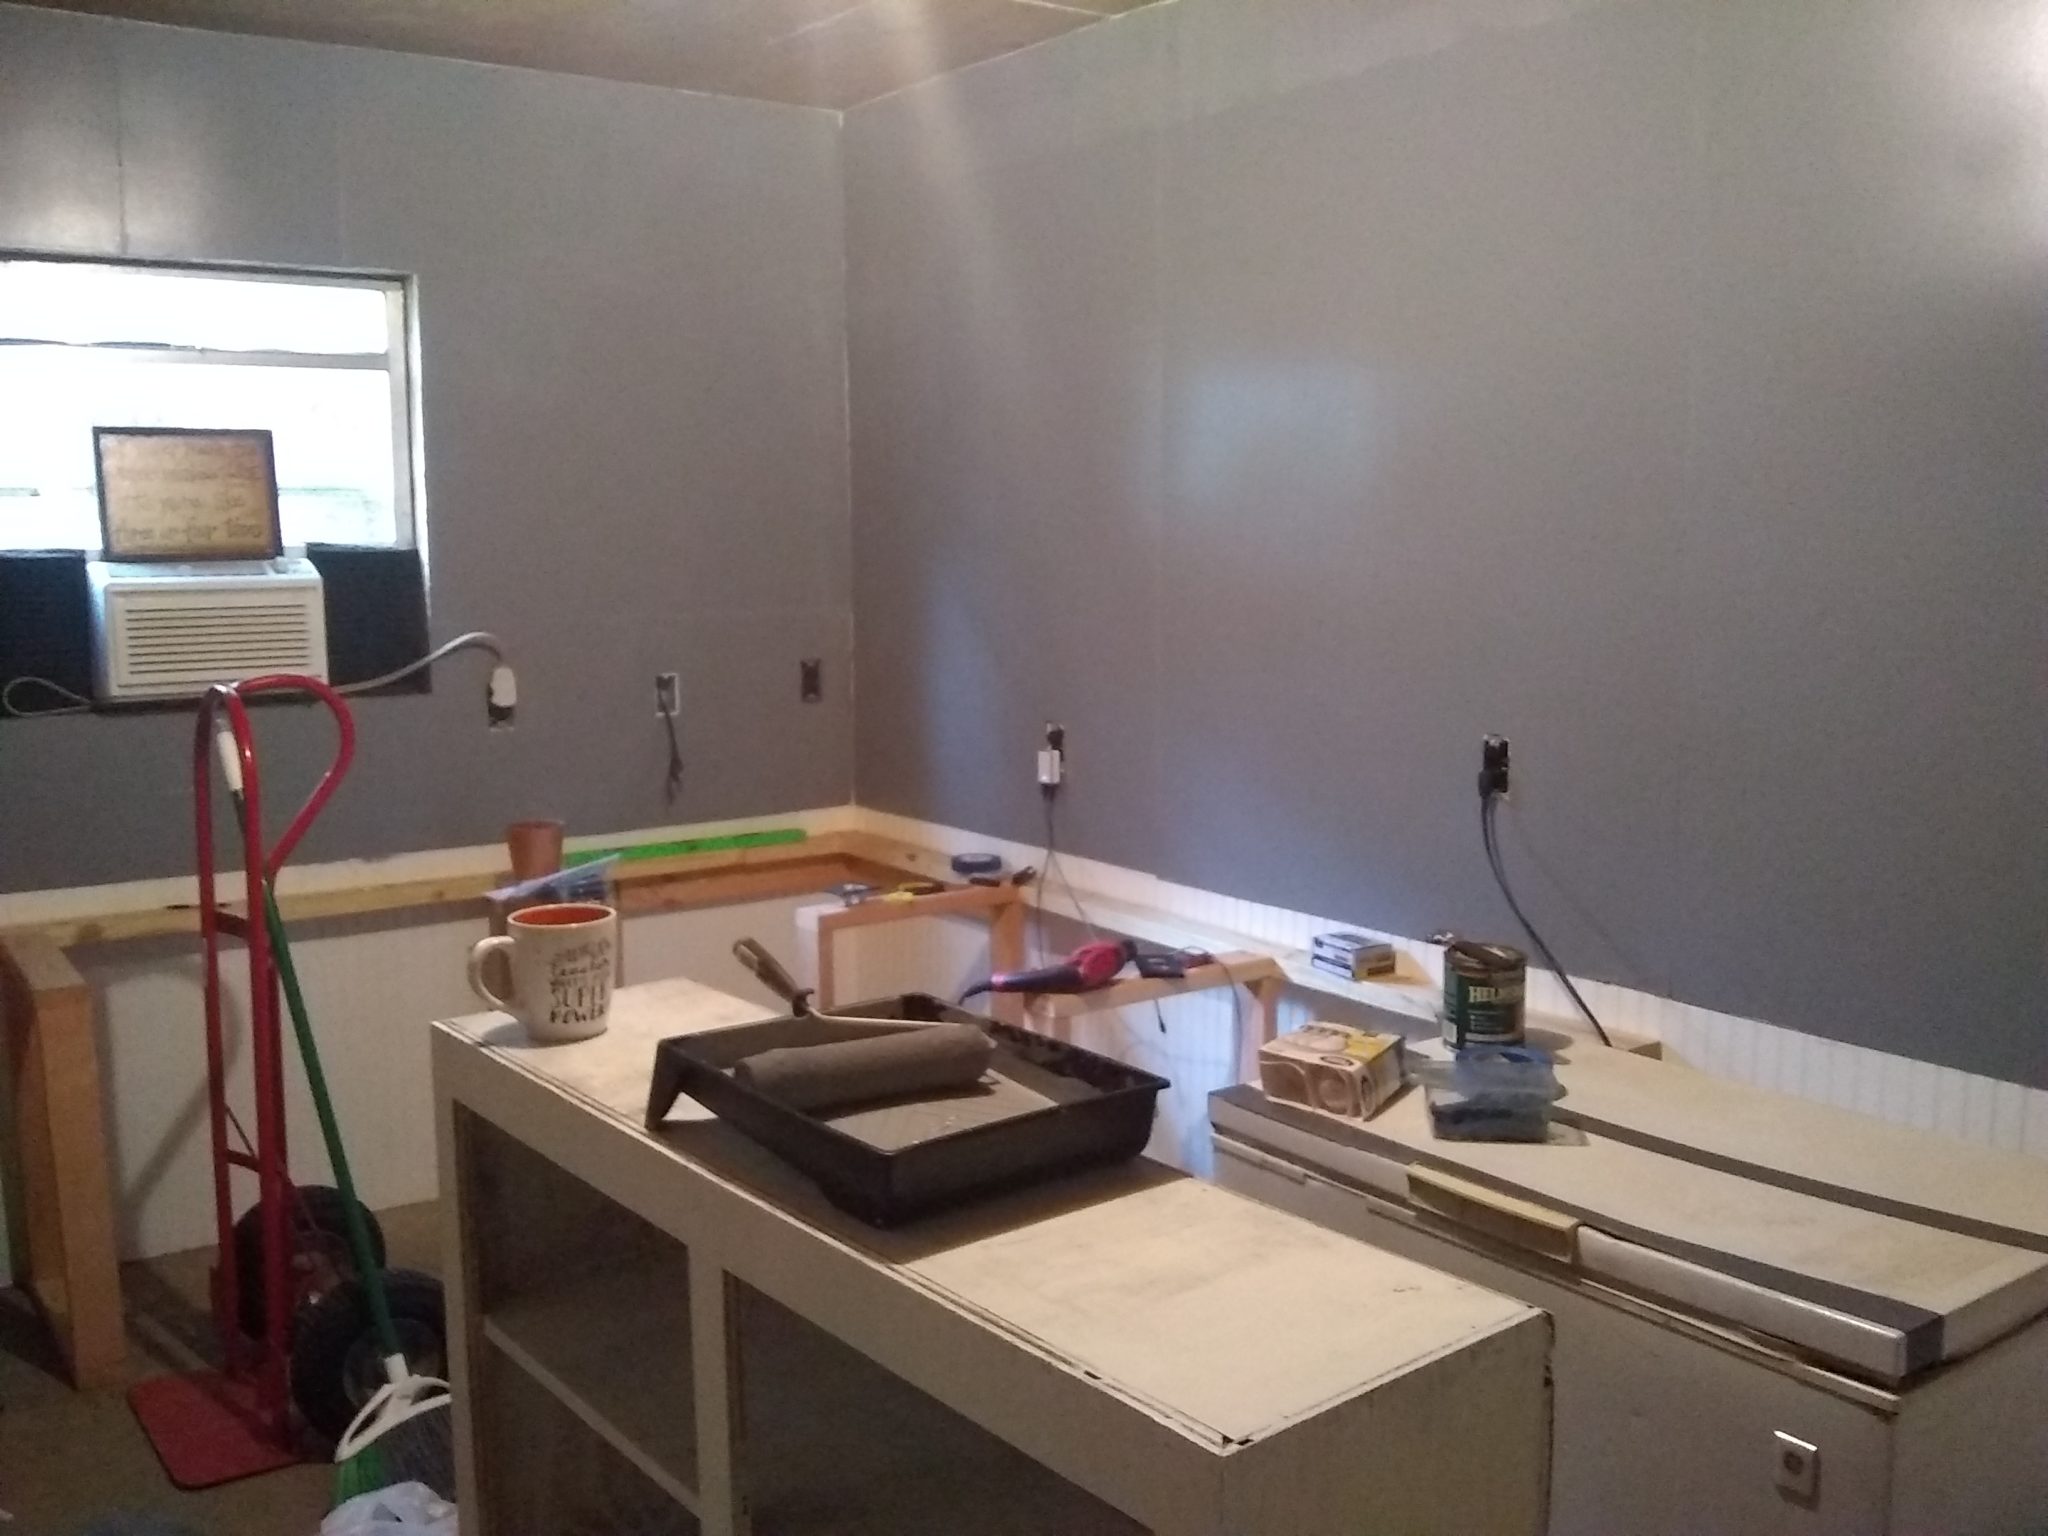


Once those were finished, I installed some new electrical outlets and covers. The idea was always to have all of those black – and they were – but the previous outlets were well over a decade old, and had been altogether too closely adjacent to water recently – so I changed all of the “desk” receptacles and covers to glossy black TRR models, and the two closest to the door (which would have the highest loads, due to use by sound equipment and appliances) to 20A receptacles.
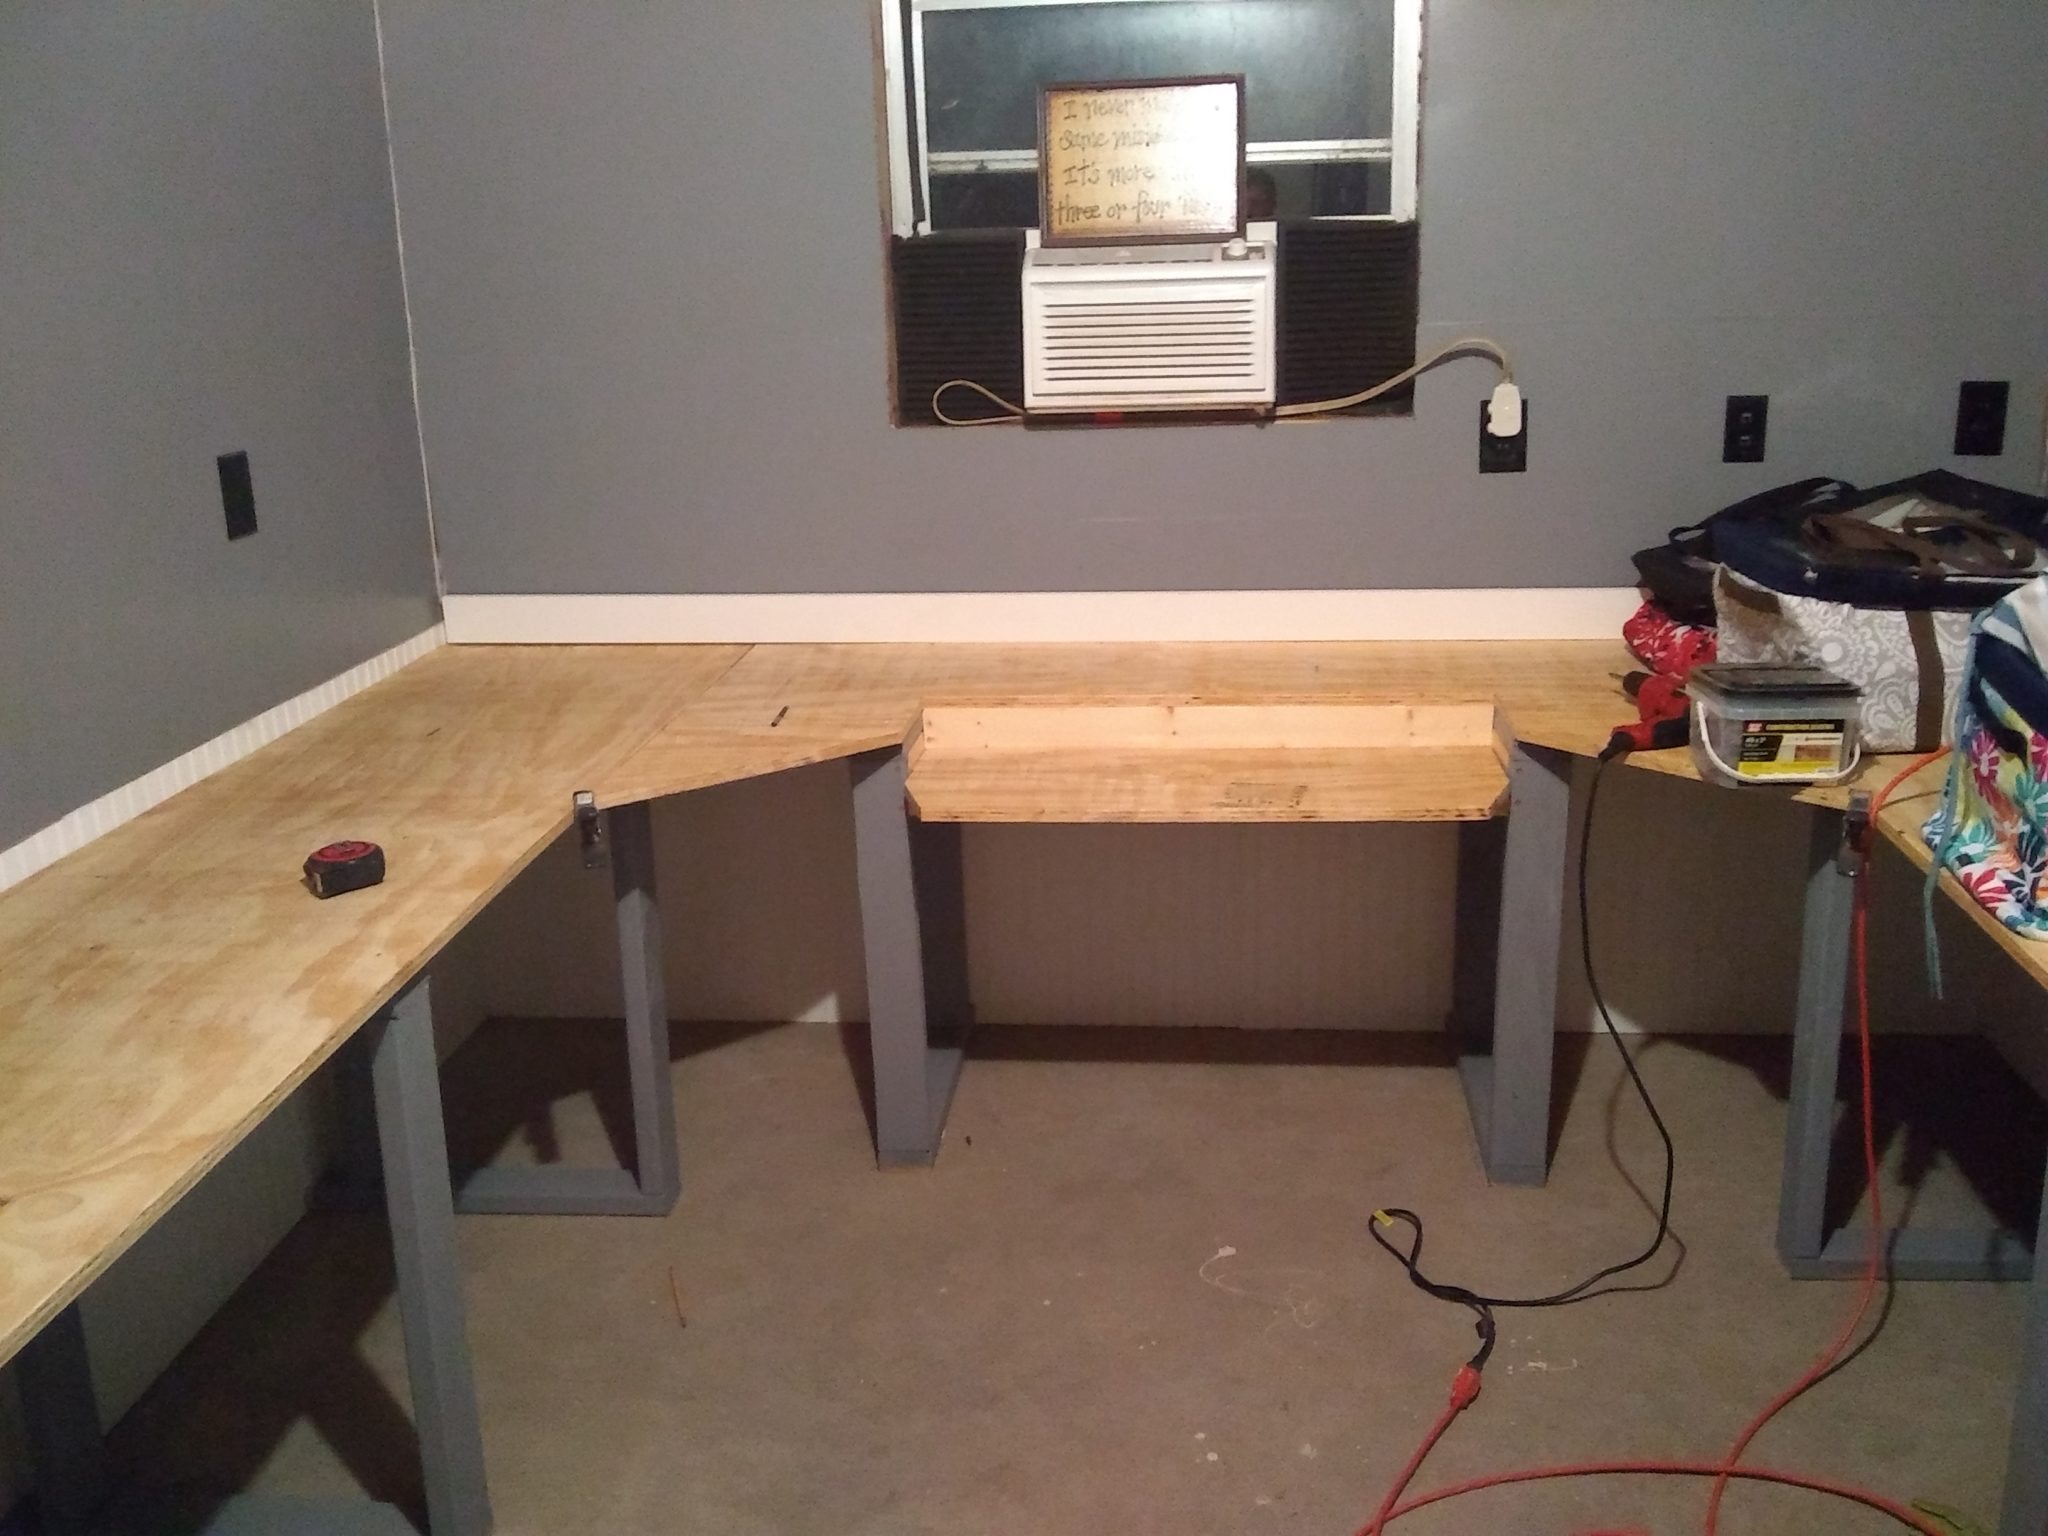
The Desk: Construction
Okay, this part is pure overkill; but it’s my desk, so I can overkill it if I want to! The main desk is 91/2x2 feet wide. The wraparound wings on either side are another 6×2 feet wide. The inside corners are both cut in at 45-degree angles for a more convenient desk area. It features a drop-down fixed tray sized for an extra-large keyboard/mouse pad at 36″x14″. It has one “command” station, with two smaller stations at each inside corner, all reachable from a center chair – and 2 additional workstations down each side of the desk “wings”.
It has a built-in multi-tier cable management system (J-channel on the desktop, two sets of cable loops below – top and bottom), pass-through cable ports, integrated USB ports for each auxiliary station (2 for the command station), and adjustable monitors pre-positioned at each (3 at the command station). Each auxiliary station will also have it’s own combination under-desk wall-mounted UPS/powerstrip, and its own slide-out keyboard/mouse tray.
The desktop itself is constructed of two full sheets of 3/4 plywood. The center of the desk and the drop tray are made of one sheet, the two wings of the other.
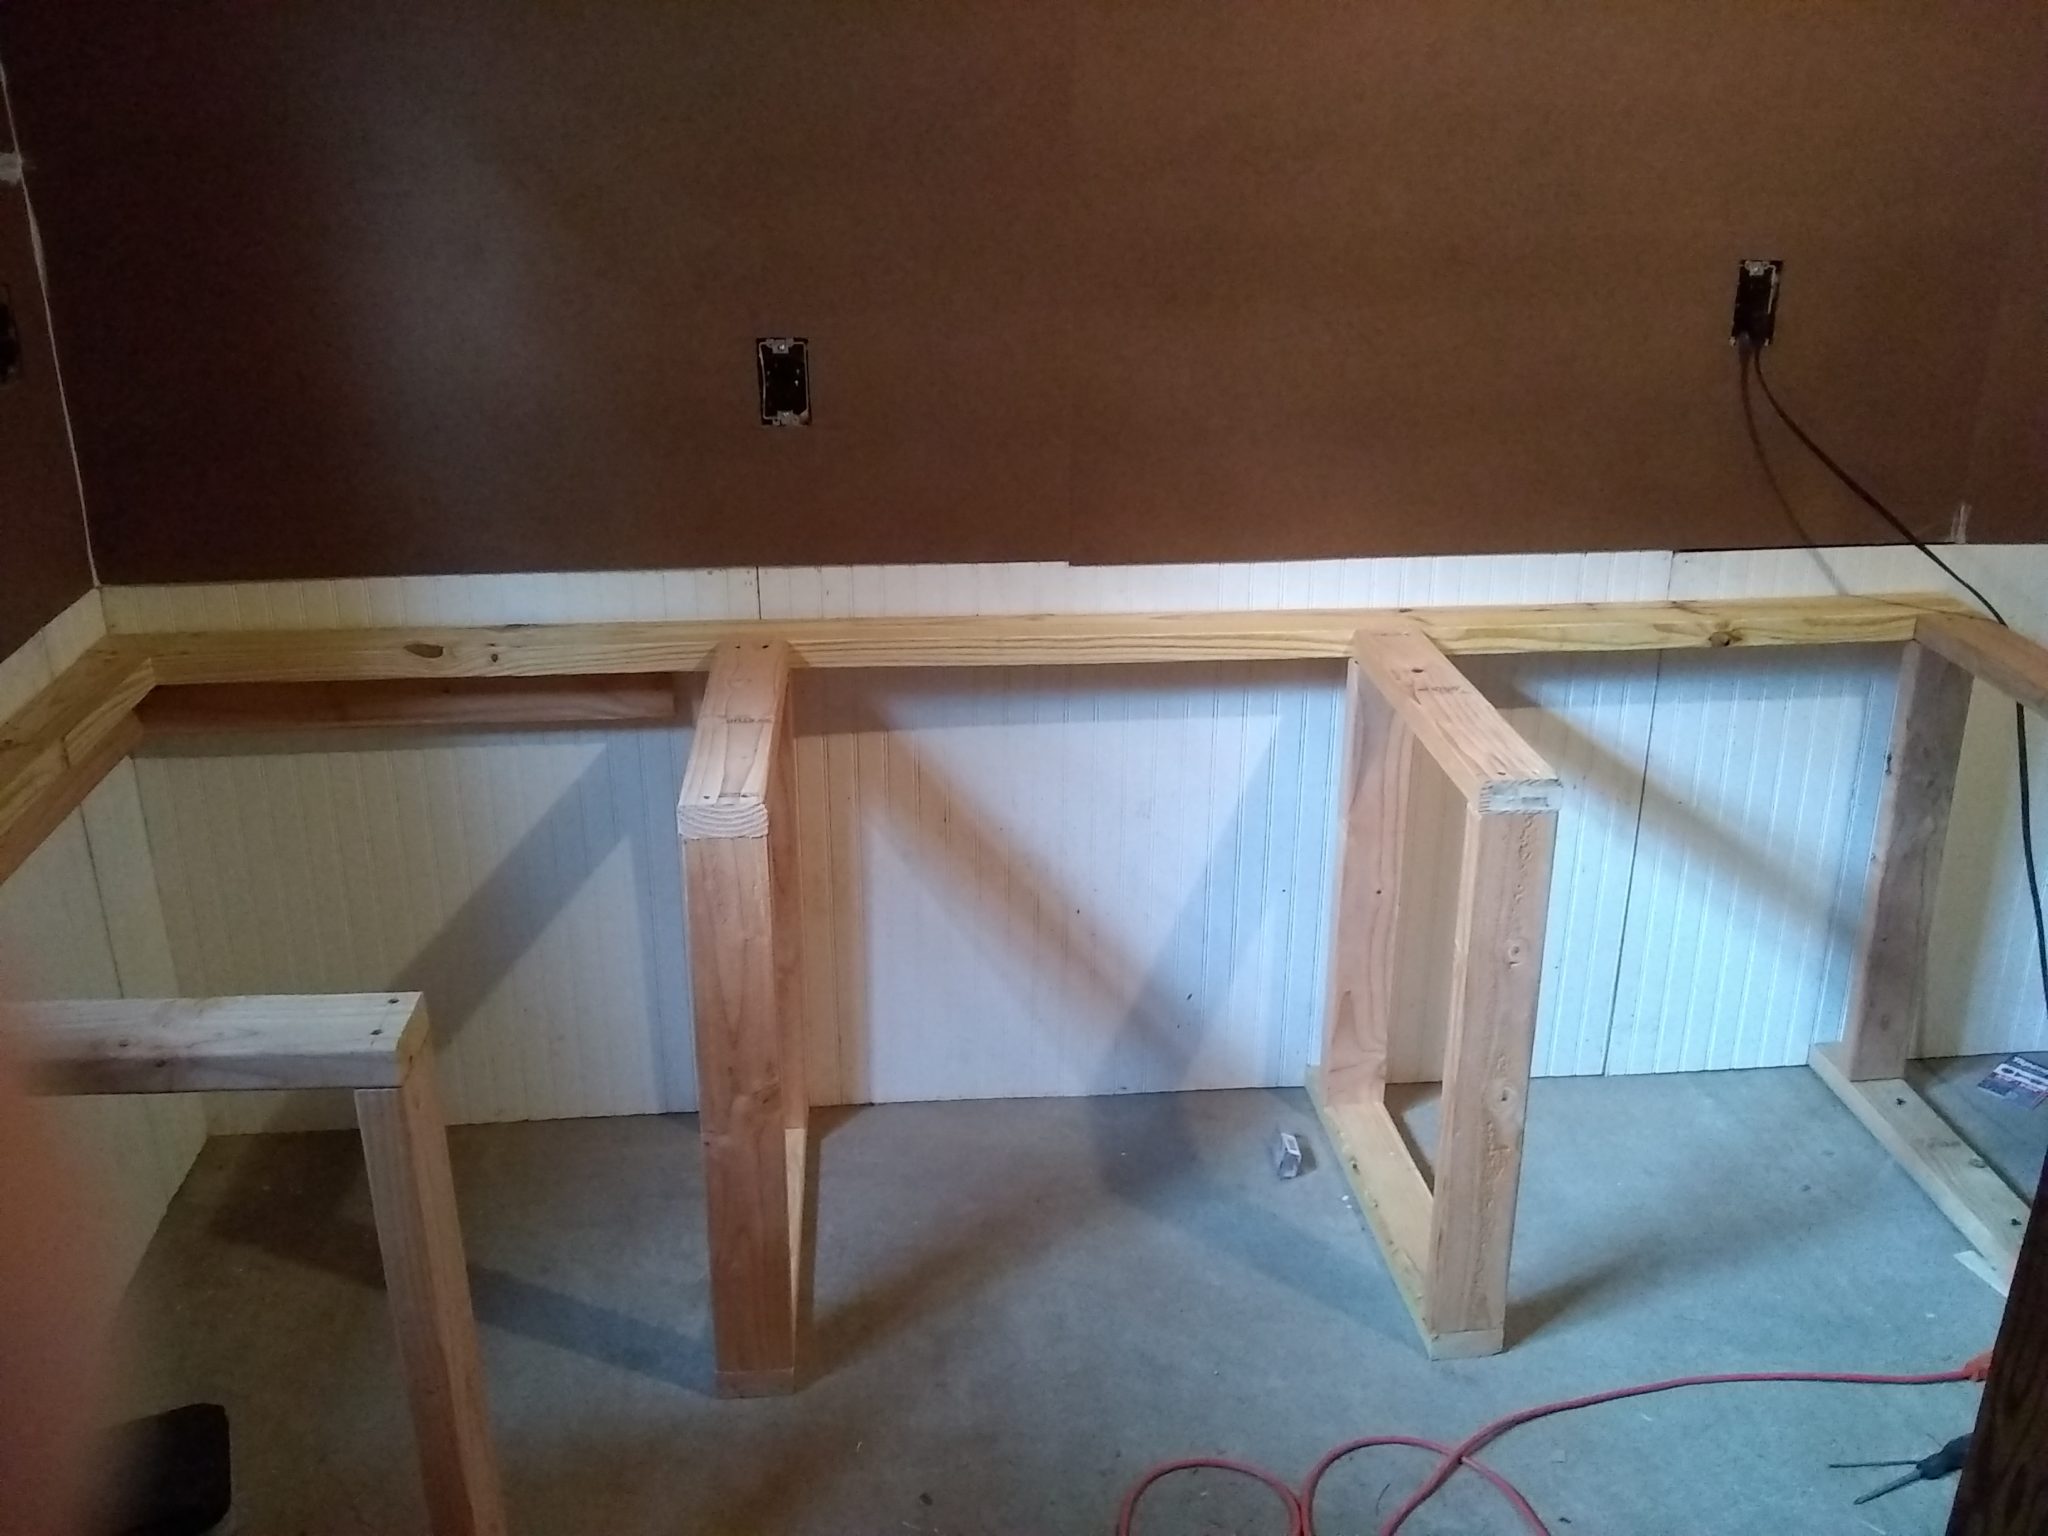
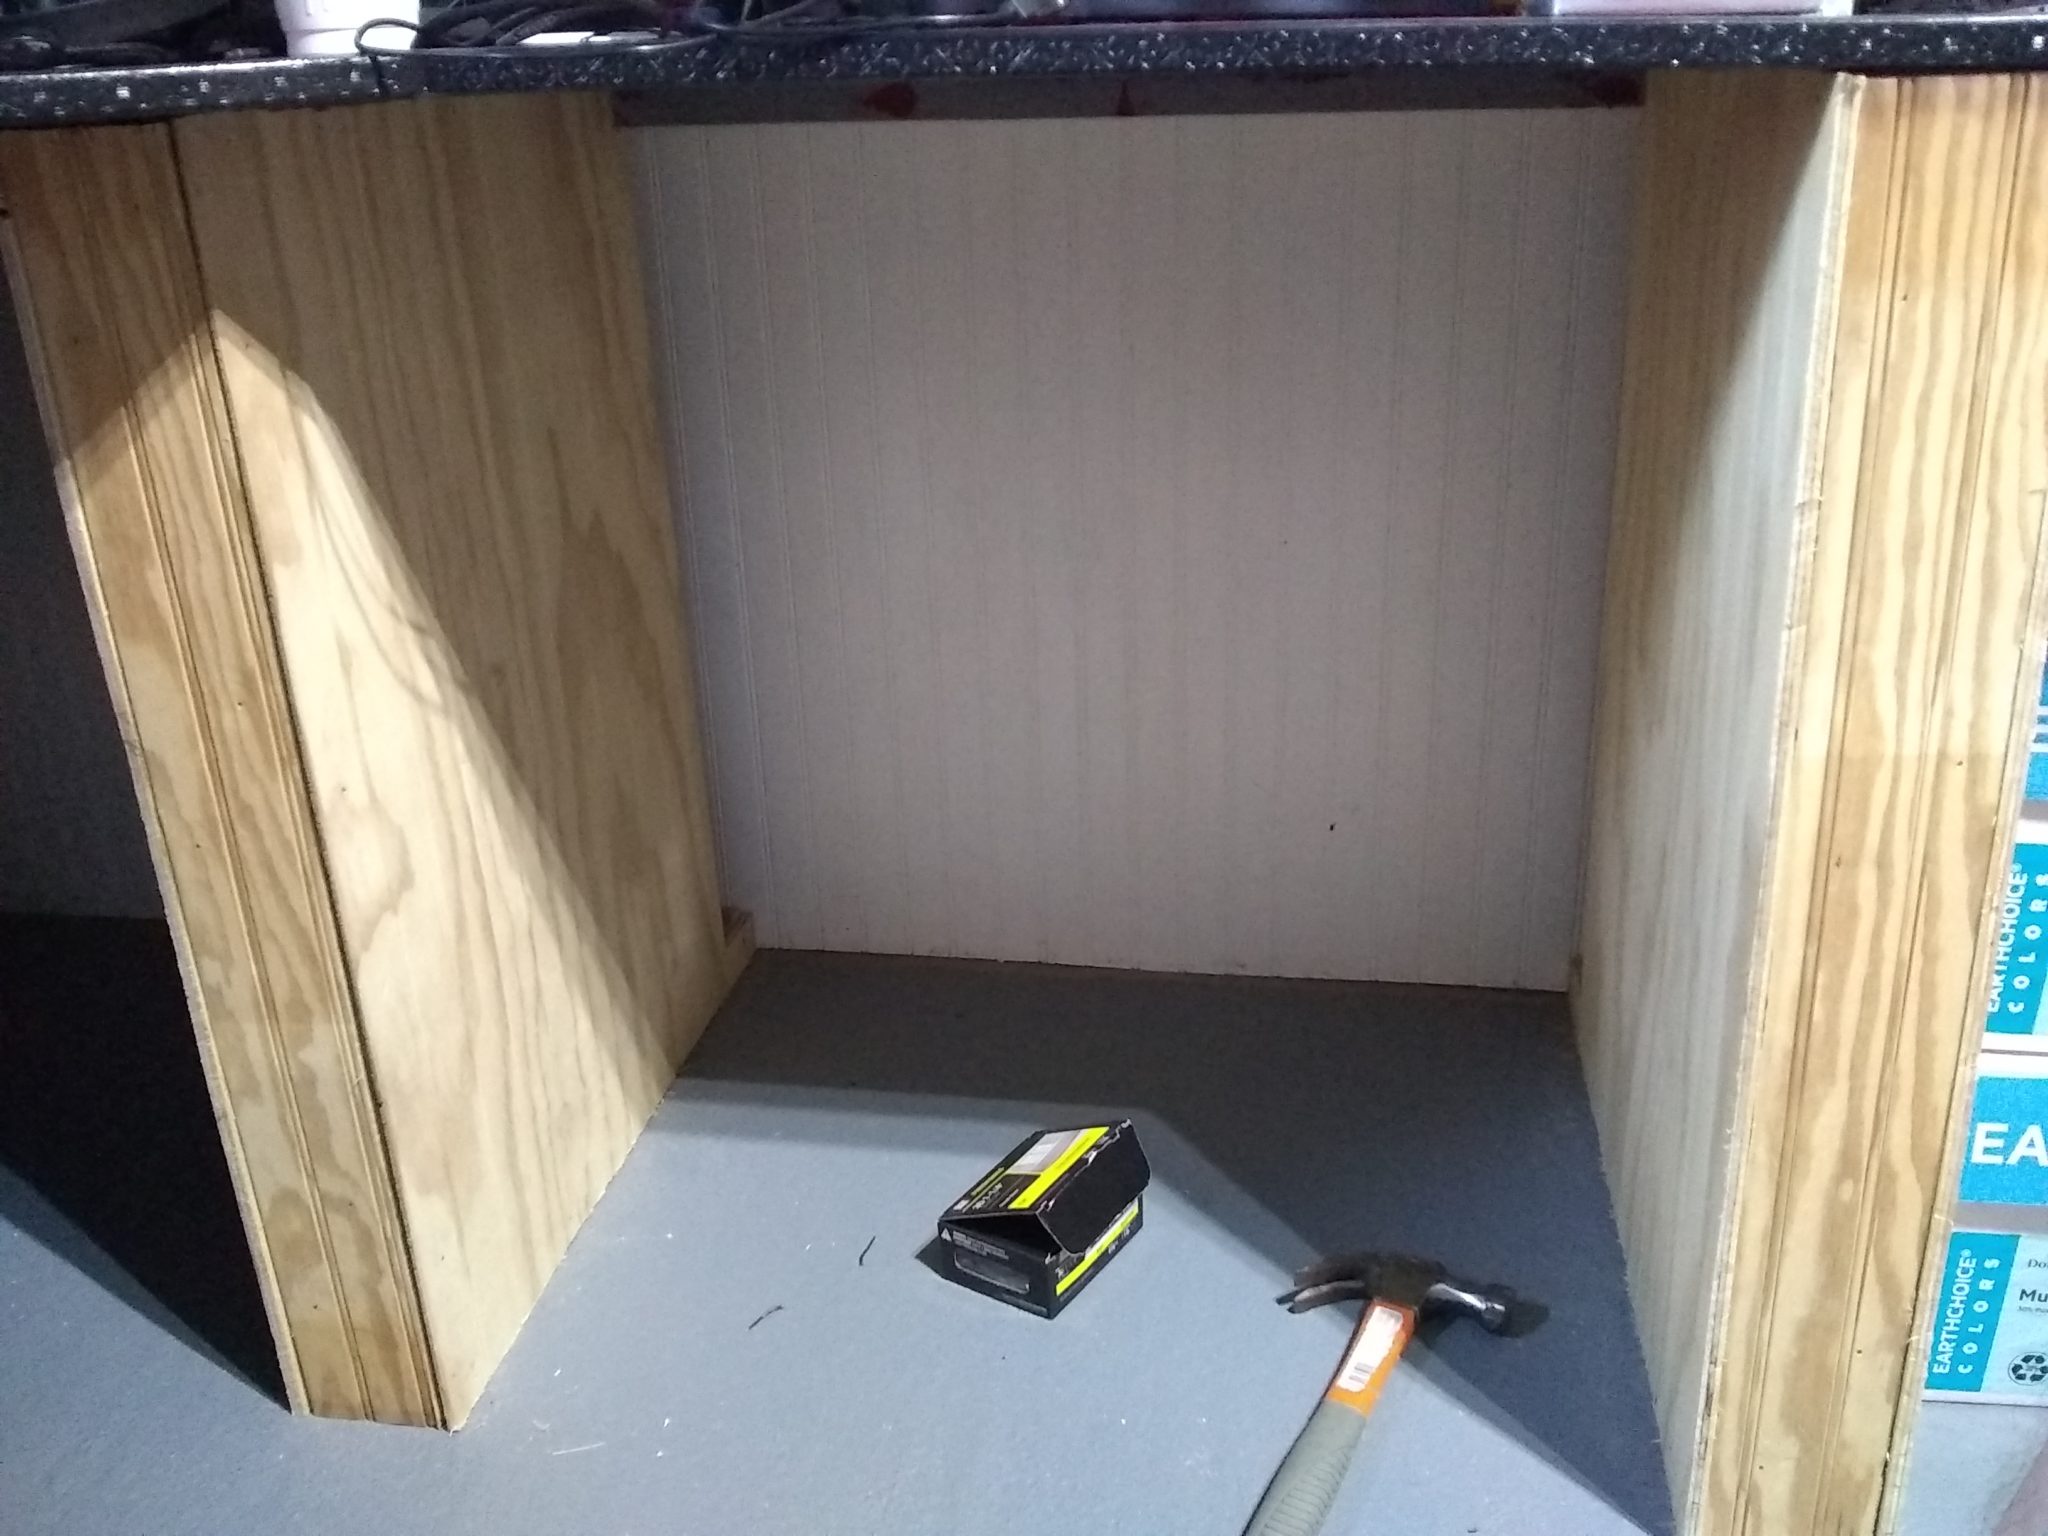
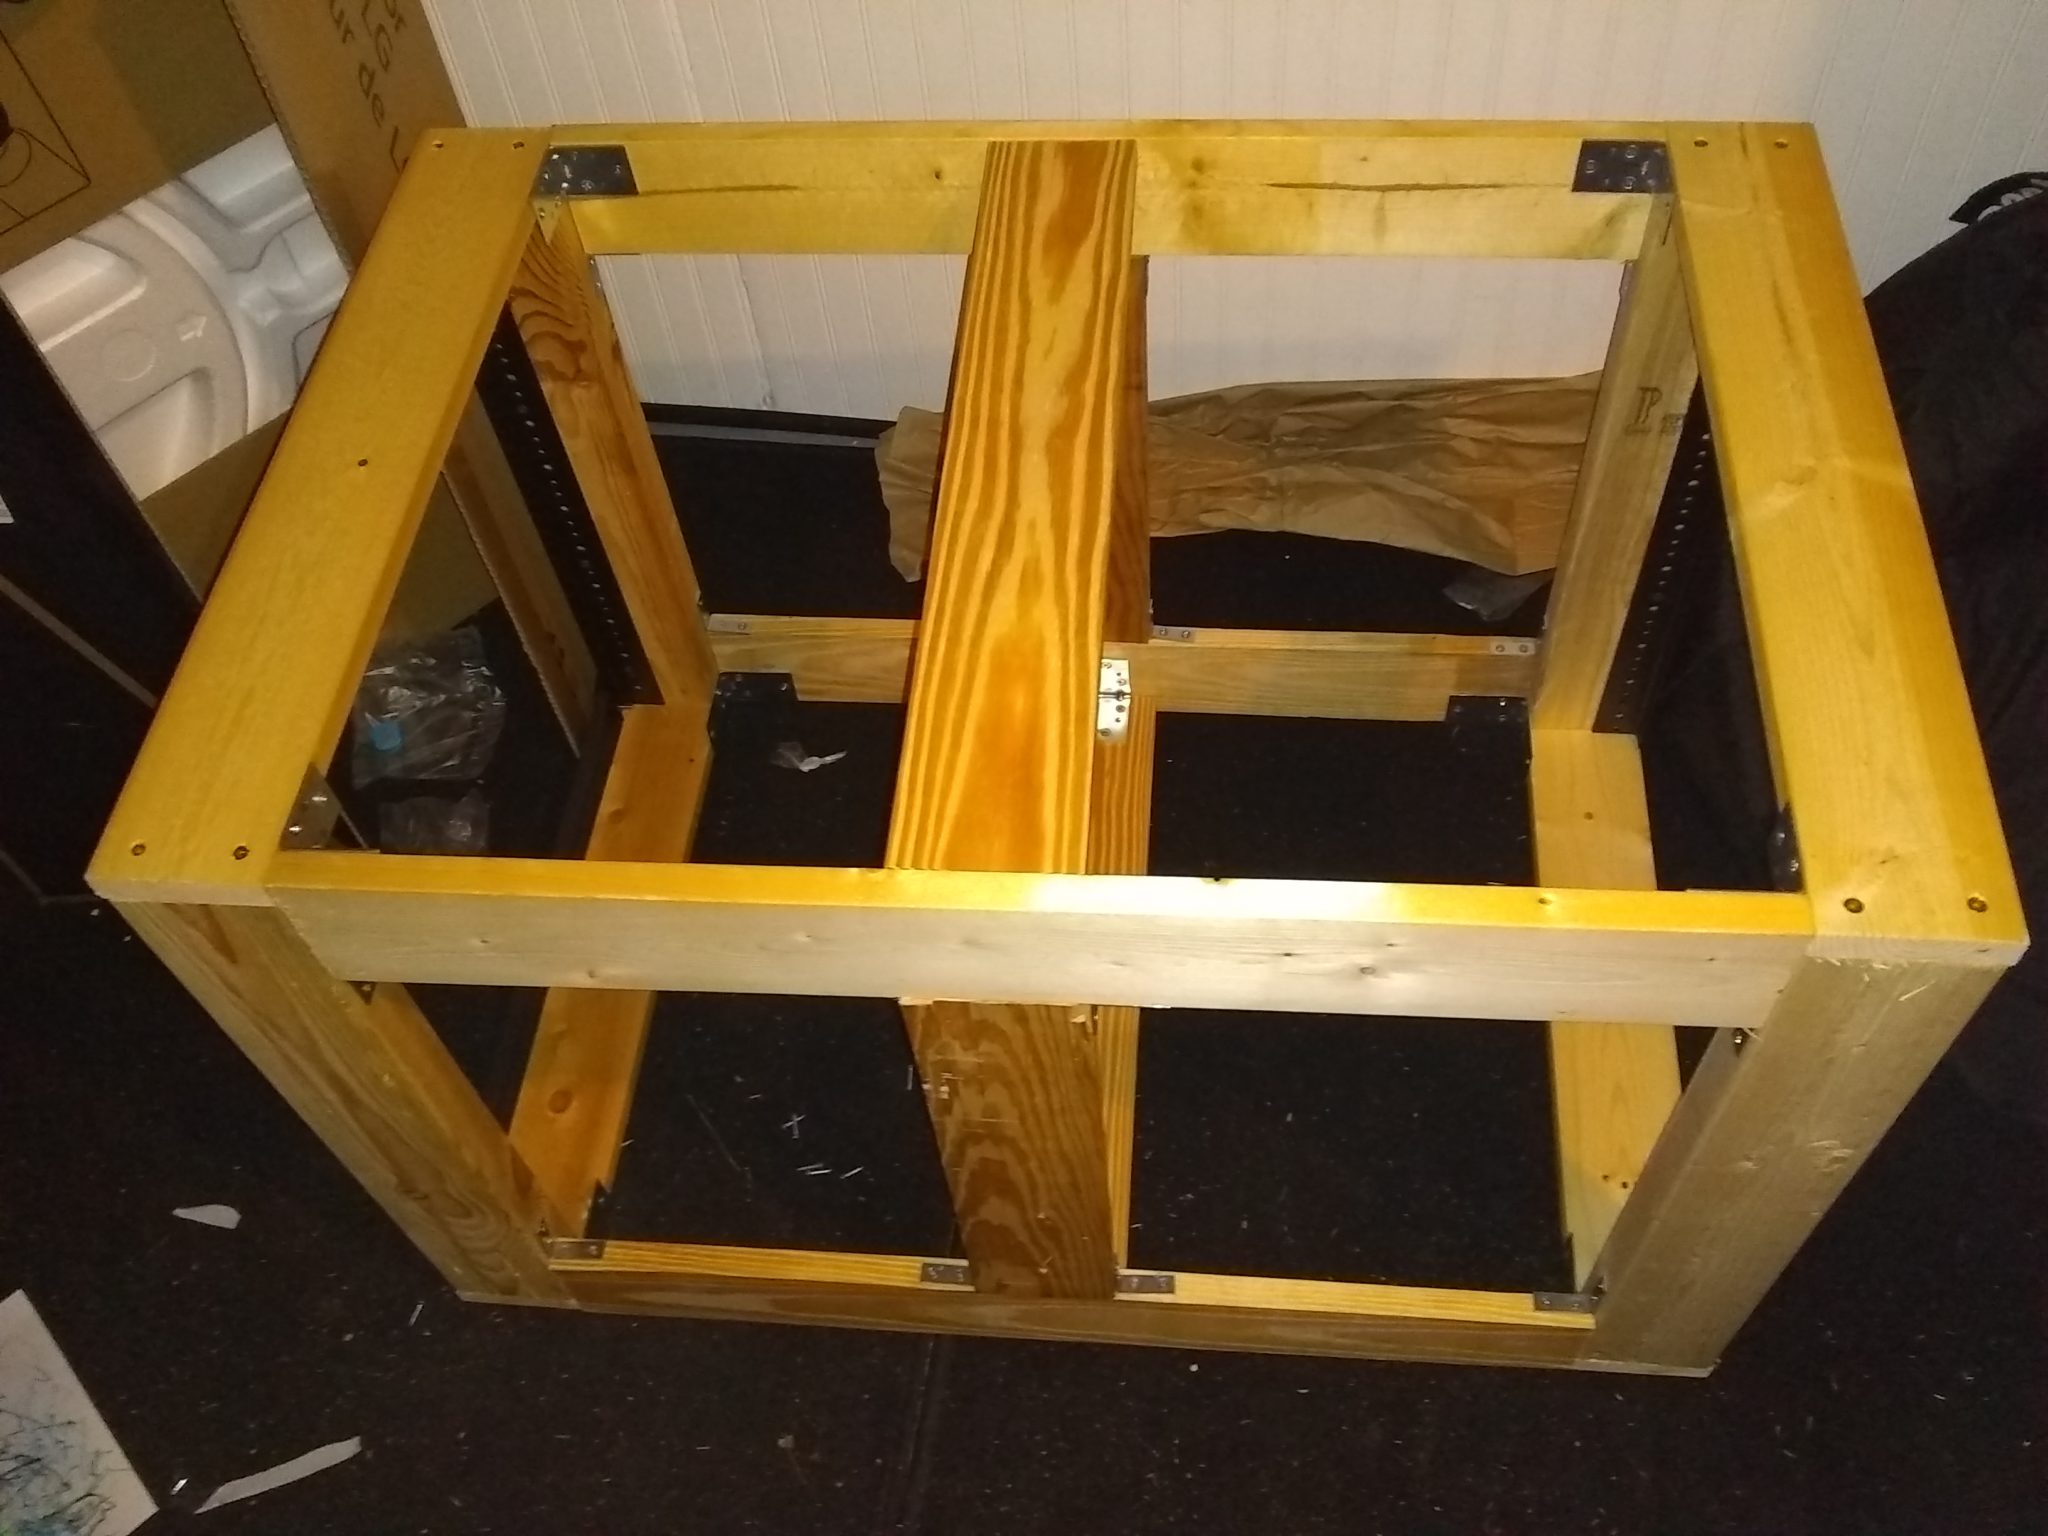
To support the desktop, I screwed 2x4s end on to the wall studs all along the rear of the desk (which I refer to as backrails, throughout), on all 3 sides, and support the desktop underneath with solid legs at various points along the desk’s run. In both corners, there are 2x4s fastened face on beneath the primary backrails, meeting at the corner, for additional support. This was a solution which provided me uninterrupted “storage corners” – shelving areas beneath the desk for items I wasn’t planning on using frequently, but would like stored close to hand.
While the legs are constructed of solid 2x4s, I subsequently paneled them with beadboard (from Jack’s) as wainscoting, to avoid an unfinished look. Each leg assembly is anchored to the concrete with hammer-in extension wedge anchors and attached to the respective wall’s anchor base by additional deck screws, toed in on each side. Each leg is constructed with a large gap between it and the wall, for ease of cable management.
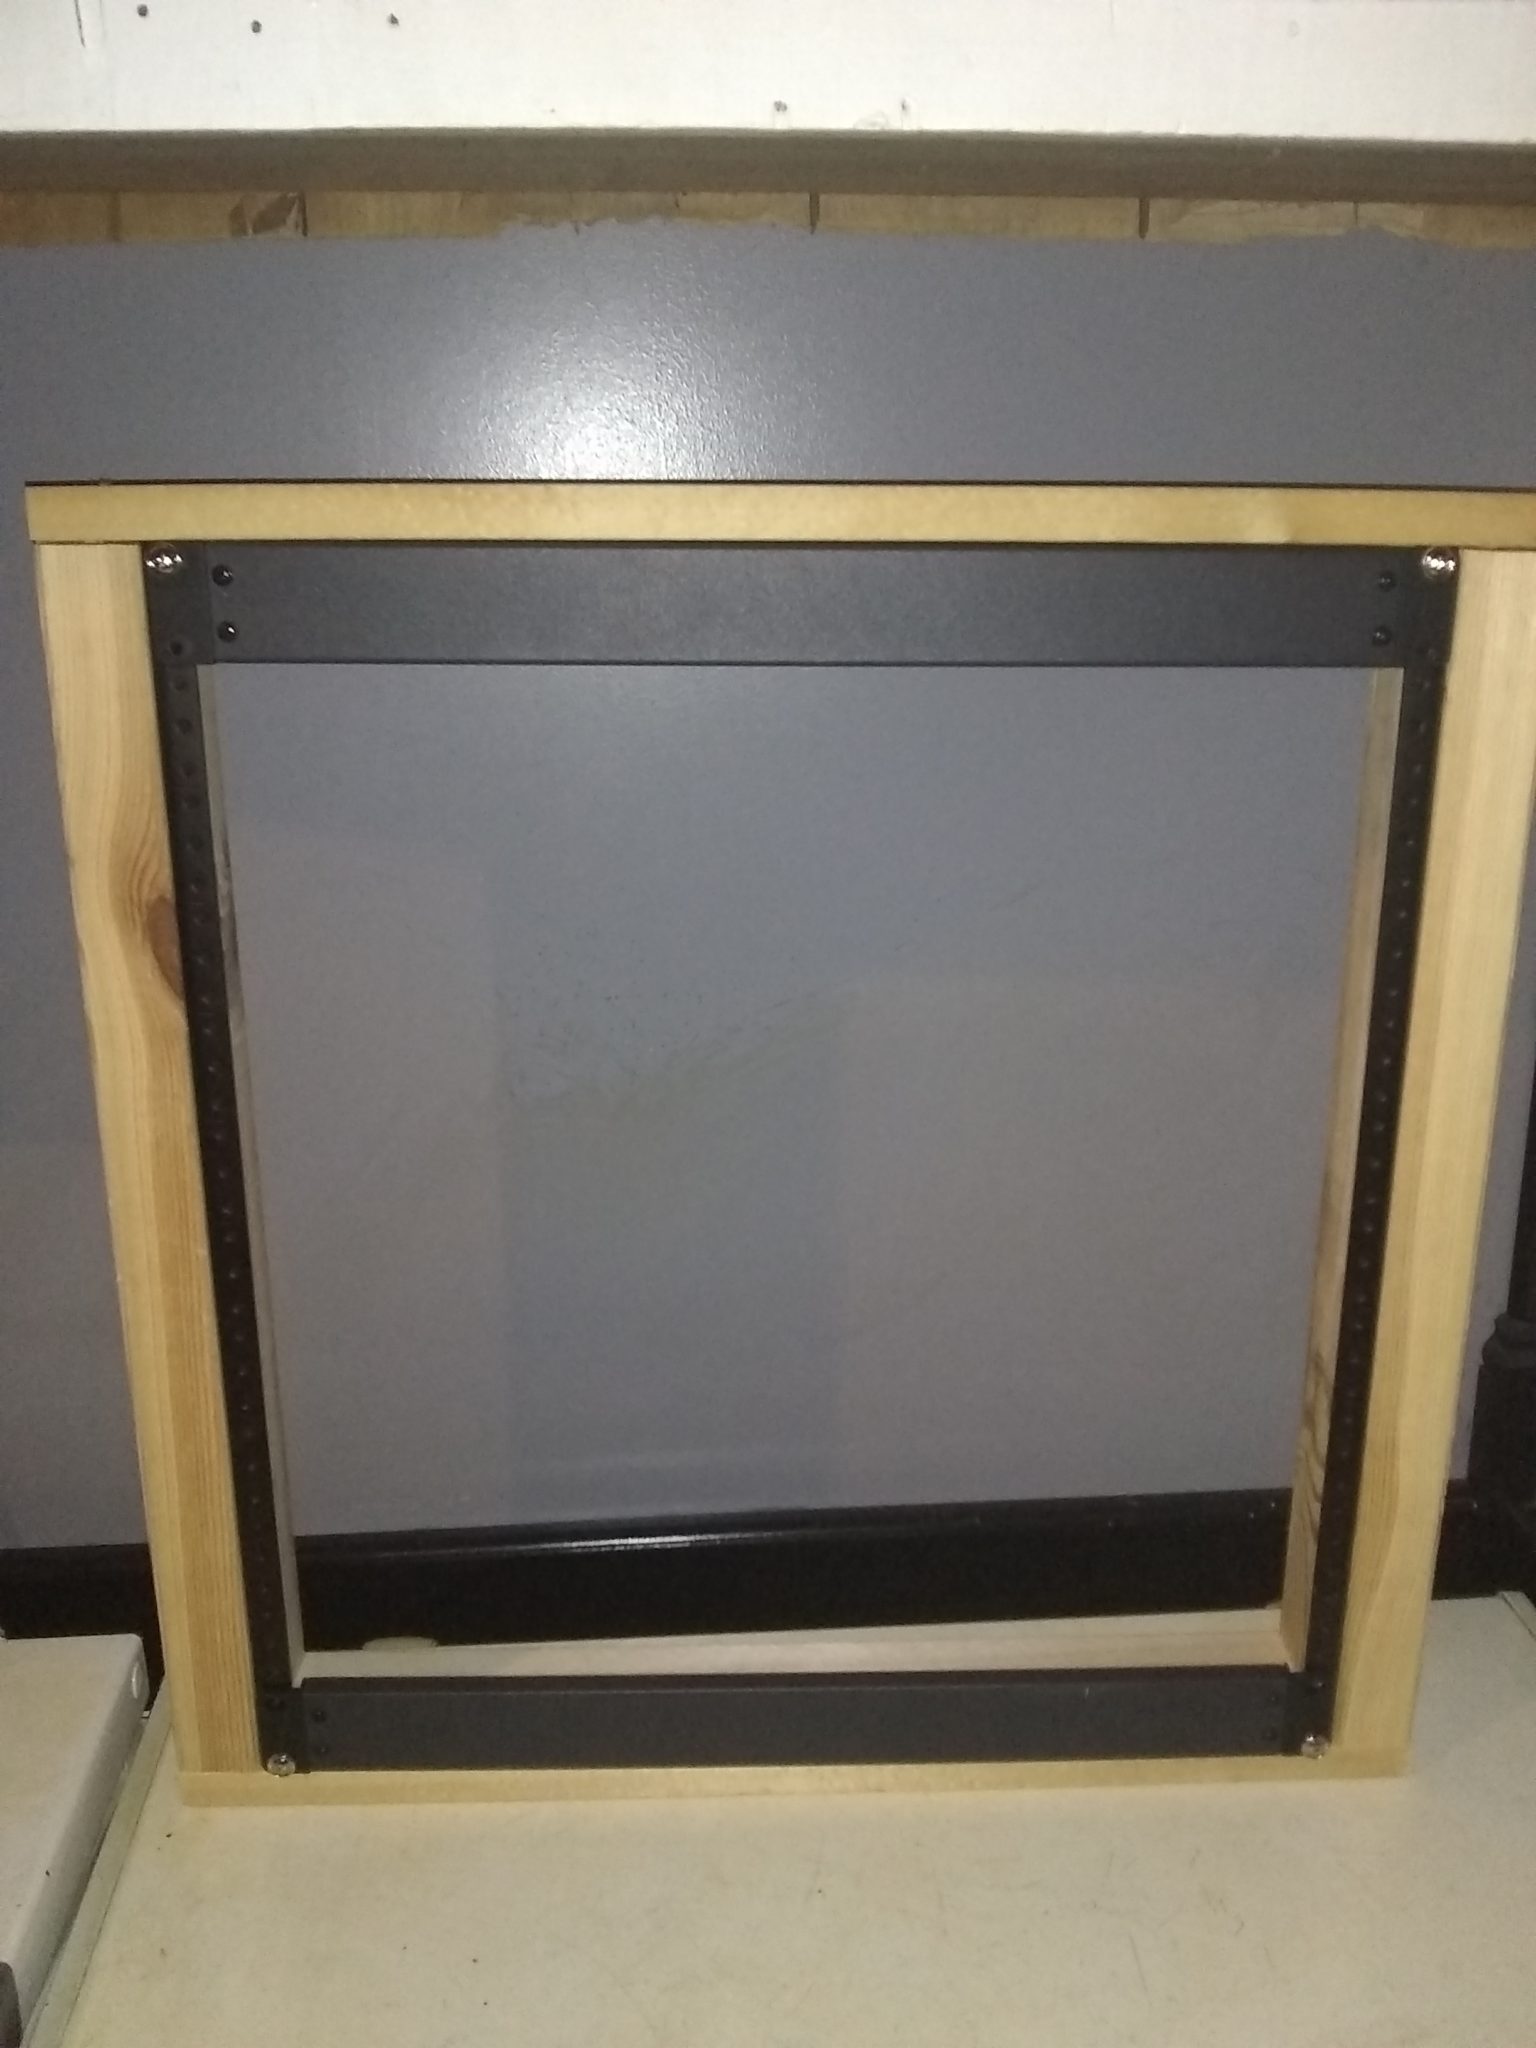
Leg Construction

I sketched out a plan for the legs that would allow cable pass-through and easy access. (Notice on my drawing that I forgot to move the rear leg out from the wall for both the backrail and the rear of the top vertical to split – don’t be like me. The rear vertical should be set out 23/4” from the wall along the bottom horizontal.) The front vertical is set flush between both horizontals, with the bottom horizontal terminating at the paneling covering the walls’ anchor plates. The rear vertical is placed so that the top horizontal lands halfway, and the rear of the vertical can be secured to the backrail, which lands on the other half of each rear vertical support. This design allows for about a 23/4” gap behind each leg – but still gives the desk surface the full support of the vertical members. As you can see, I had originally intended to add an additional vertical in the center, but once I had the primary structure put together, I realized that I just didn’t need them. The measurements for each piece are as follows:
- Bottom horizontal: Cut to 231/2“
- Top horizontal: Cut to 20″
- Both verticals: Cut to 261/4“
- Rear backrail: Longer cut to butt against left side backrail, and land on center of right rear leg; shorter section cut from same center to right side backrail
- Side backrails: Full 8ft boards
- Corner supports: 2ft sections, meeting in corner on each side.
With 3/4″ plywood for the desktop, this design puts the desktop level at 30″. Corner supports are attached with their top faces at the level of 273/4“, which will provide a support in each corner at the same height as the rear backrail notch of each leg section.
All told, it features 3 legs to each “wing”, 2 in the center section, supports under each corner’s backrail. The end product framing looks like this:


The Desktop
To make the “two wings” – just cut a full sheet of plywood exactly in half. End of line. For the center… a bit more complicated. I had to measure the entire center section out precisely, to fit as closely as possible to the two wings. The 45 degree flyouts that meet the wings gave me the most trouble. Once I drew it out on the plywood, and verified all the measurements, I cut the excess off the sheet in two chunks, then used a jigsaw to carefully cut this section out to my specifications, then cut the tray out, which was drawn out in the same process. The desktop itself is fastened to the backrail, and to each leg assembly, with countersunk deck screws, which I then filled in with wood putty.

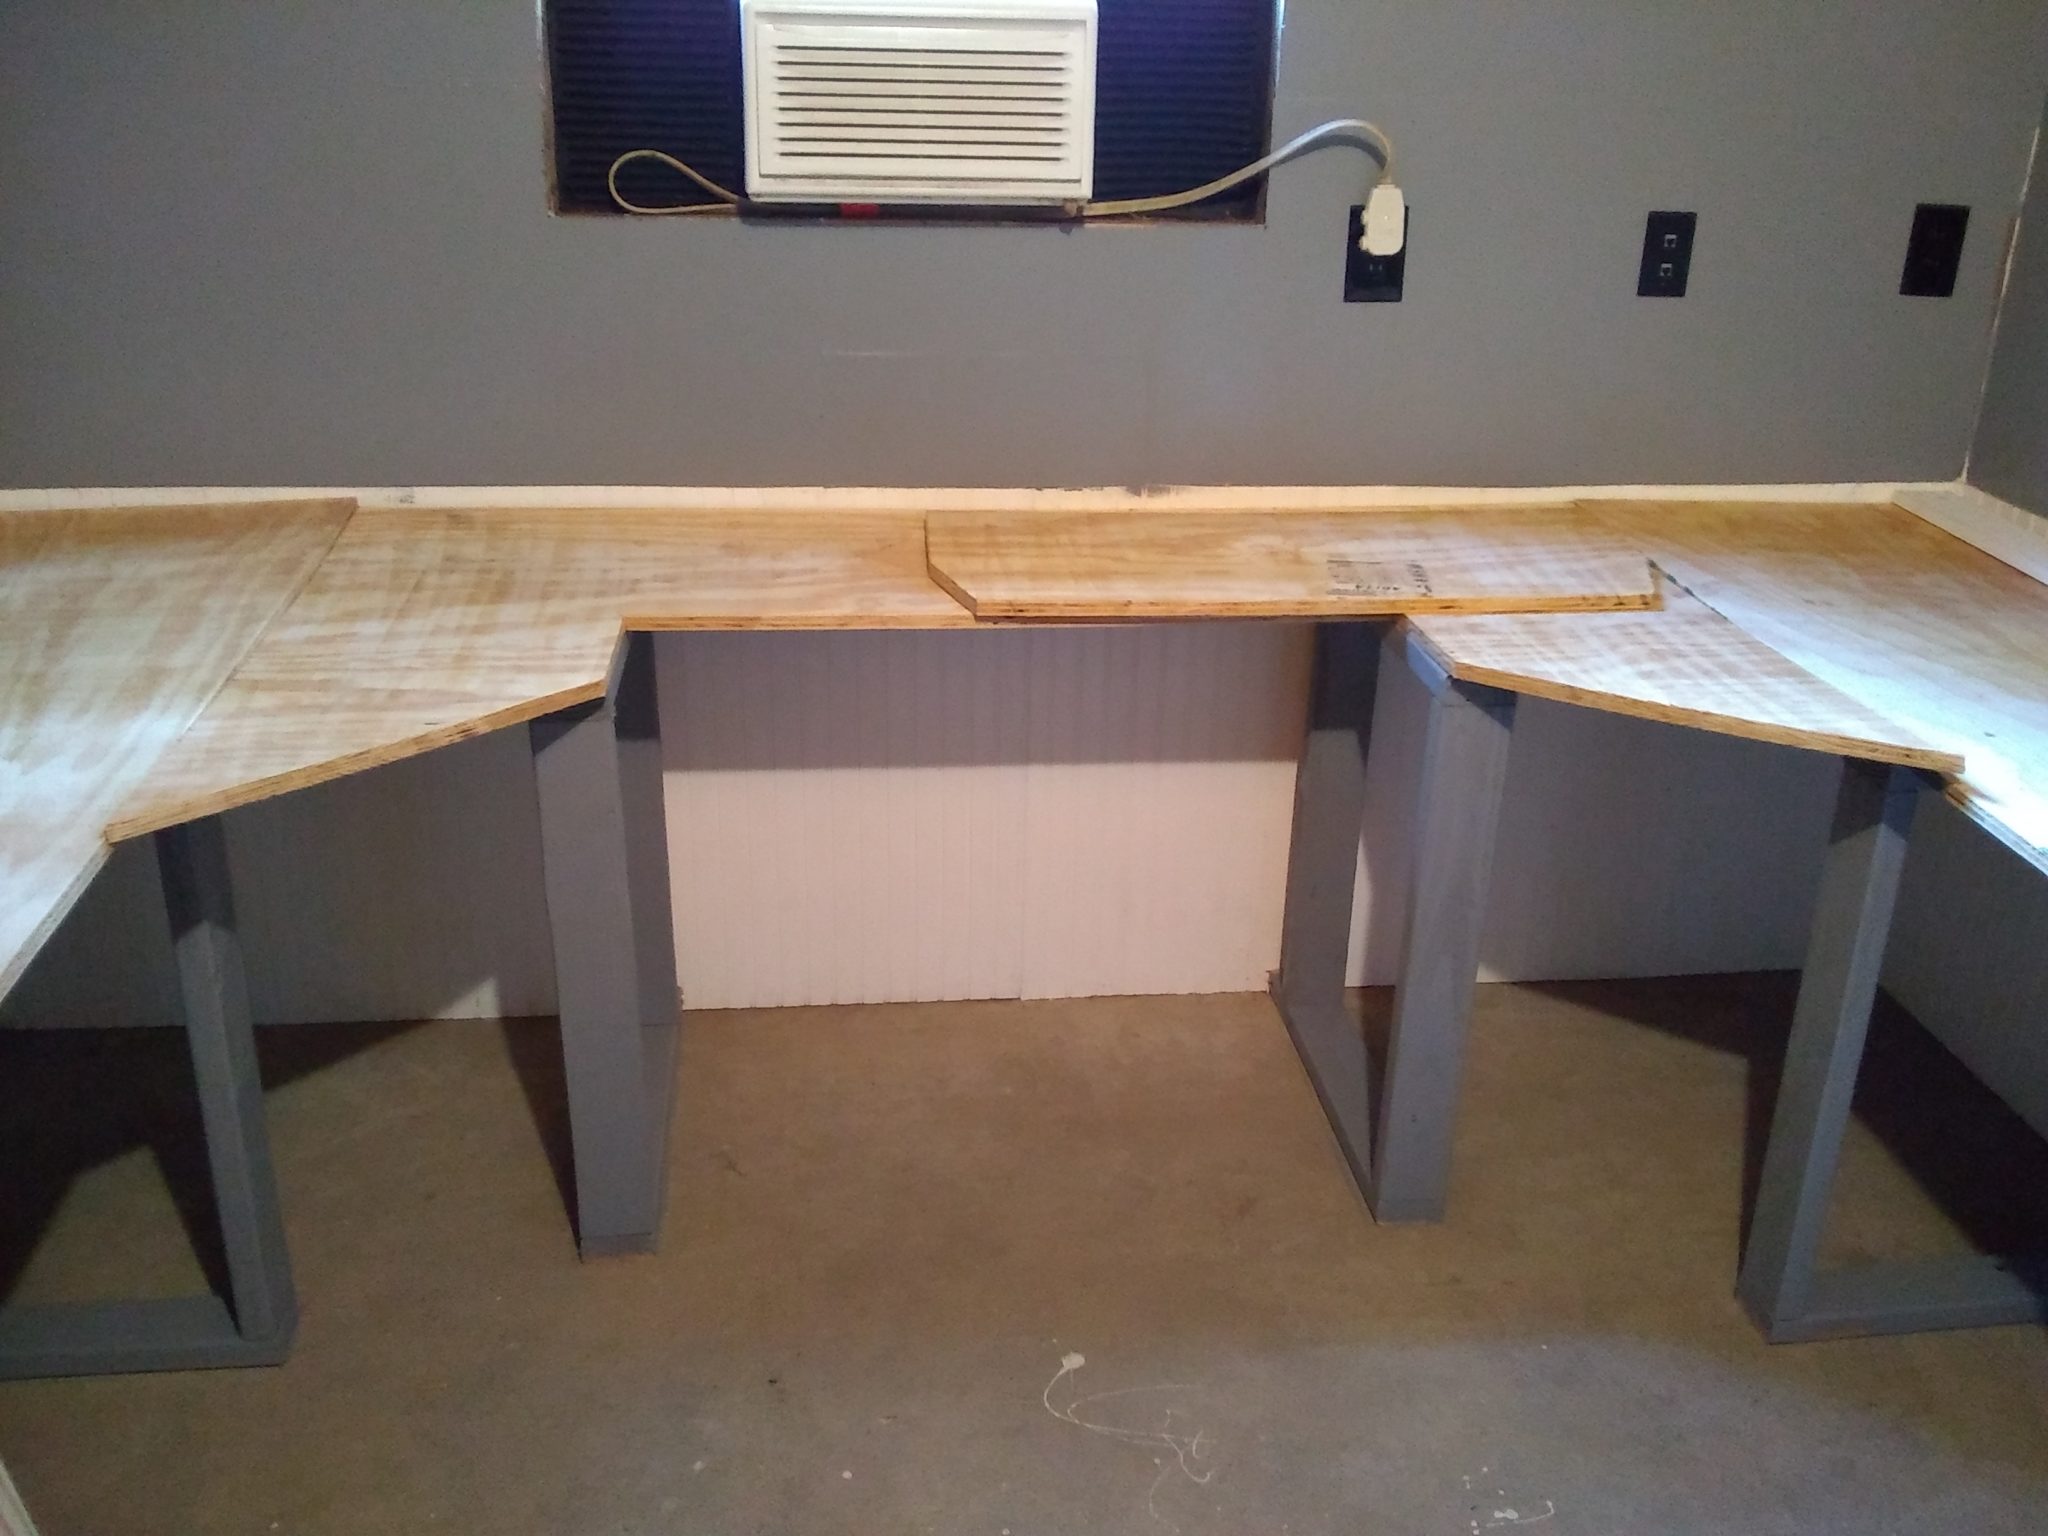

The center desk 45s were clamped to either wing for about 24 hours after attachment, joined to the wings as outlined below, then smoothed together cosmetically with more wood putty.


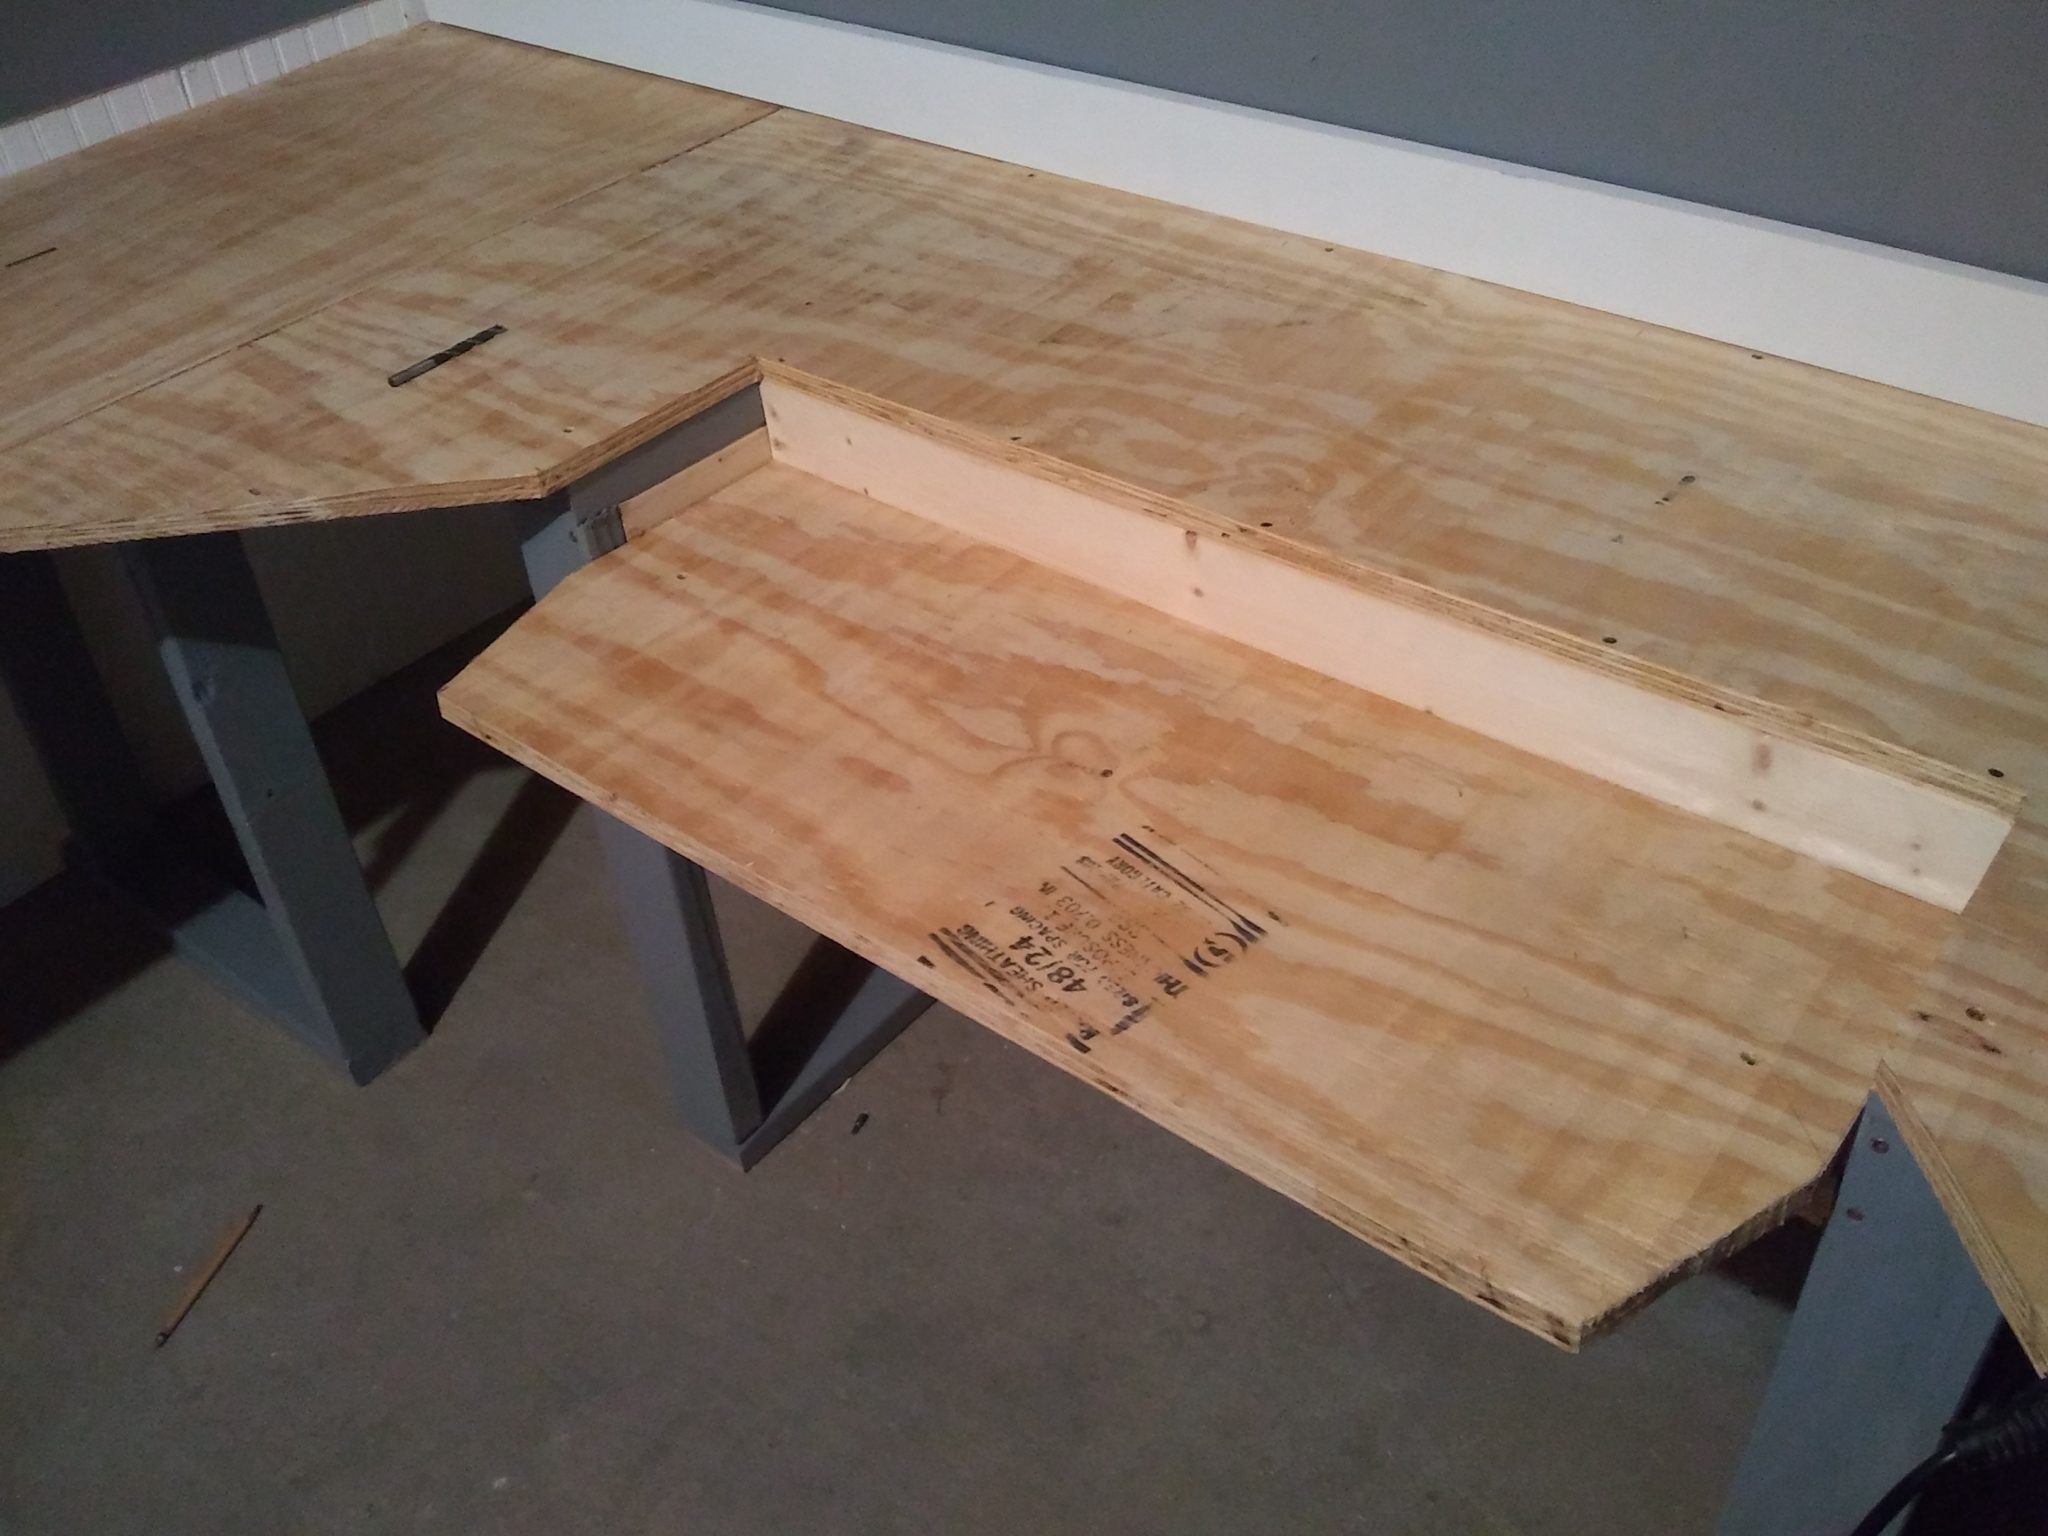

You can stand (or even jump) on this desk, with no problems whatsoever. It’s very solid. The only places where that might not be advisable are the joins between the three pieces, but to counter any structural weaknesses, I have 1) an additional 2×4 support centered underneath each join, butted into the backplates, as well as the closest leg, and toed in to both with deck screws. 2) Small steel join plates about 2 inches from the end of each 45-degree join. 3) Small 90-degree supports that are attached from the front of the appropriate legs to the underside of the desktop. As an example, I did much of the later ceiling work from on top of the desk, rather than a ladder. I step a mite gingerly at those two points, but I don’t worry too much about it. I’m more worried about the paint job than any structural failure, in any case.
Note, for those wanting to duplicate this project: Unless you have a good sized space, this desk size and shape may not work for you. For any other size space, you’re going to have to modify the plans to fit. It is very custom, (it is built into the walls, anchored to the floor) very overkill – and admittedly, very cool – but I have a wall to wall U-shaped desk that takes up over half of a 9.5×15.5 ft. room. This desk dominates the room. Much wider, and I’d have too much room in the center for a convenient “swivel to station”; much narrower, and it’d be cramped quarters. Think about what you want your desk to do. I’ve been planning this redux project for about a decade, with all the features I might want in a blue sky project. I designed it for my side work as a PC builder, light network admin, and repair tech – but with the added bonus of doubling as a killer LAN party hangout. You might want other things – build accordingly.
Keyboard Tray
One feature that I really liked about my previous custom desk, and had to retain, was the drop-down keyboard tray. I had built it to a scale slightly less ambitious last time, and used cheap MDF; but that feel of solidity – and fixed location – was a decided preference. The arms of my chair are precisely at the level of the keyboard tray. It is set at 33/8” below the main desktop level, at 265/8“, for no better reason than that I like it there. The side and backplates for the keyboard tray are 1×4, with scraps from the wall paneling covering the side plates, and filling in the slight gap left by the saw width difference, allowing a more secure attachment of the side plates, flush with the desktop edges. The keyboard tray is cut directly out of the same piece of wood the center of the desktop was constructed of. The legs to either side were placed so that the tray could be fastened directly to them, as well as to the backplate. I have an additional 2×4 running from leg to leg (and toed into each side) beneath the center of the tray, for further support. It measures 3’x14”, and comfortably fits a (very) large keyboard/mousepad.
The Paint Job
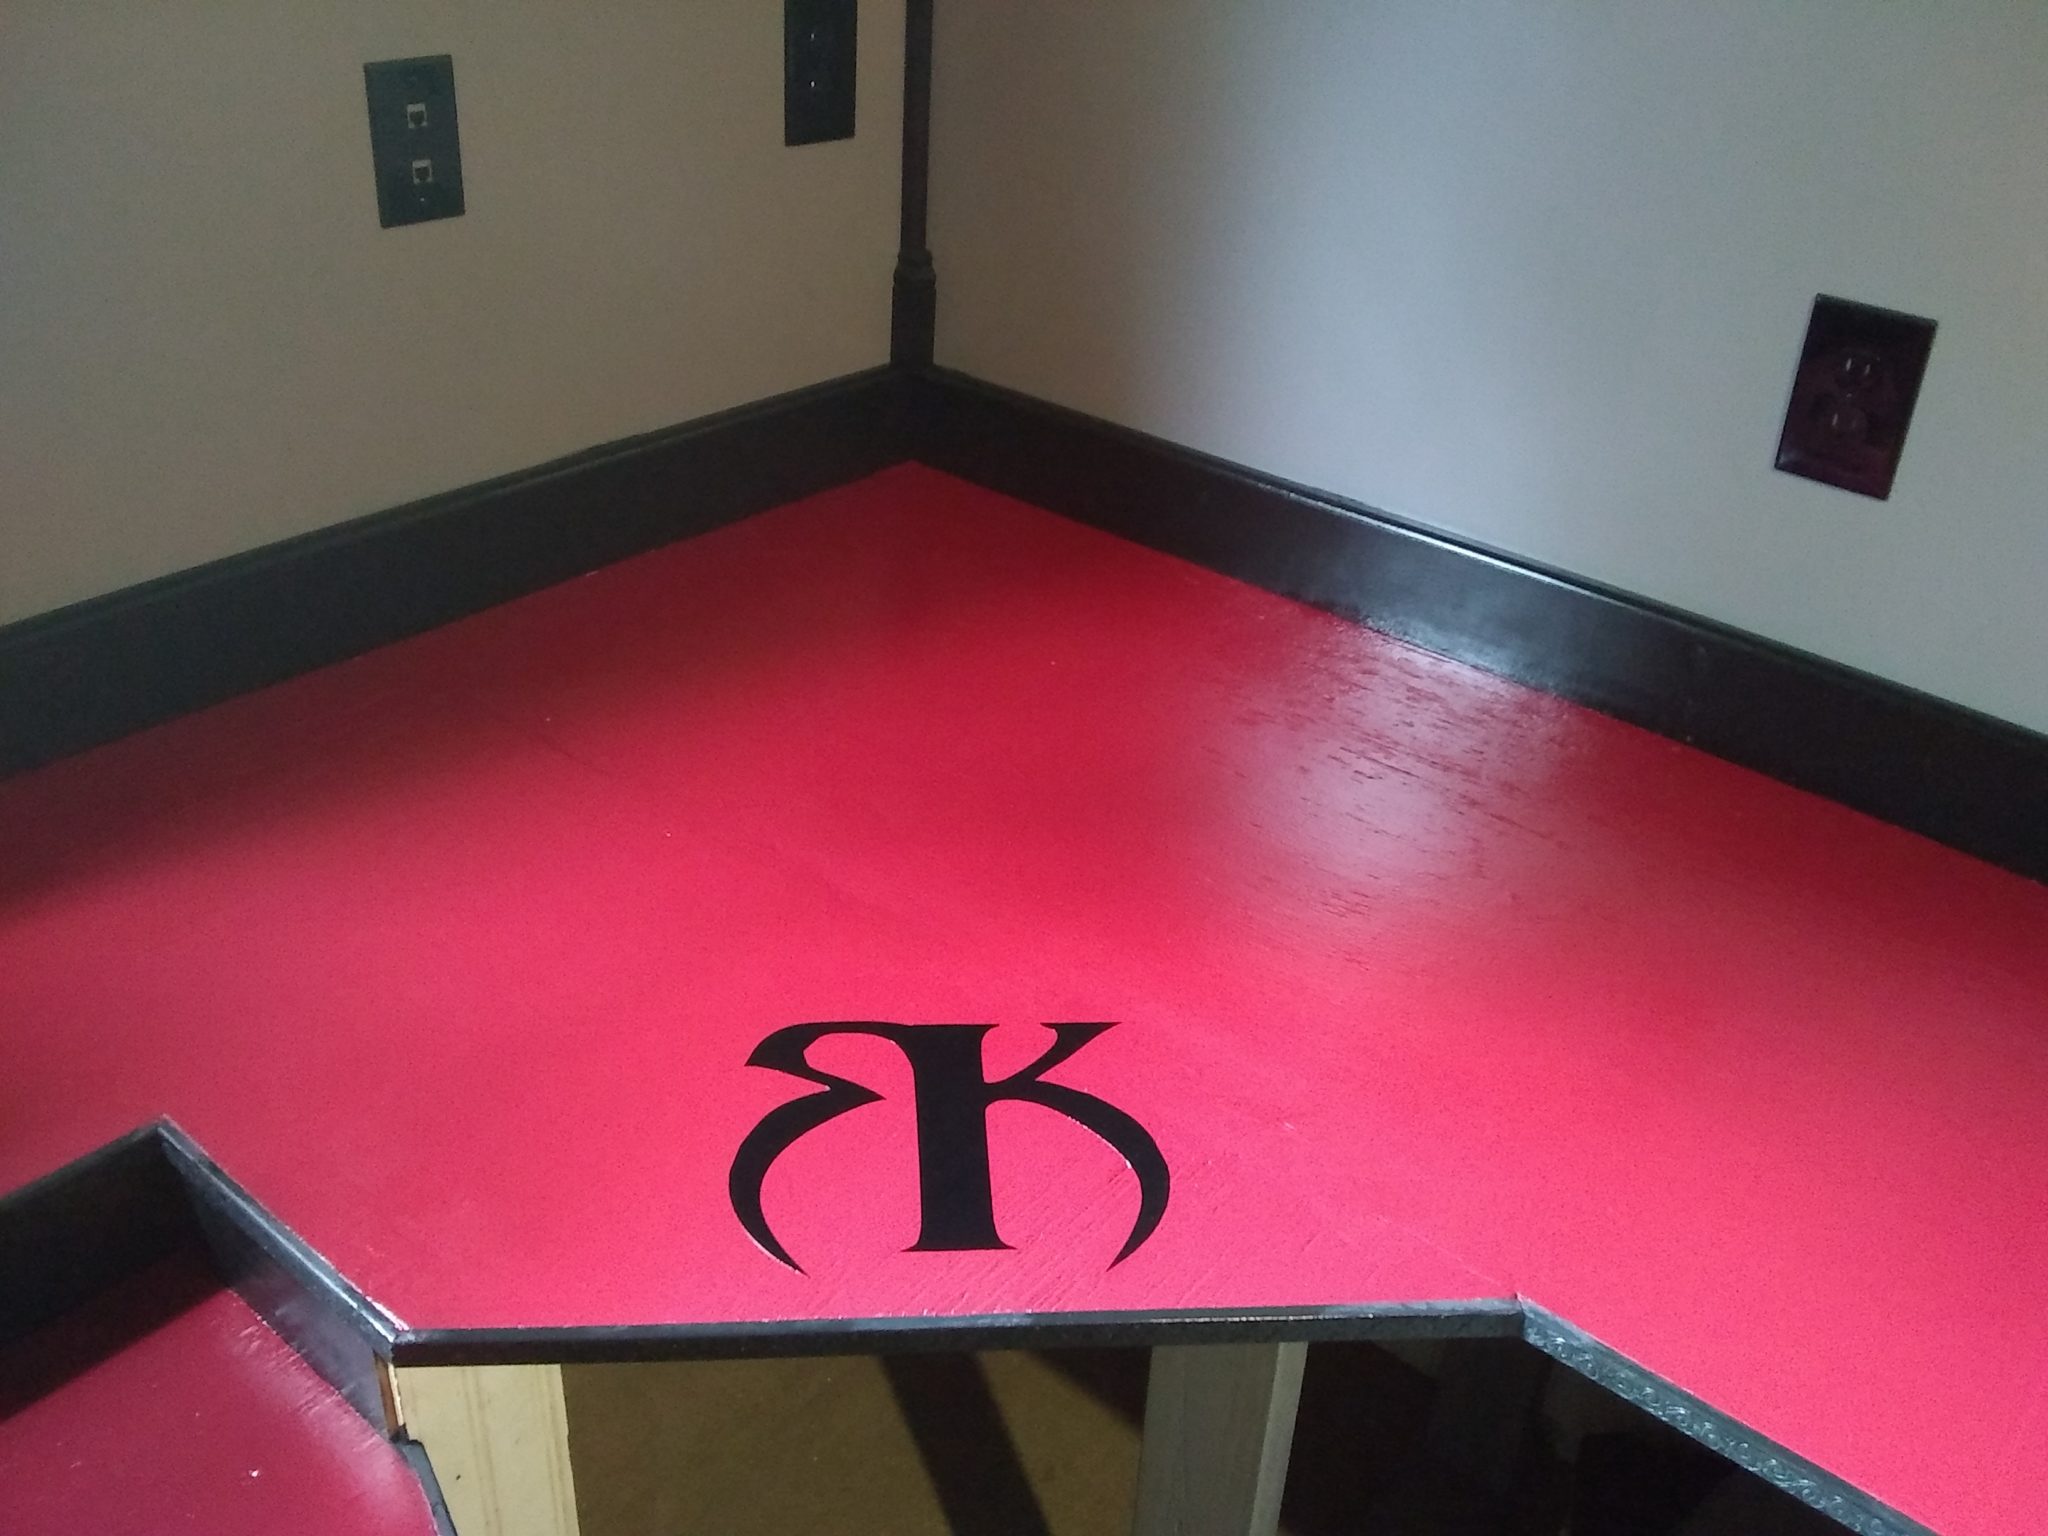
Not gonna lie, this is the part that made me the most excited about this space. The functionality is awesome, it is entirely my design, and I did it all myself – but this is the one place where I can let my love of the color red go wild. We’ll come back to this in a bit, but as you can see, it simply dominates the space.
It’s painted in Behr Ultra Dark Crimson Semi-Gloss Enamel. The enamel paint is fantastic, and can be applied by a roller with no problems. The desk also has my logo applied to it in vinyl, and is then coated with about 4 layers of high-gloss clear polycrylic for protection.
Incidentally, polycrylic is suitable for use over vinyl, and over painted surfaces. It doesn’t yellow the paint, and it won’t affect the vinyl. I used to work at a sign shop, so a word of advice – if you apply vinyl, make sure there are absolutely no air bubbles underneath. Use a scalpel or pin and poke pinholes at points to help you get air out, and smooth it down repeatedly with a plastic ruler or another straight edge. I used a new plastic scraper of a type that we usually use for dishes. On this rough plywood surface, I had to do a good bit of that before I was satisfied. Once the poly is applied, you cannot access the vinyl again. If you left the air, it’s there forever, and you will have a gap underneath your protective coating due to slack in the vinyl. So, don’t leave any. Also, another tip – DO NOT use a roller of any kind to apply polycrylic. I did that on one coat, and regretted it, immensely. Took forever to sand a myriad of tiny bubbles back out of coat #2 with ultra-fine grit sandpaper – and I basically wasted that entire coat.


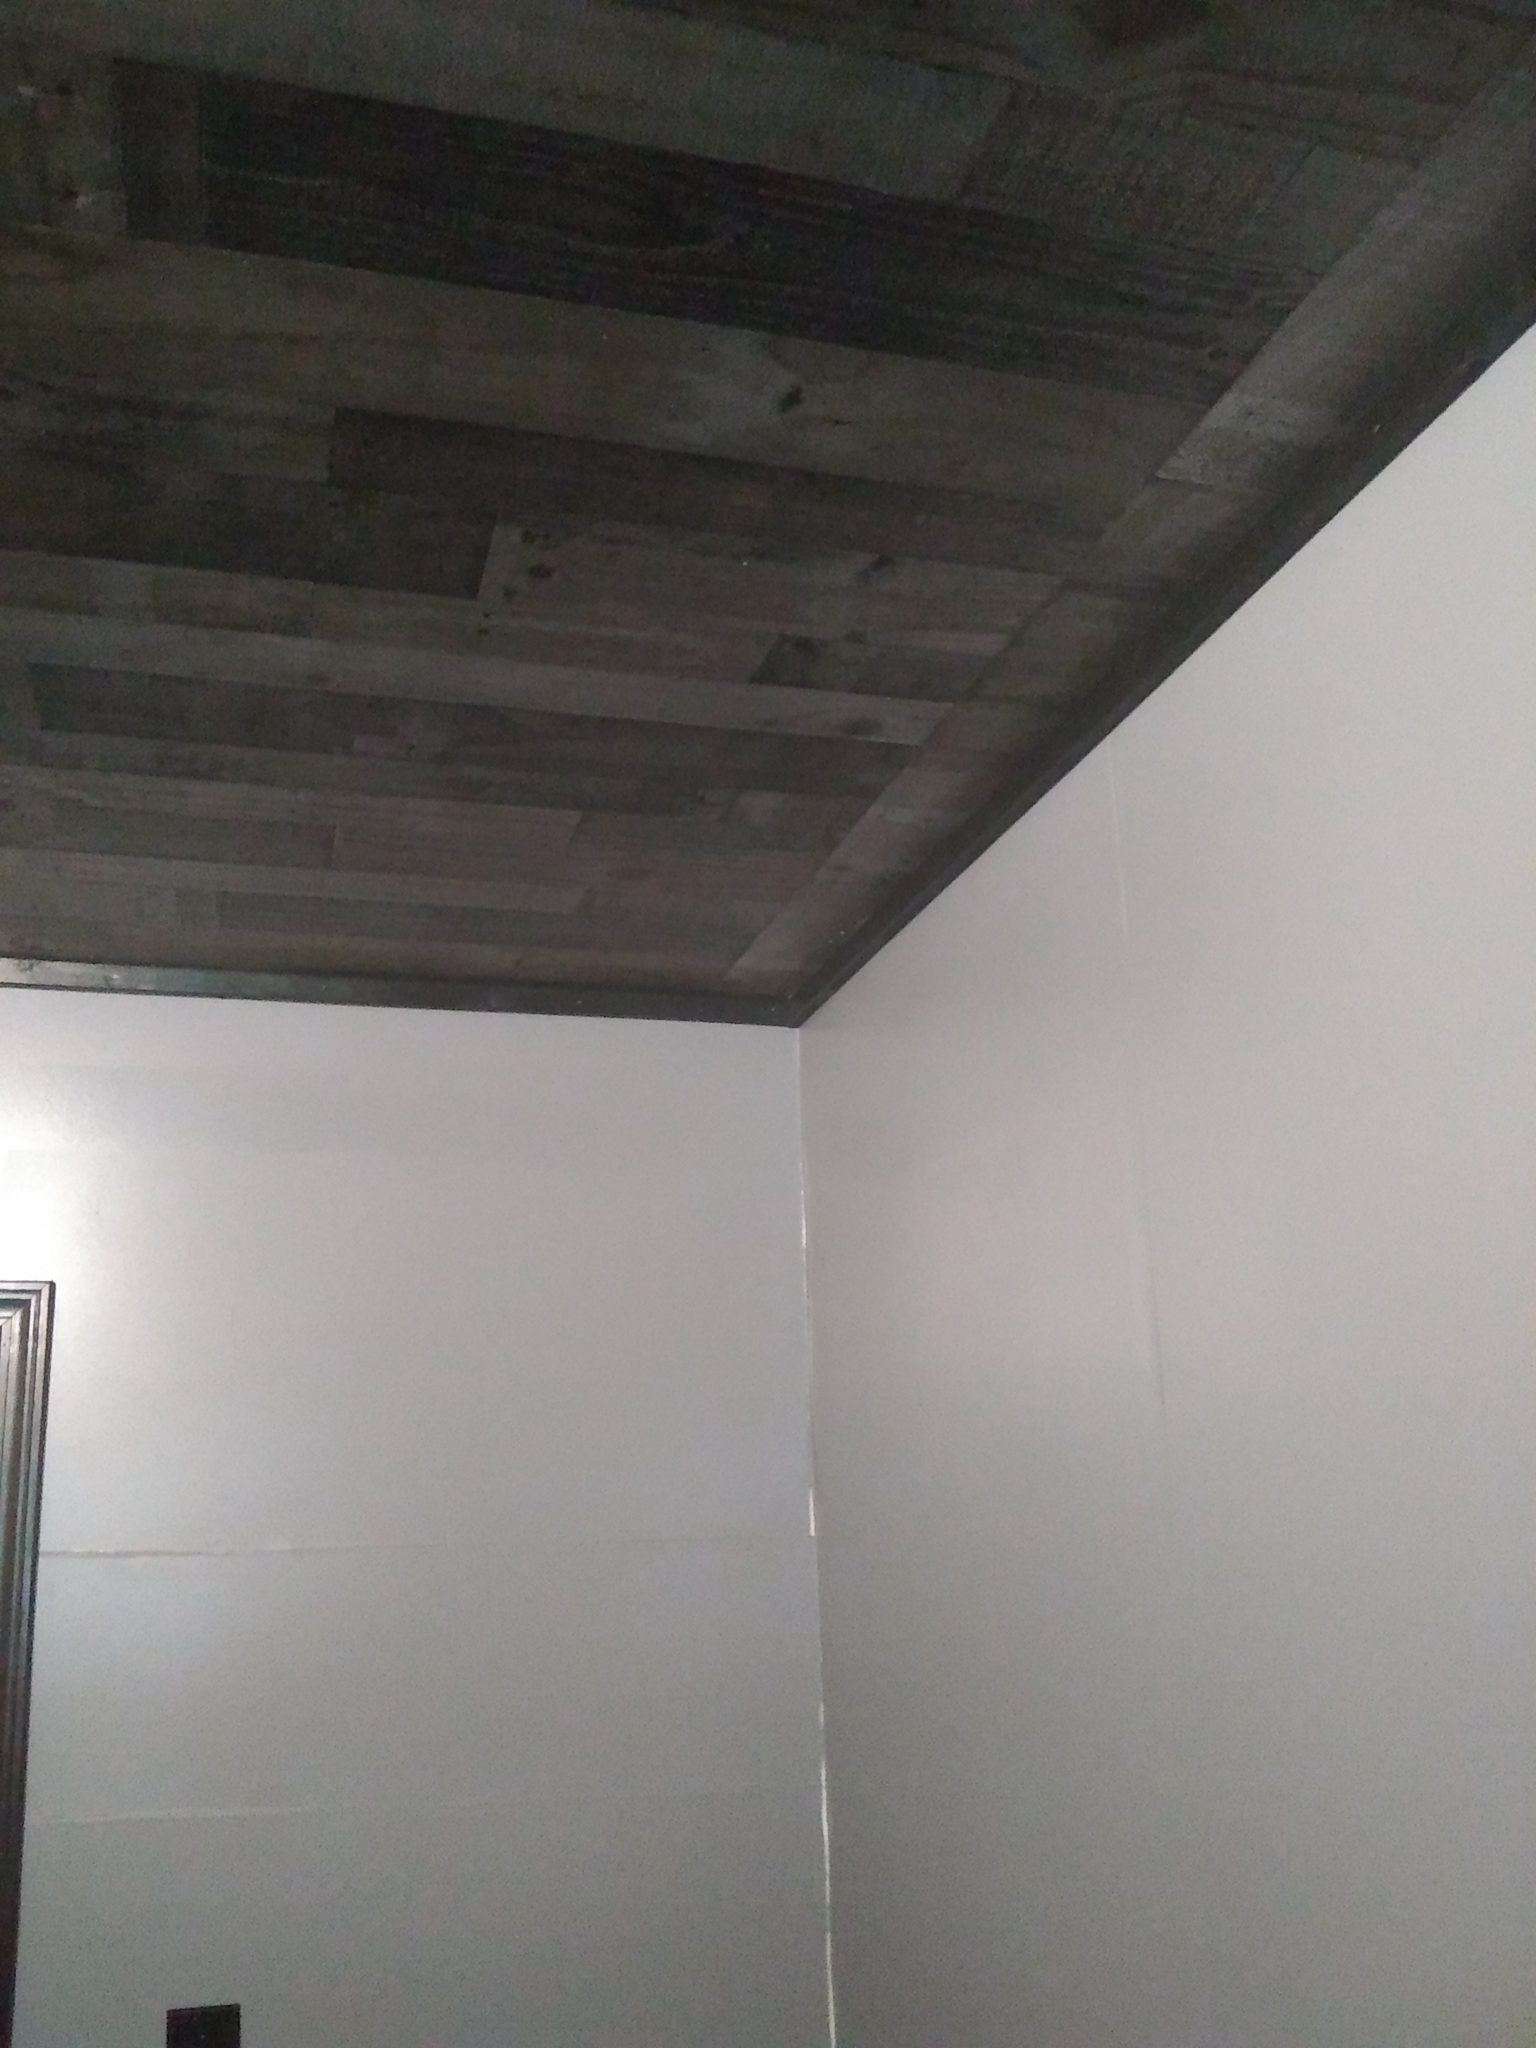
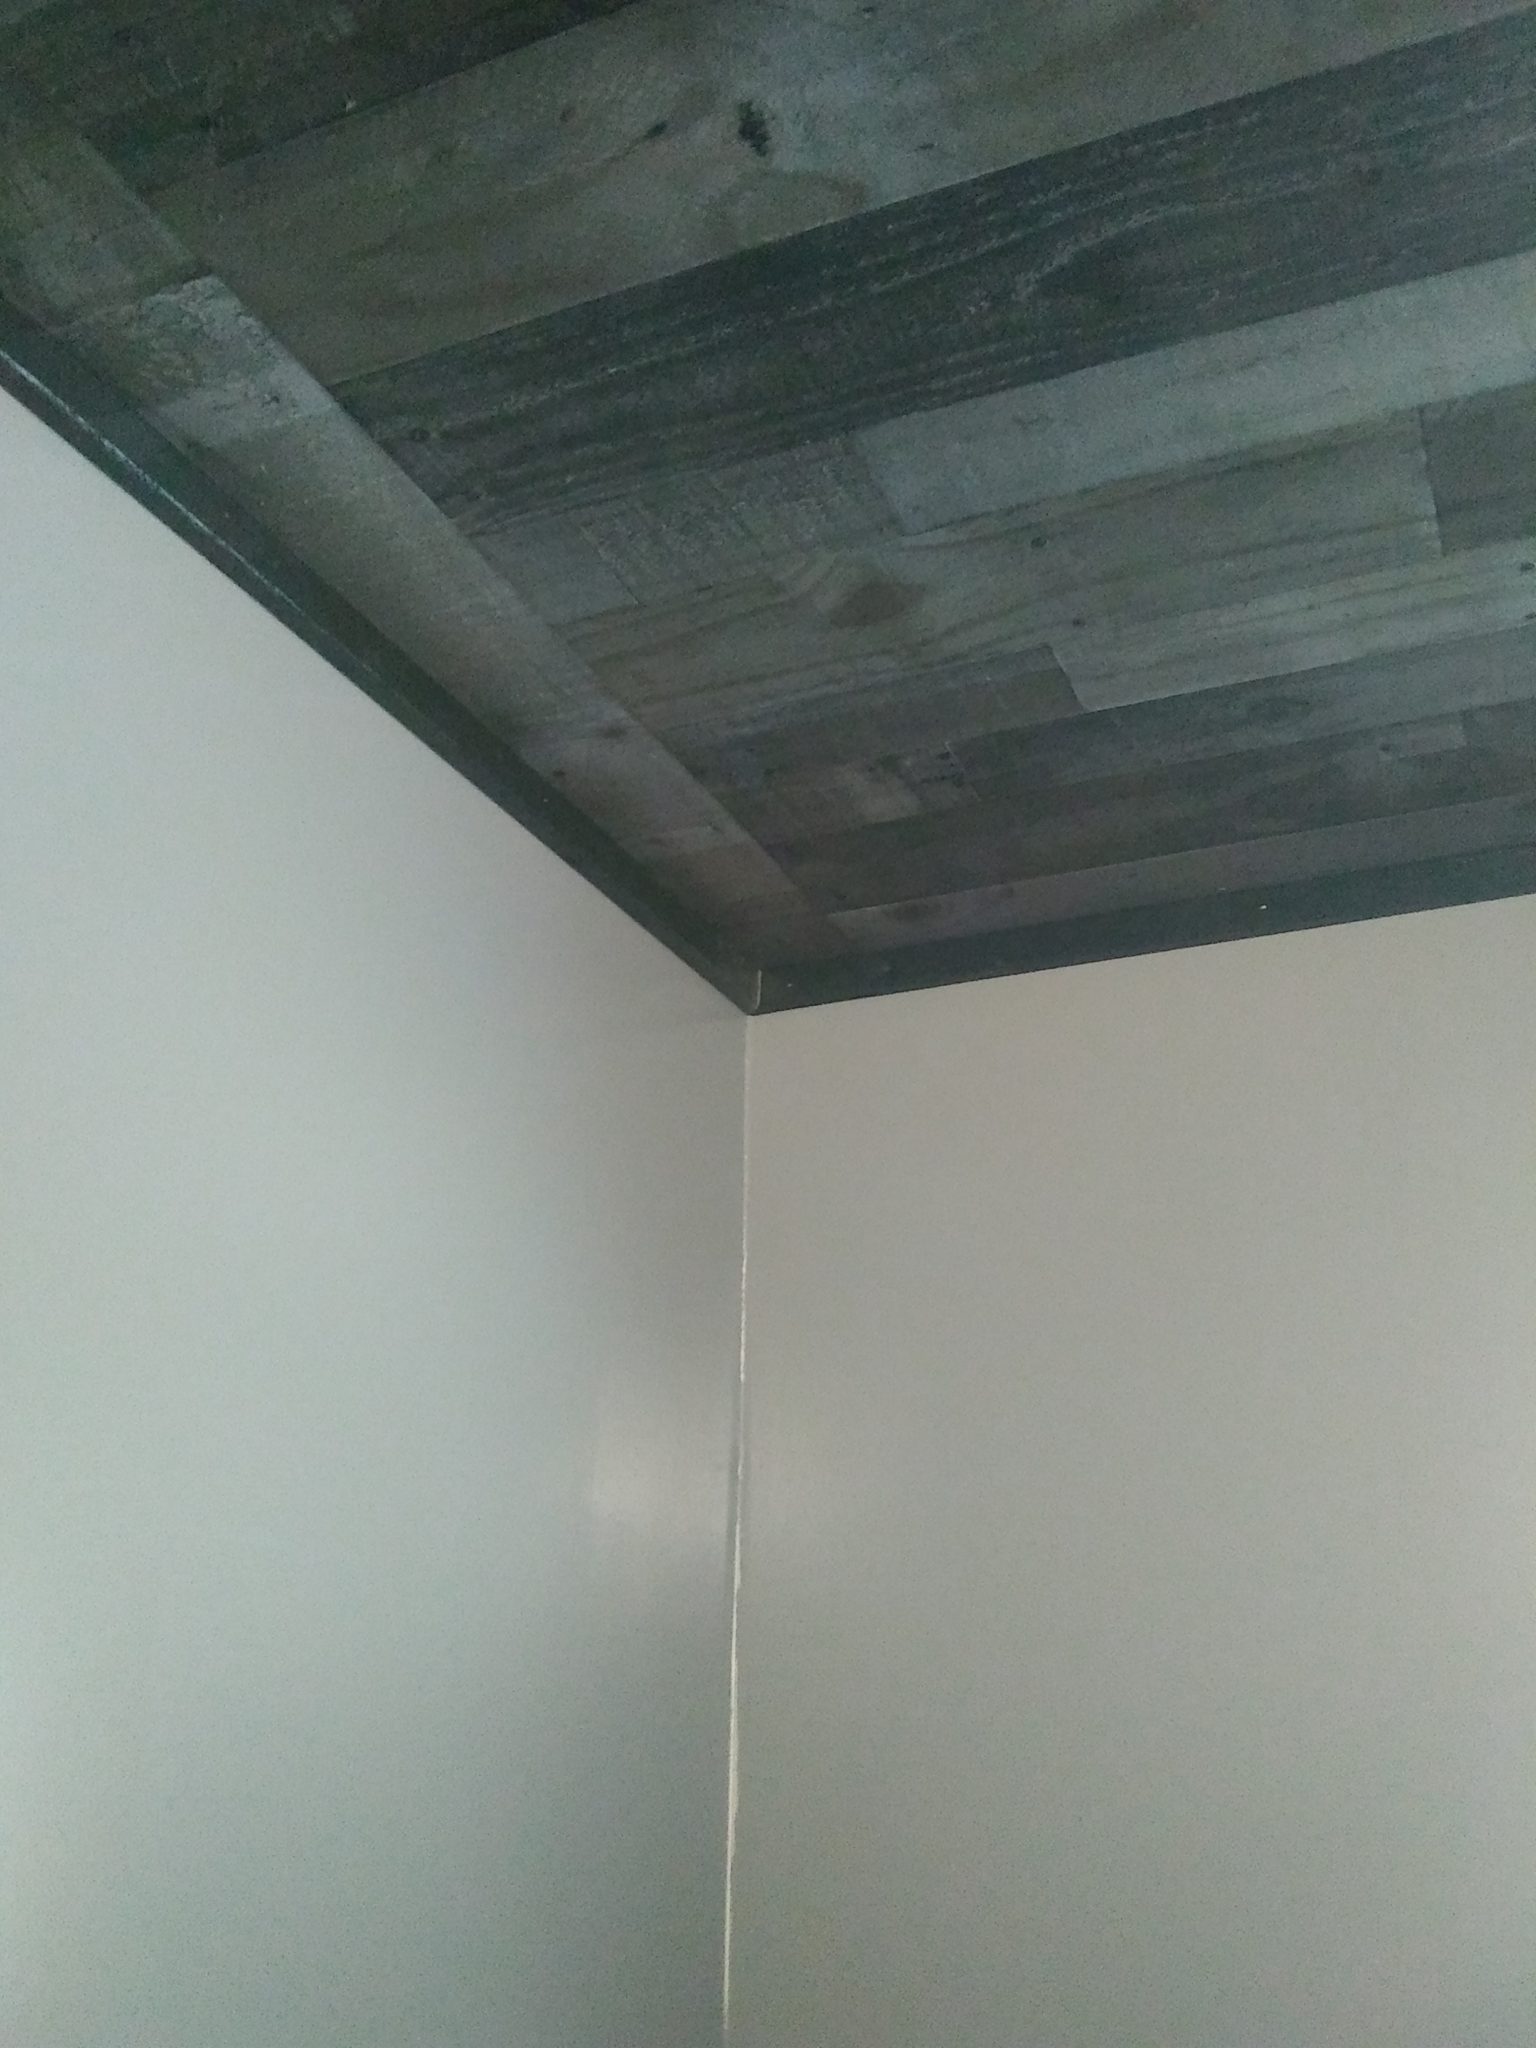
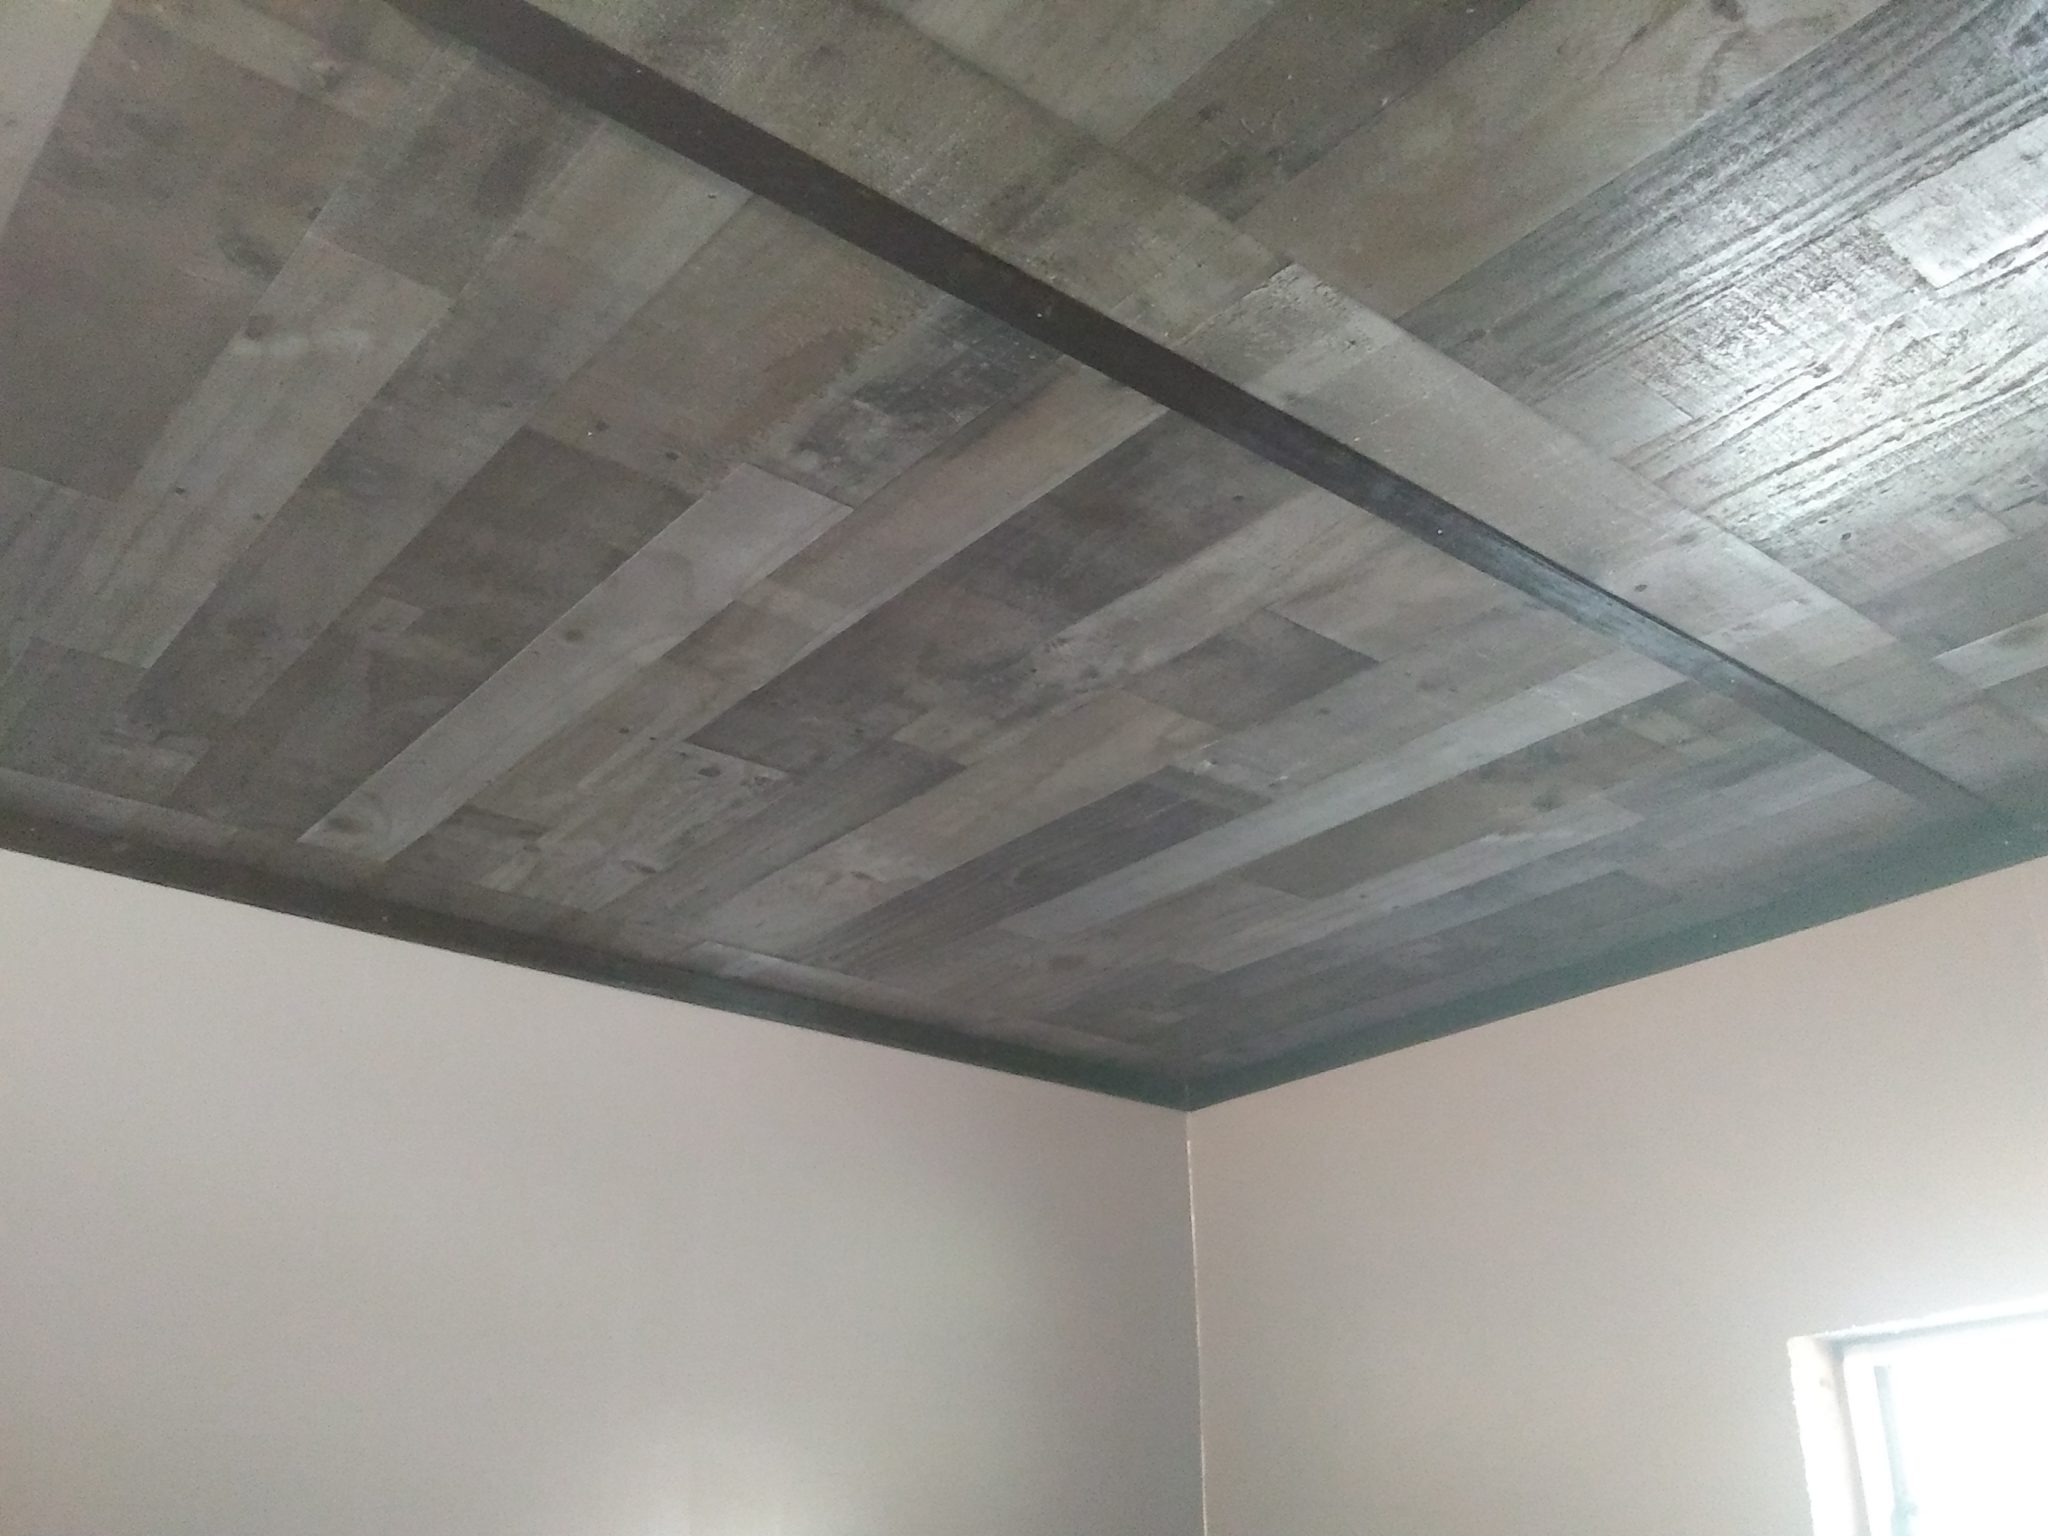
The Ceiling
Once the desk structure was done, I moved on to the ceiling. Like the walls, it was simply covered with plywood, as you could see in previous photos. While perfectly serviceable, it just didn’t have the look I was going for. So, I bought some more paneling. Home Depot sells a variety of decorative paneling, typically used for walls. I wanted it for my ceiling when I saw it.
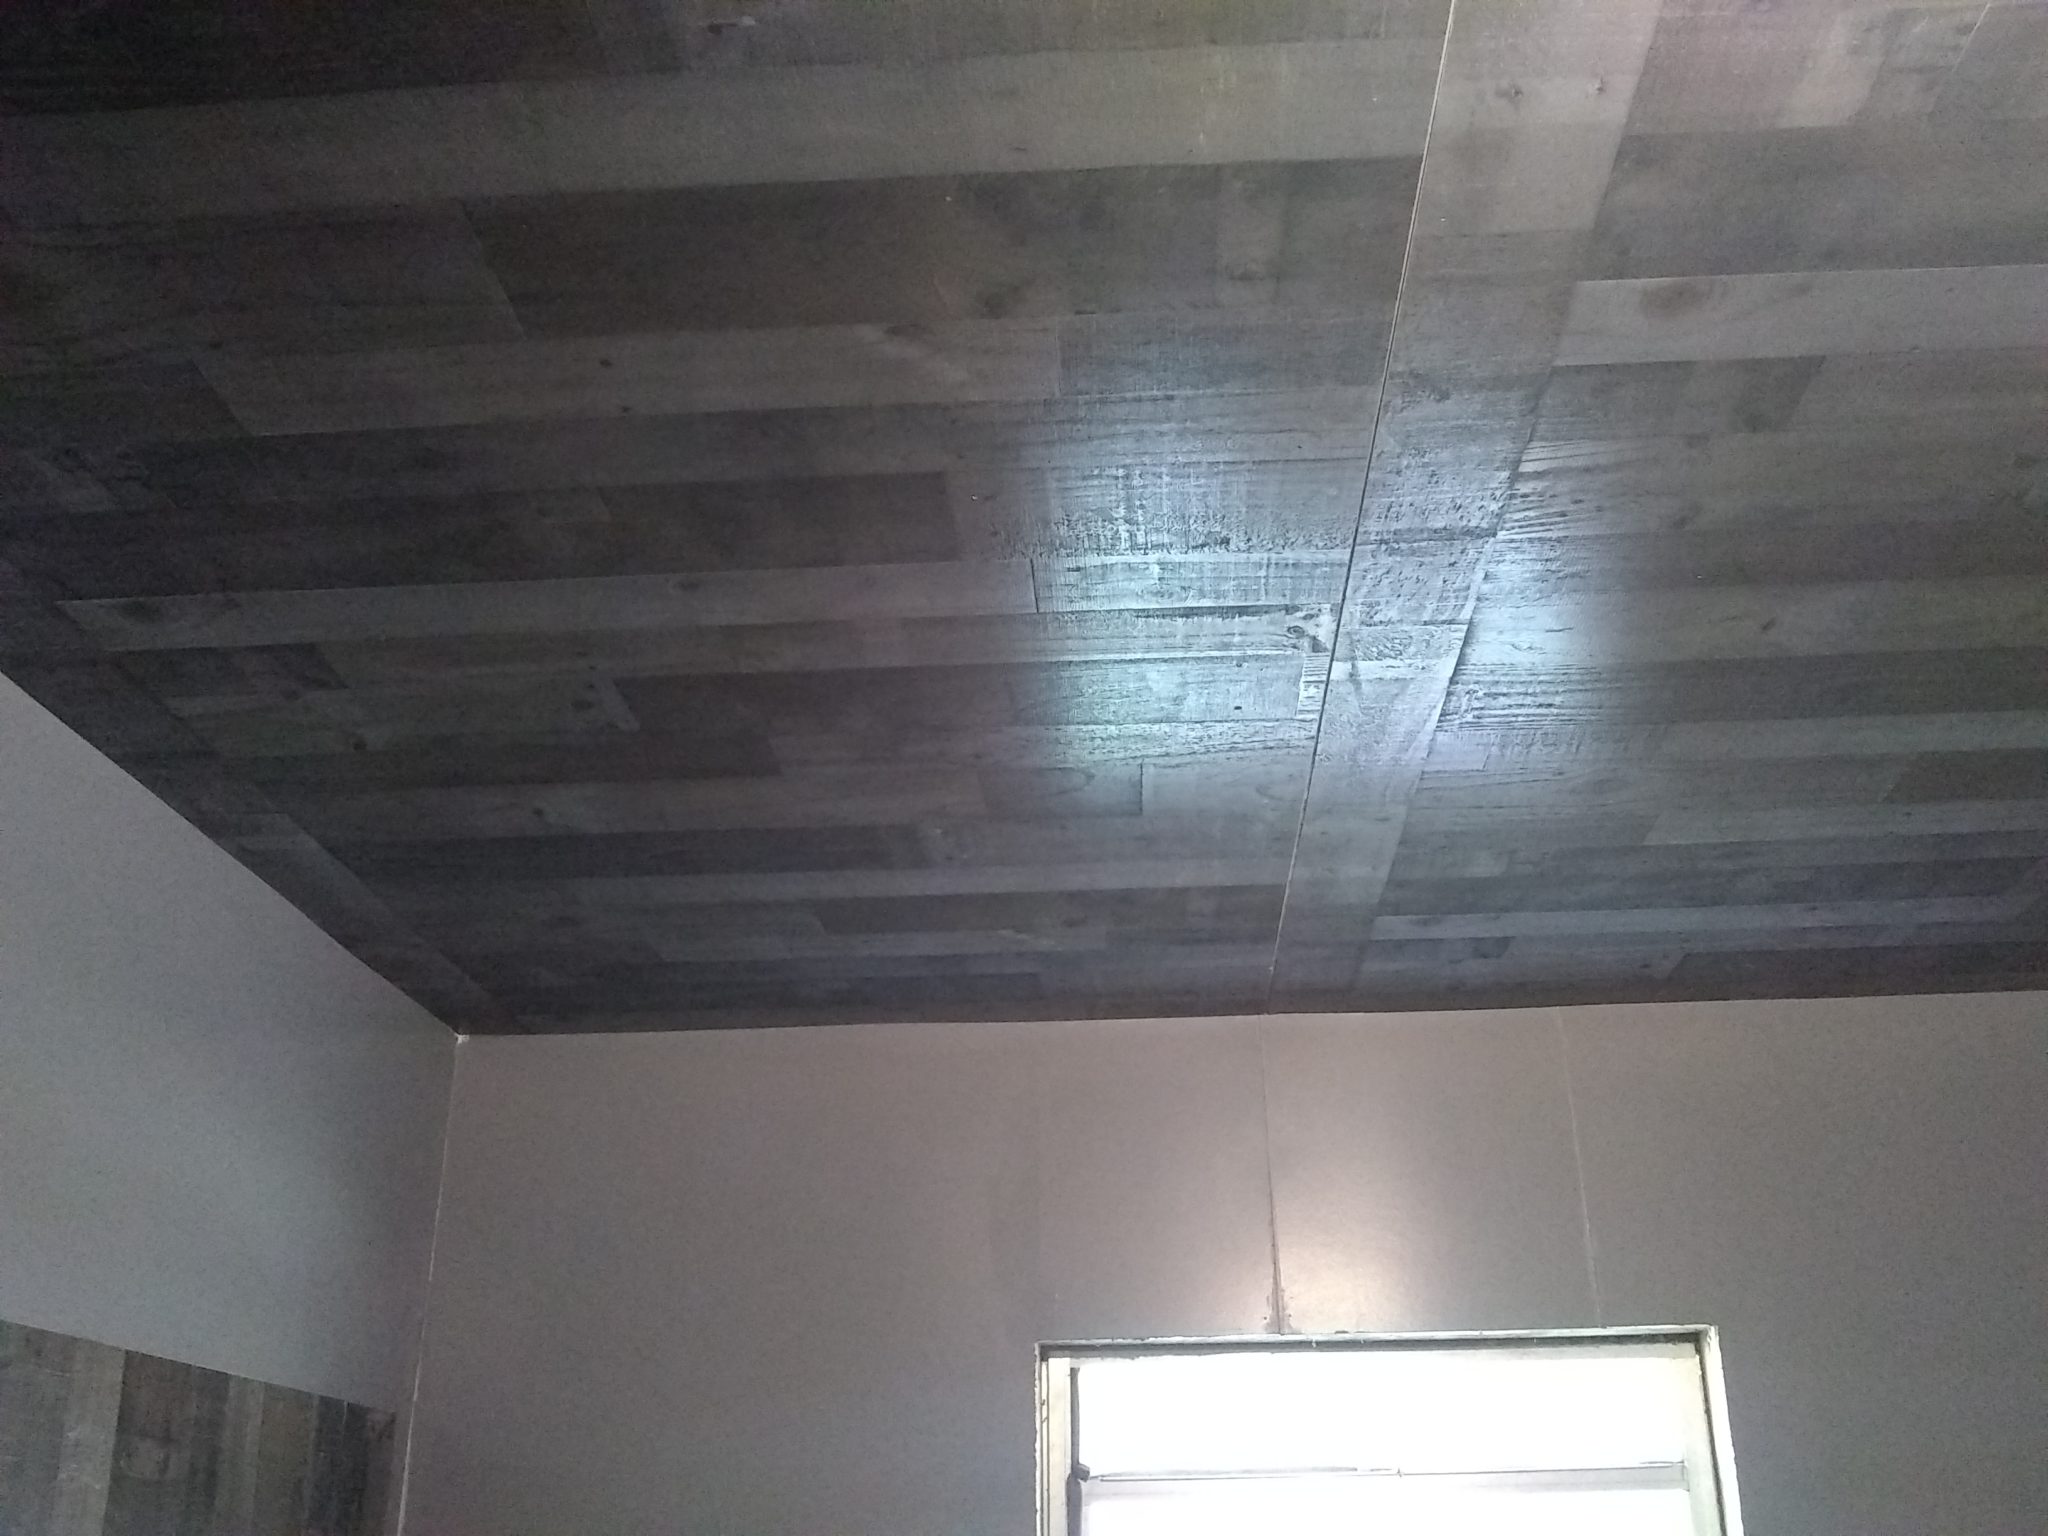


It is a printed faux-pallet wood panel, mostly greys. It has fairly realistic (if you aren’t looking too closely) nail holes, a variety of “wood” types, and an interesting variation in color. The only problem is, the room wasn’t exactly square – so I had to fudge it a little bit, as you can see in the final picture. There’s a solution for fudging – other than silicone.
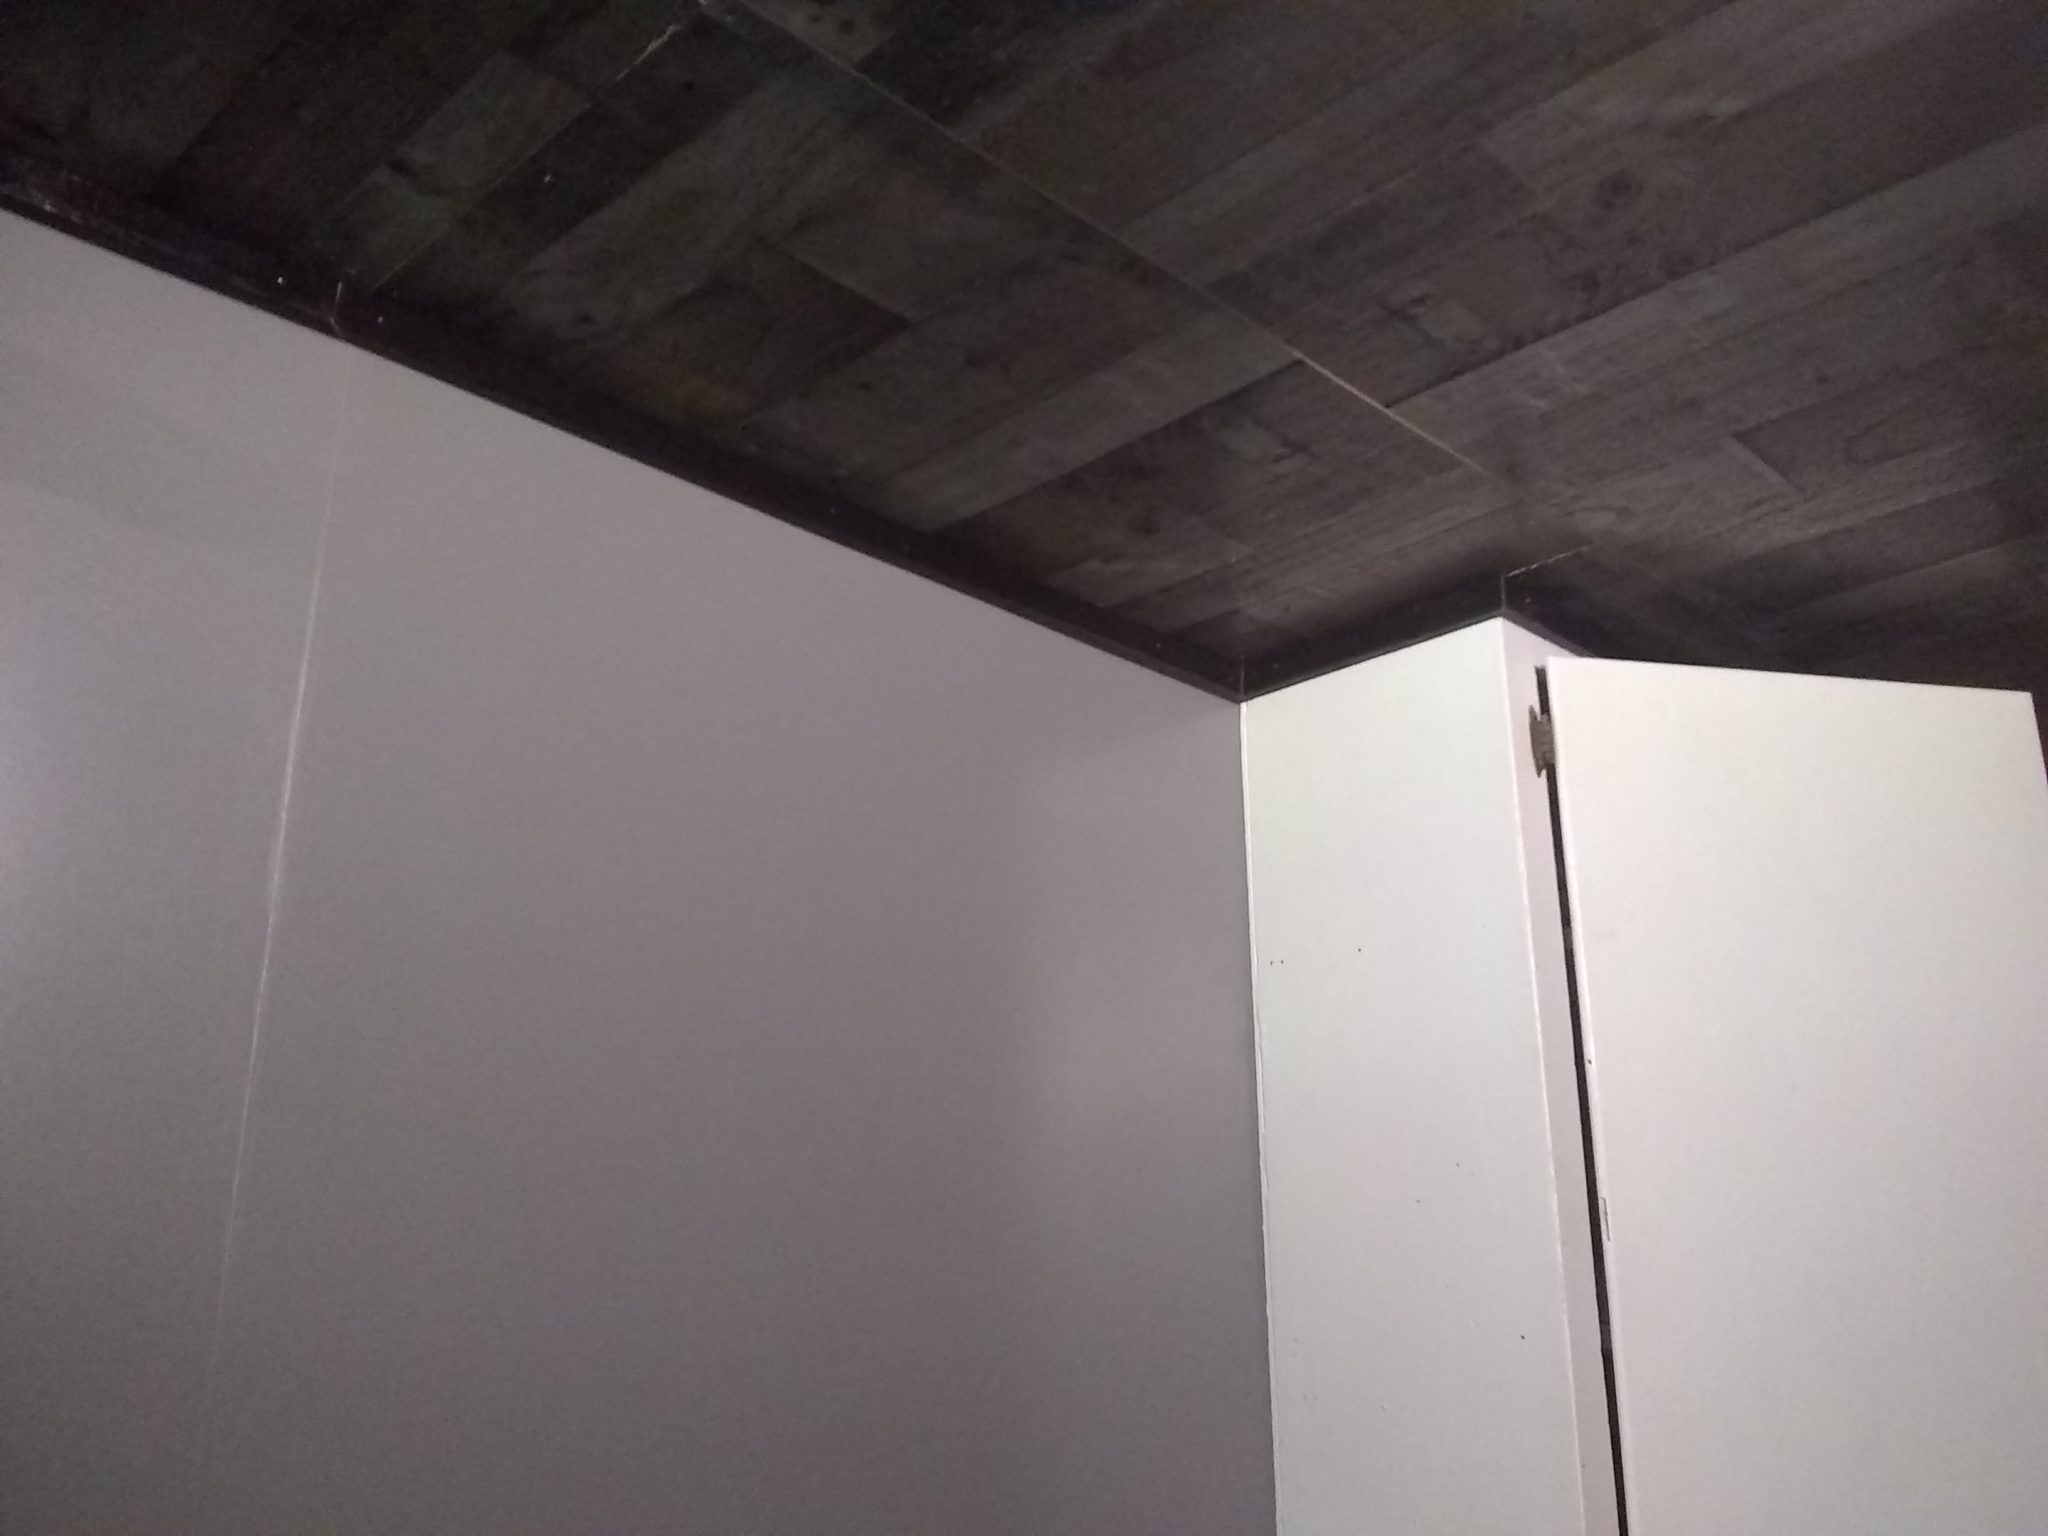
Trimwork
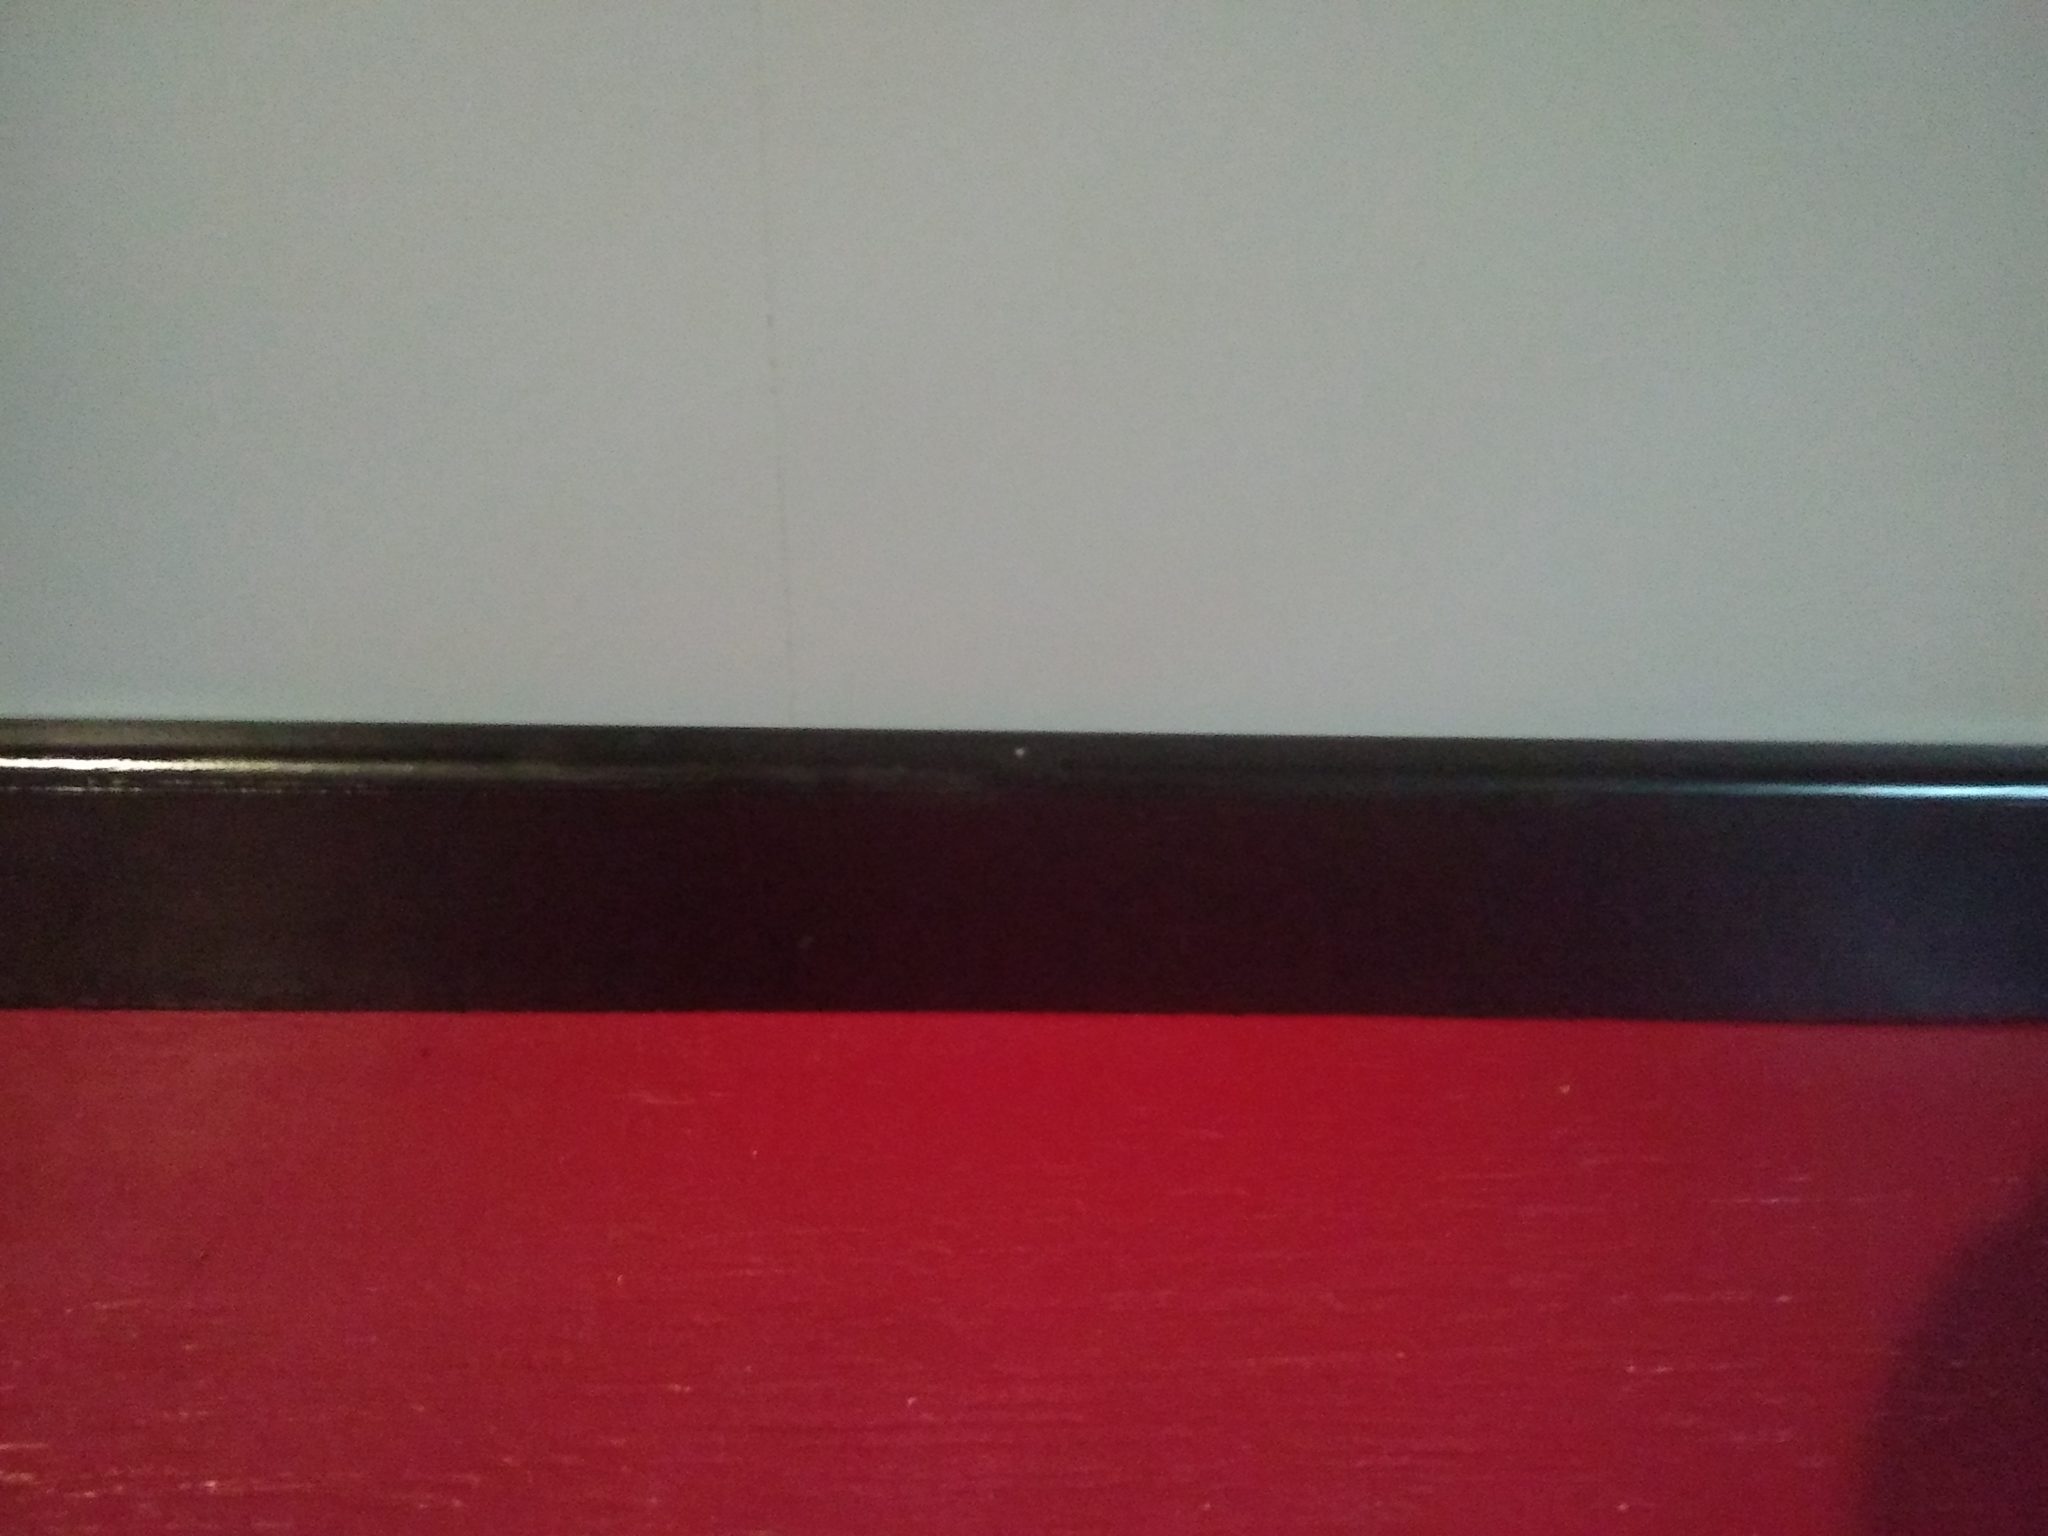
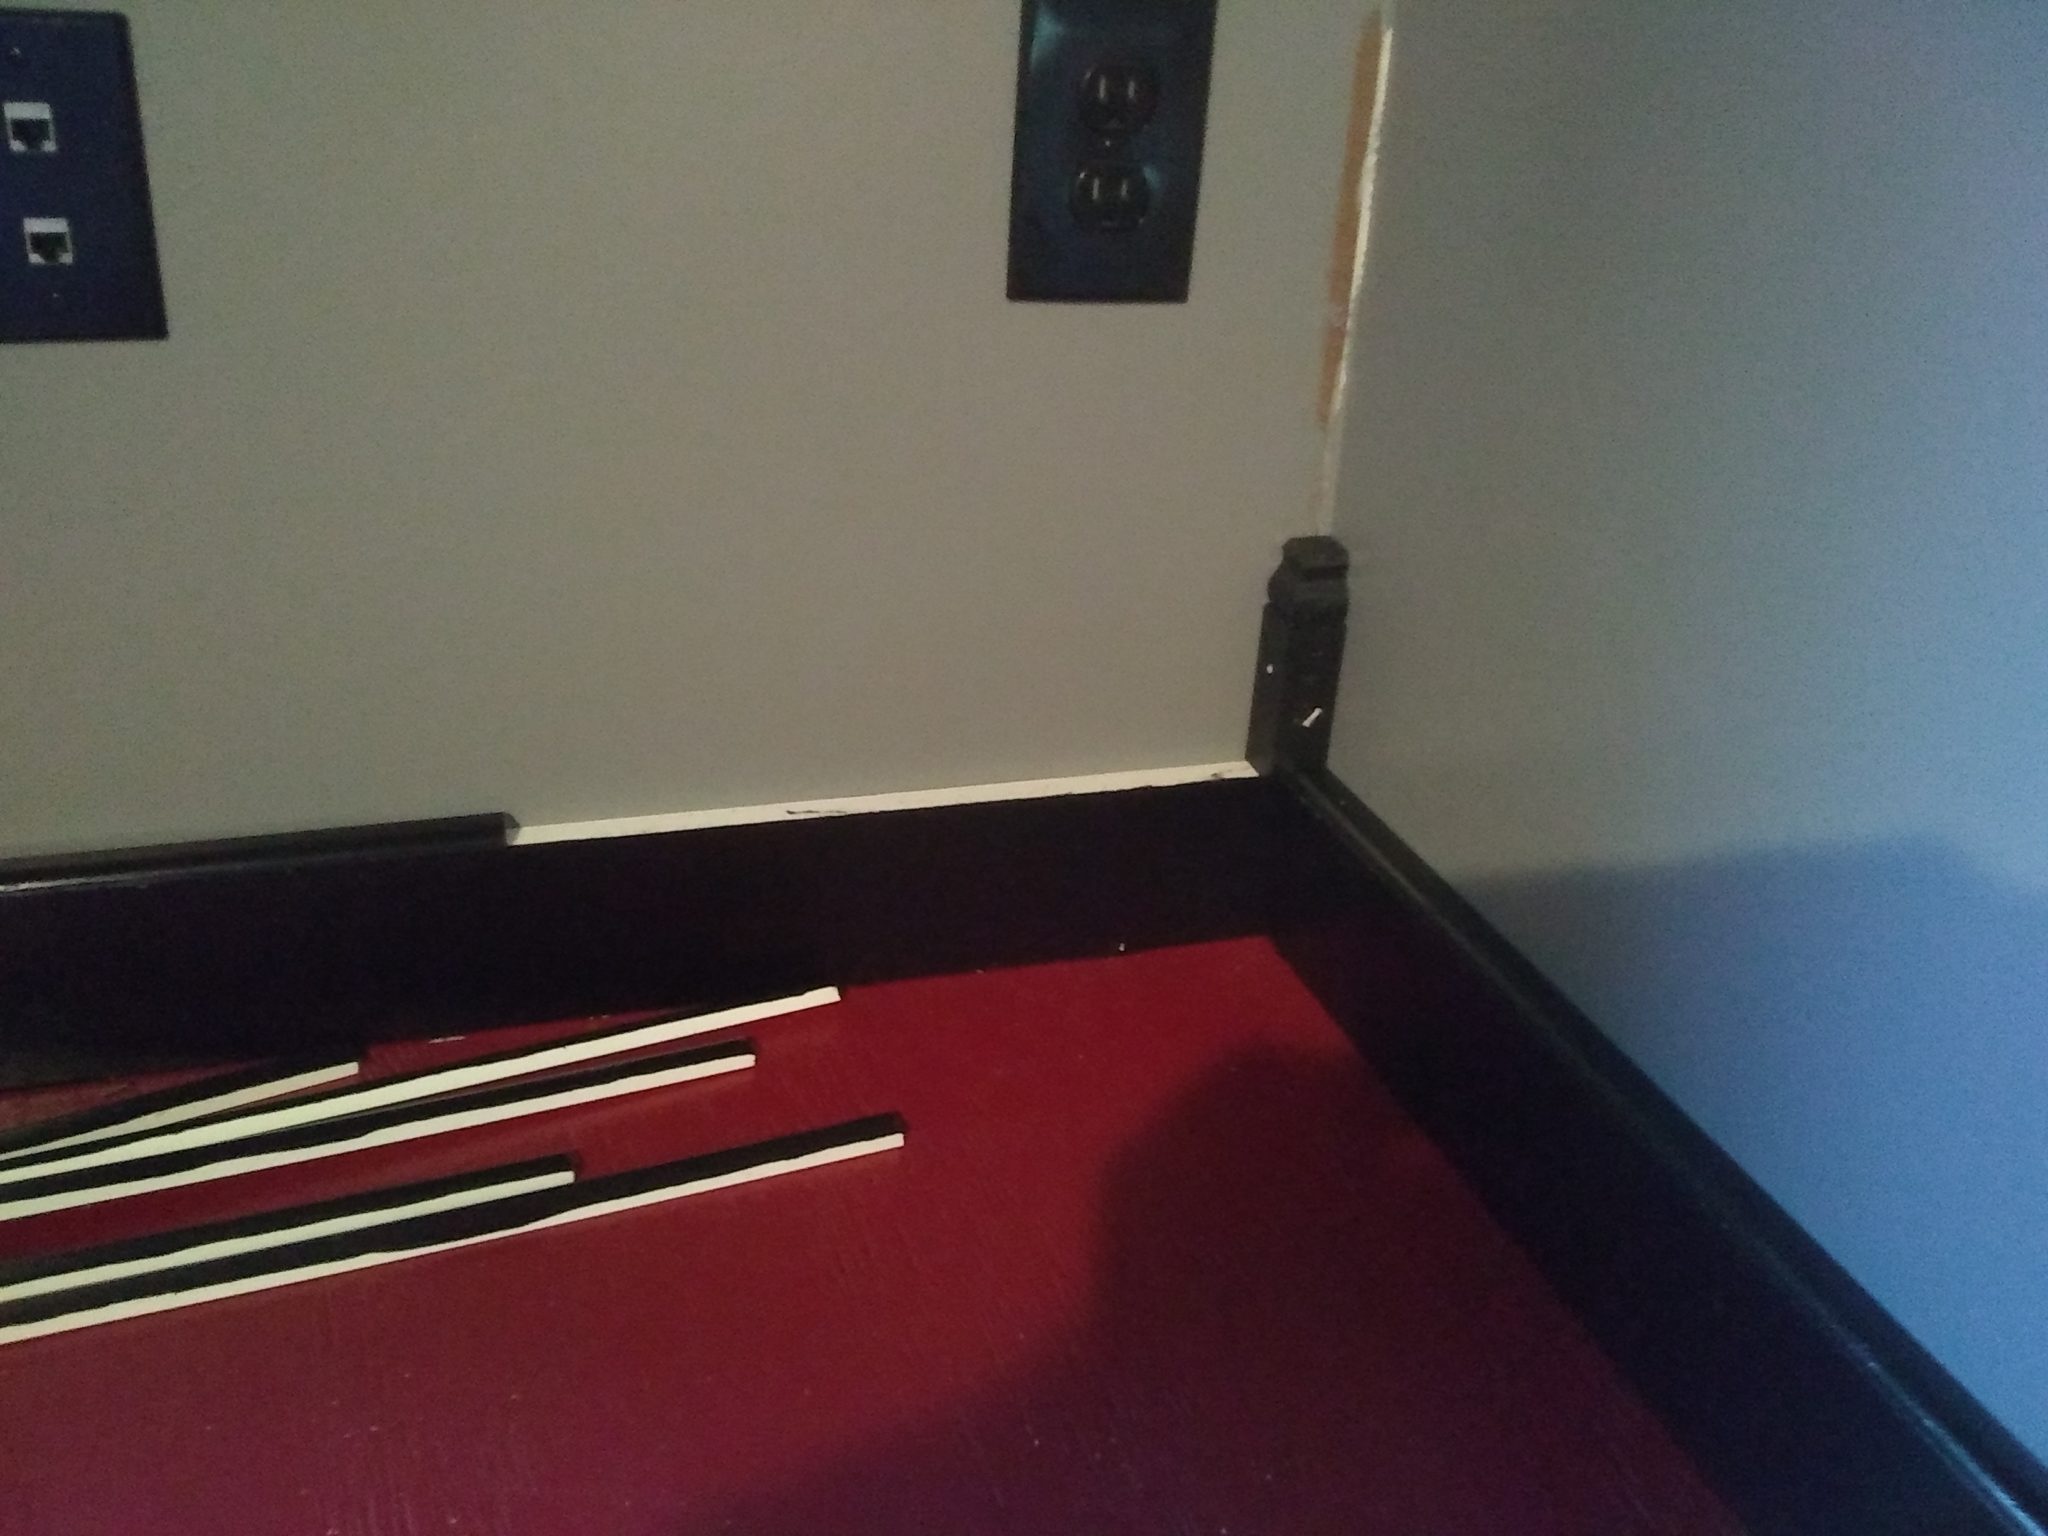
The desk itself is the major eye-catcher, as was intended. The trim work, however, is what sets it off. Every bit of trim in this room is a glossy onyx black. The desk, while great on its own, needed some contrasts. The ceiling, while fun, needed something to draw eyes away from flaws and irregularities. There are several elements of trim that I used to make this room stand out.
First, the “chair rail” was expanded, using 1×4 composite boards, into a combination backsplash for the desk as well as chair rail for the rest of the room. A typical chair rail would have left an awkward gap between the desktop and the bottom of the chair rail. Using these boards gave me a nice clean “cut” between wall sections, as well as a nice finishing touch to the desk.


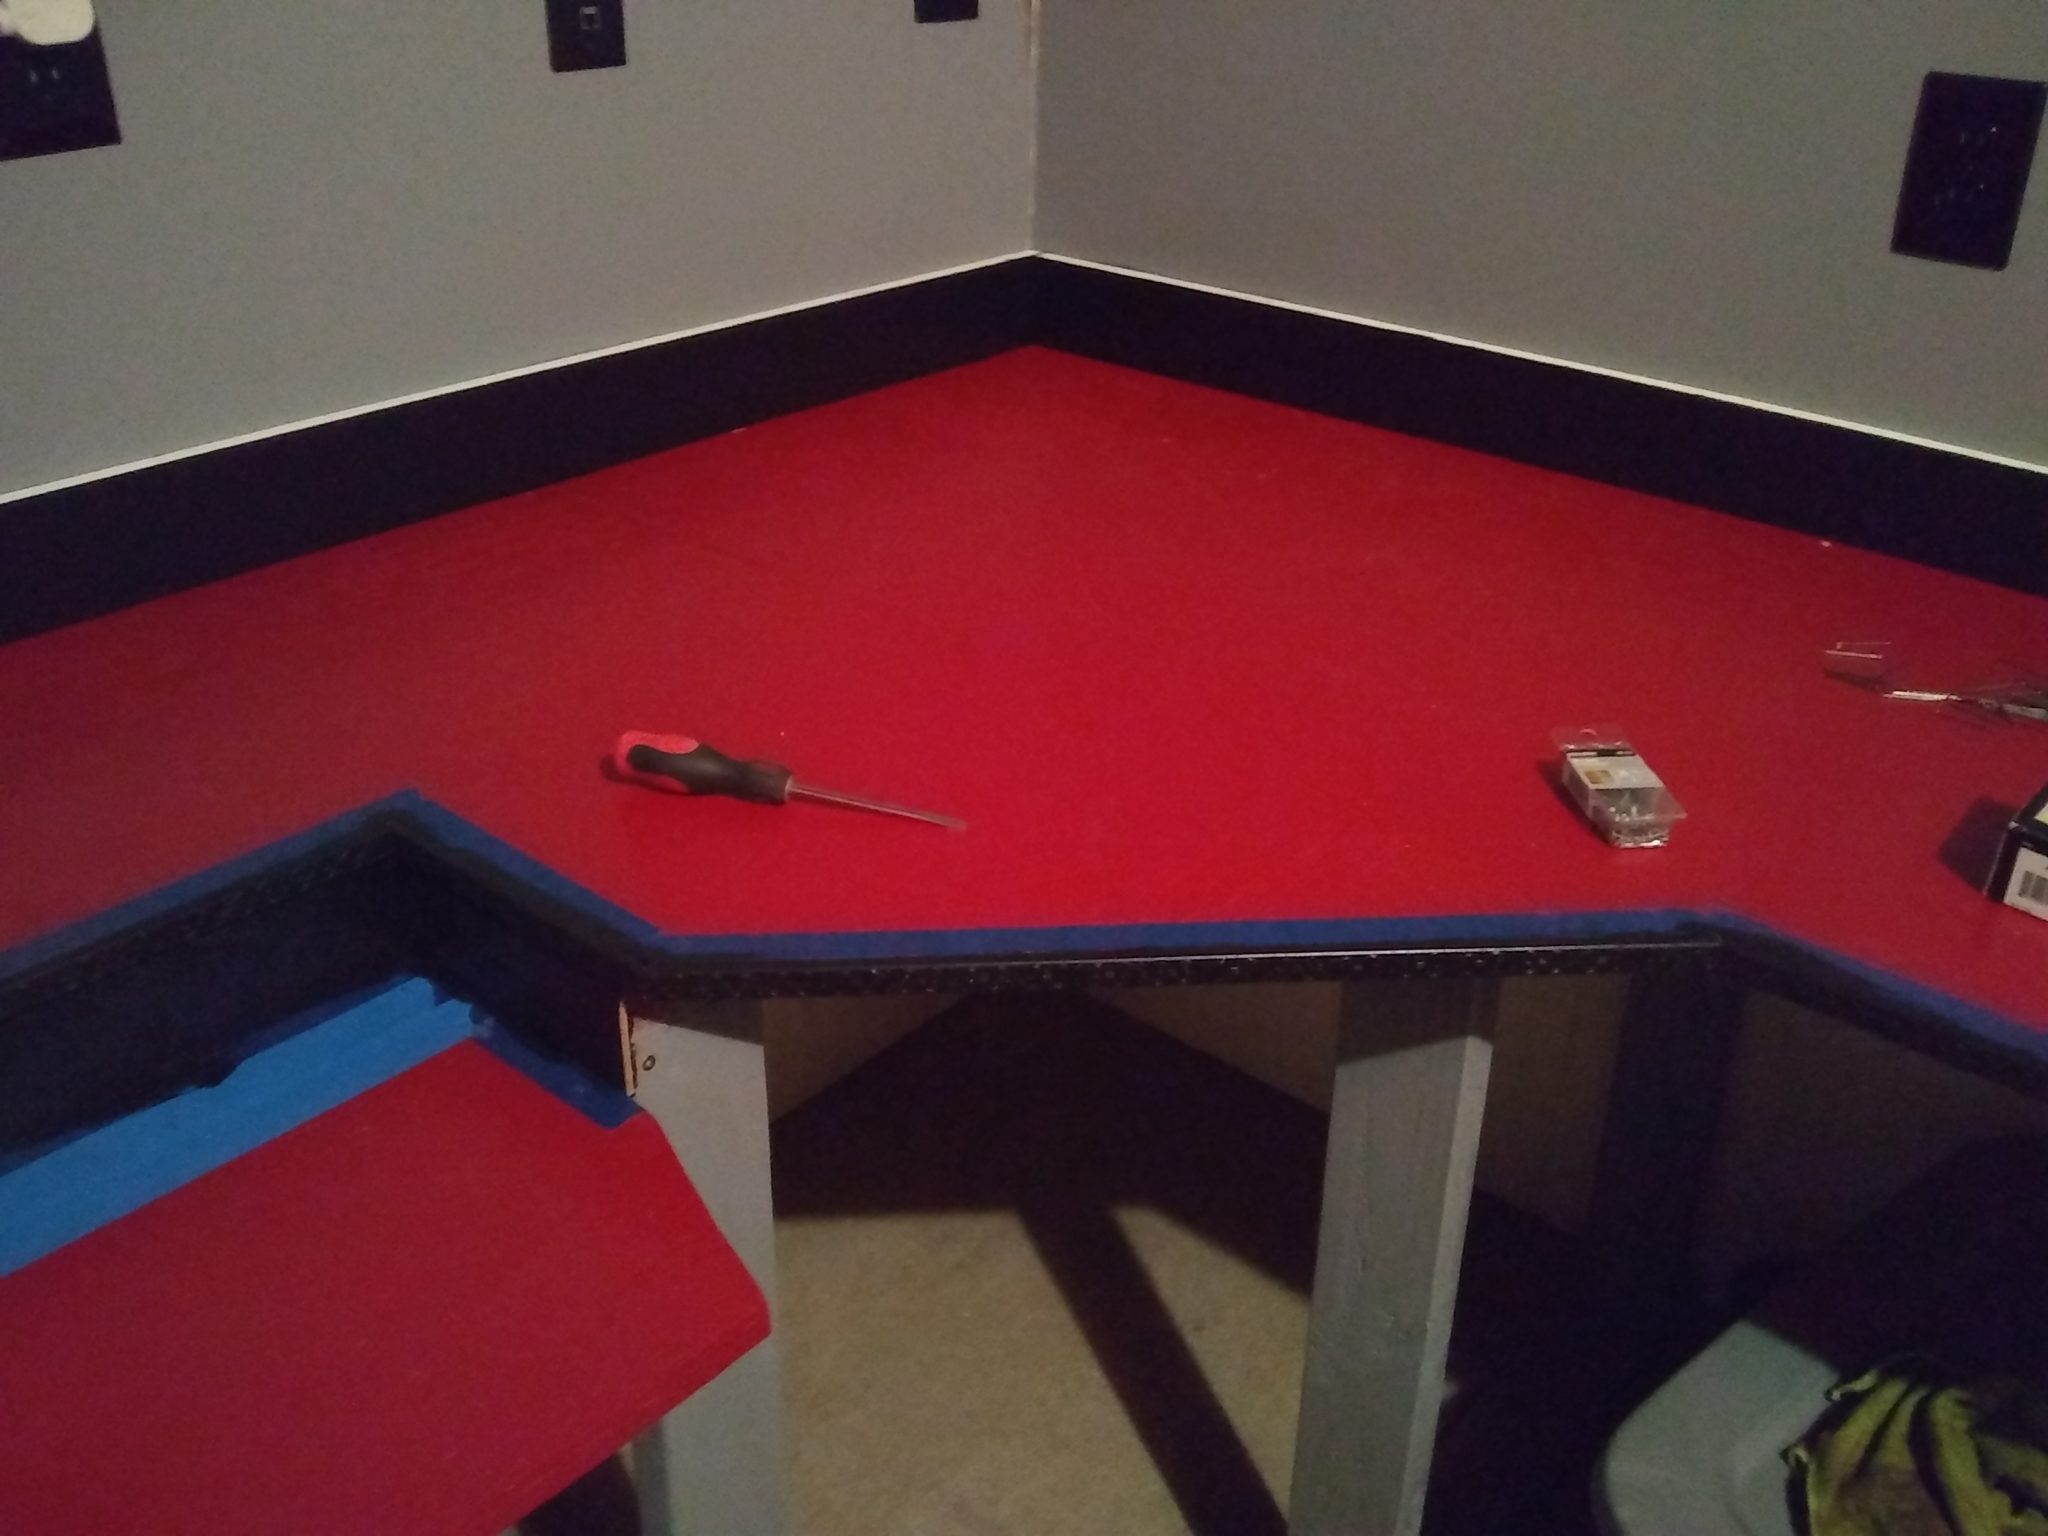
On top and bottom of the rail, (not counting the desk area, where it is mounted flush on bottom) I installed some shoe molding, to round them both over, and make it look more organic.
To avoid joining issues at the corners, I put in corner blocks on top of the rails, and at the floor.
Second, in the corners, I have 1/4 round molding.

Third, the desk itself is trimmed on the outer edges in a purely ornamental 3/4 molding that happened to catch my fancy. The drop tray is backed by a 1×4. The legs are trimmed with 1×1 outside corner. Shoe molding is used for base all the way around the walls and desk legs.


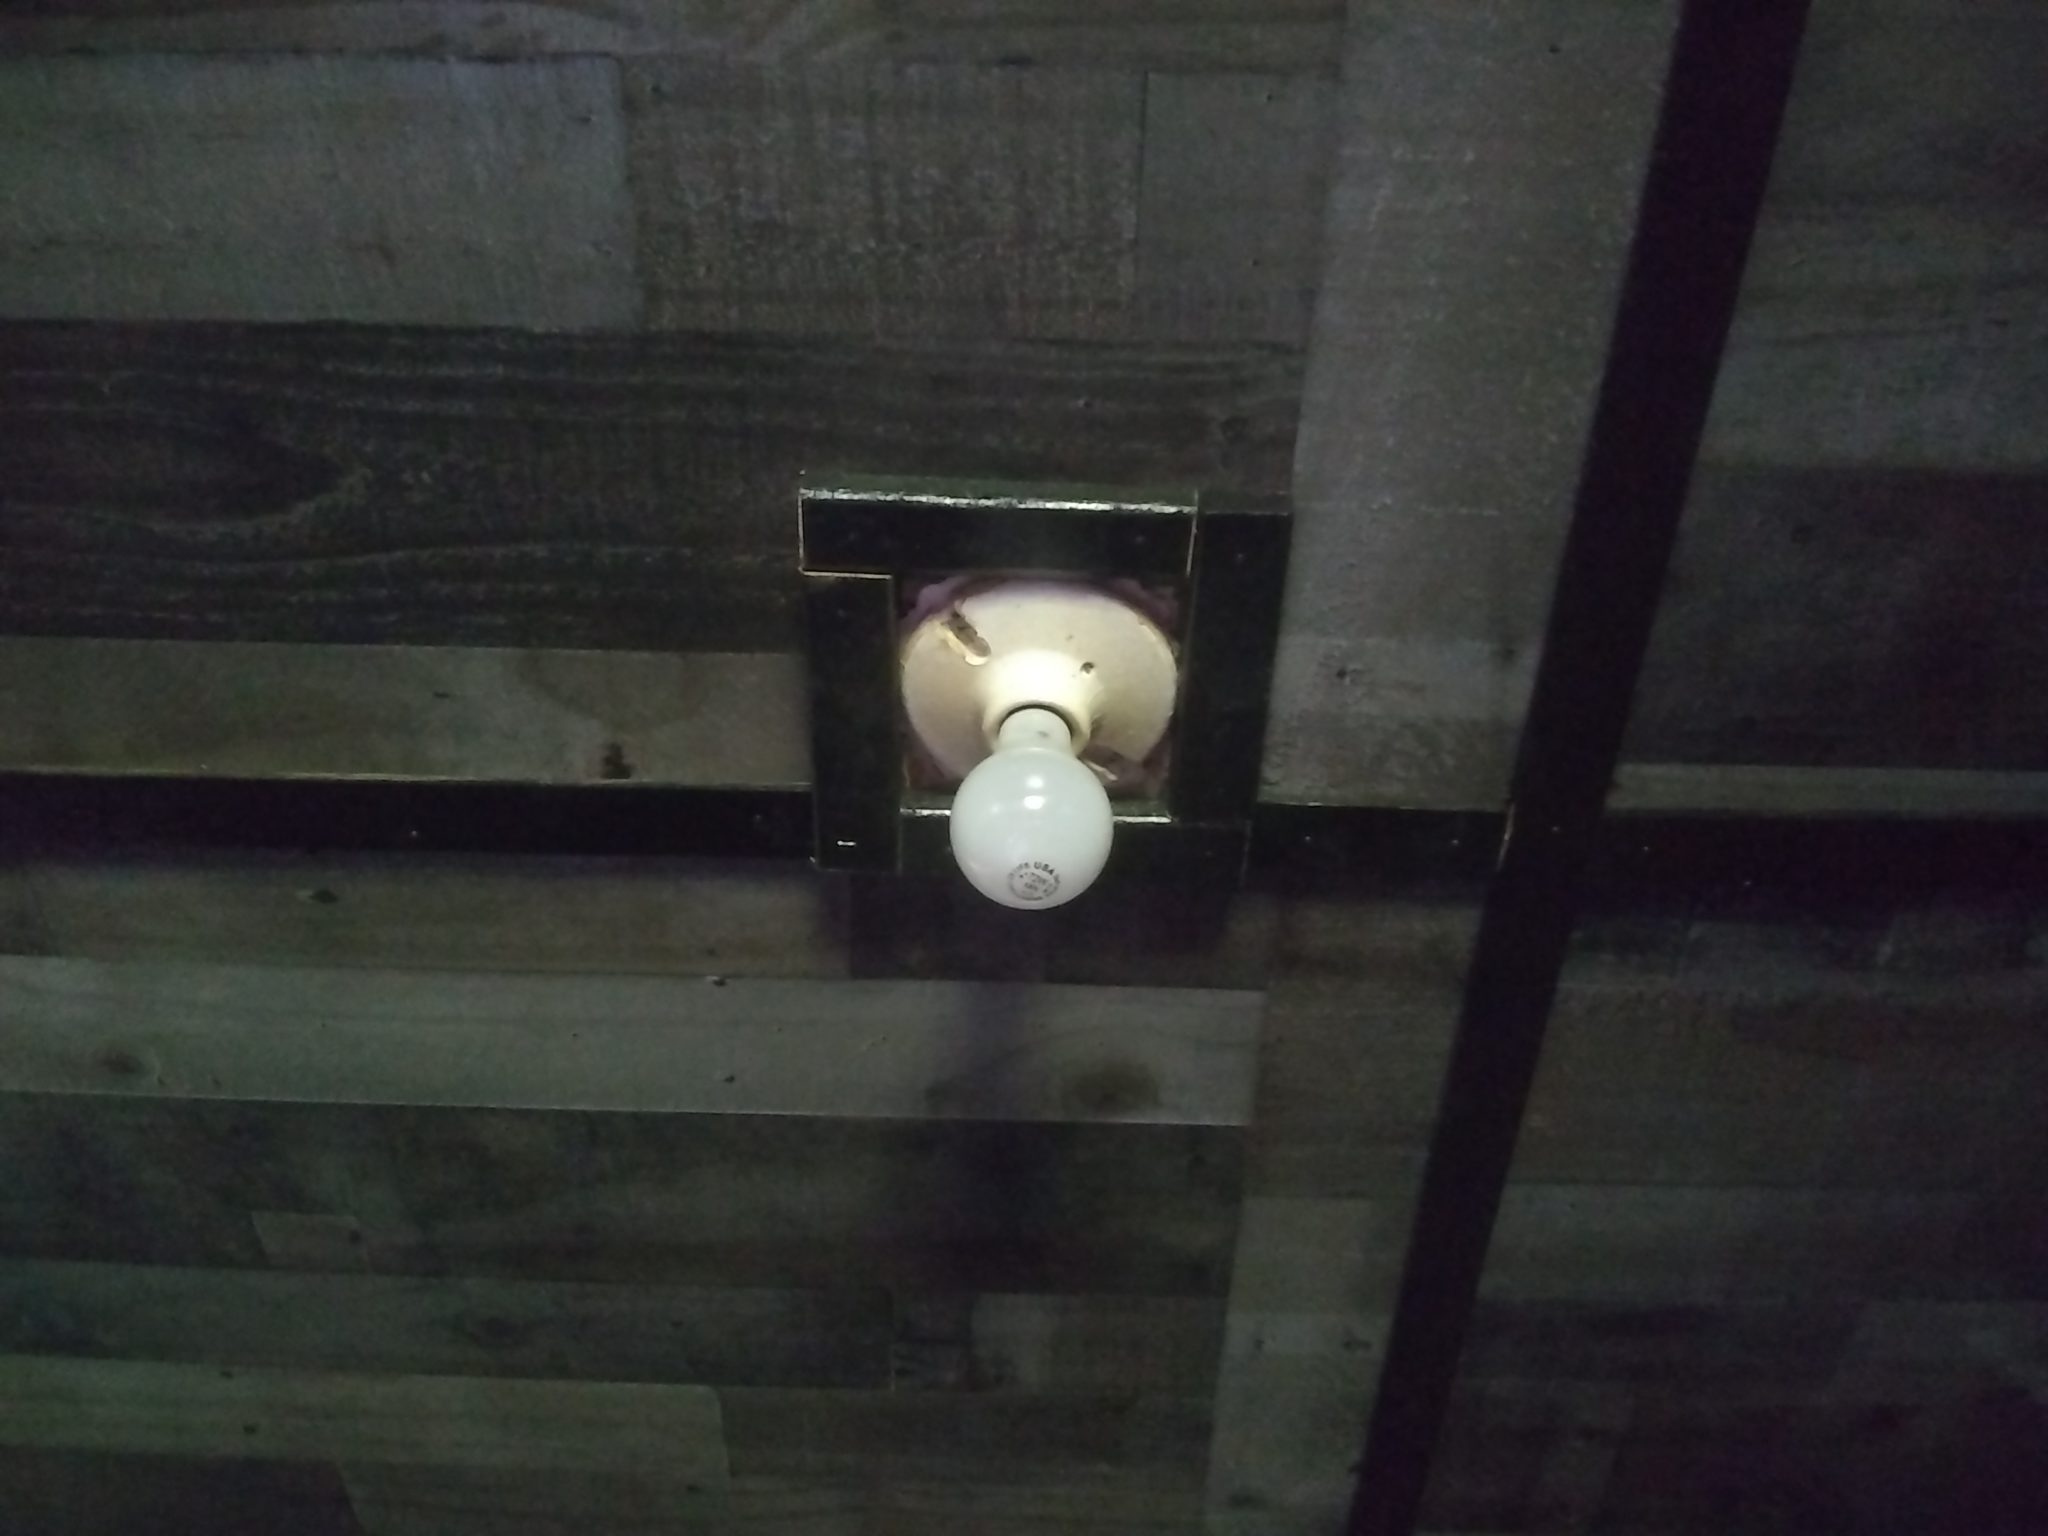
Fourth, the ceiling trim is made of 1×2 furring strips, and the center pieces are 1/4″x11/2” lattice molding. These cover all the joins, and mask any pattern inconsistencies; while providing a gridwork to enhance the look of the ceiling. Instead of replacing the overhead light socket, I boxed it in, painted it black – then installed a special light.


Fifth, the door is similarly trimmed in black, and painted red – the only other element painted to match the desk.
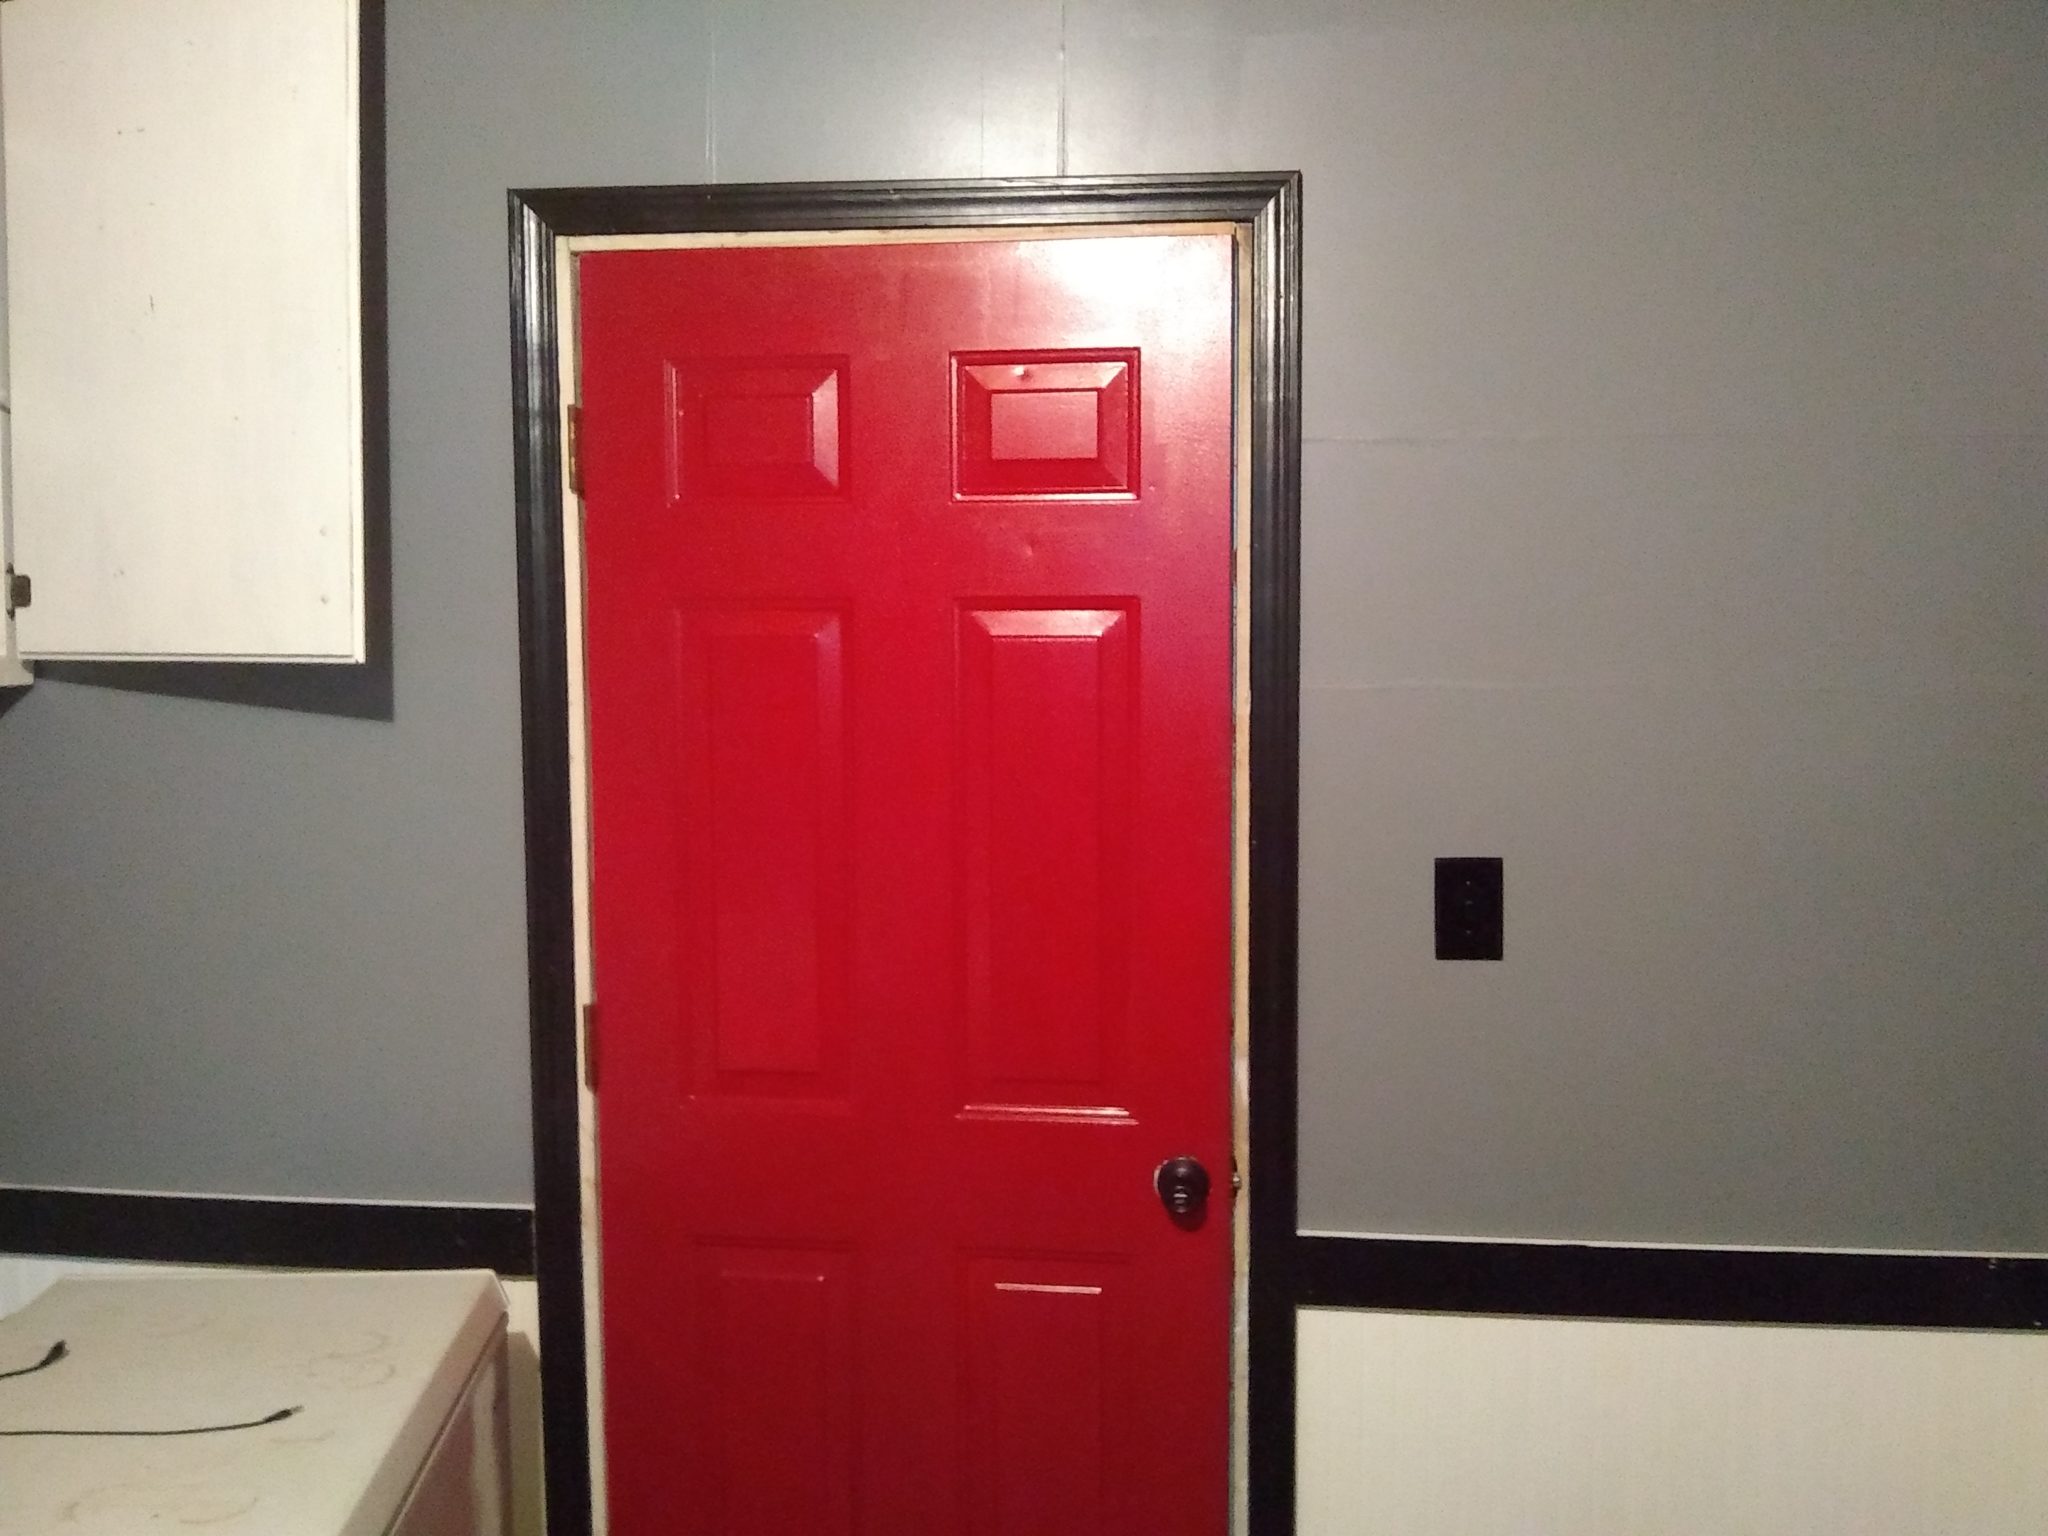
The color looks much different under white, not yellow lighting.
The window originally had no sill. I put one in, and cased the window’s interior and frame in 1×4 boards.


Floor, Desk Legs and Base Trim
For the floor, I just went with a slate grey that matches the walls. This may change to a darker shade later.


I was going to do this earlier, but I ended up putting it off for quite a while, due to the purely cosmetic nature of this step. This is what the leg paneling looks like when completed. All that remains is to trim them out to match the rest.


Other Desk Features
Personal Logo in Vinyl 
Full Shot, Desktop & Window 
Cable Port Hole Drilled 
Cable Port, Cover on 
Cable Port, Cover off 
All Cable Ports Installed 
All Cable Ports, Angle 2 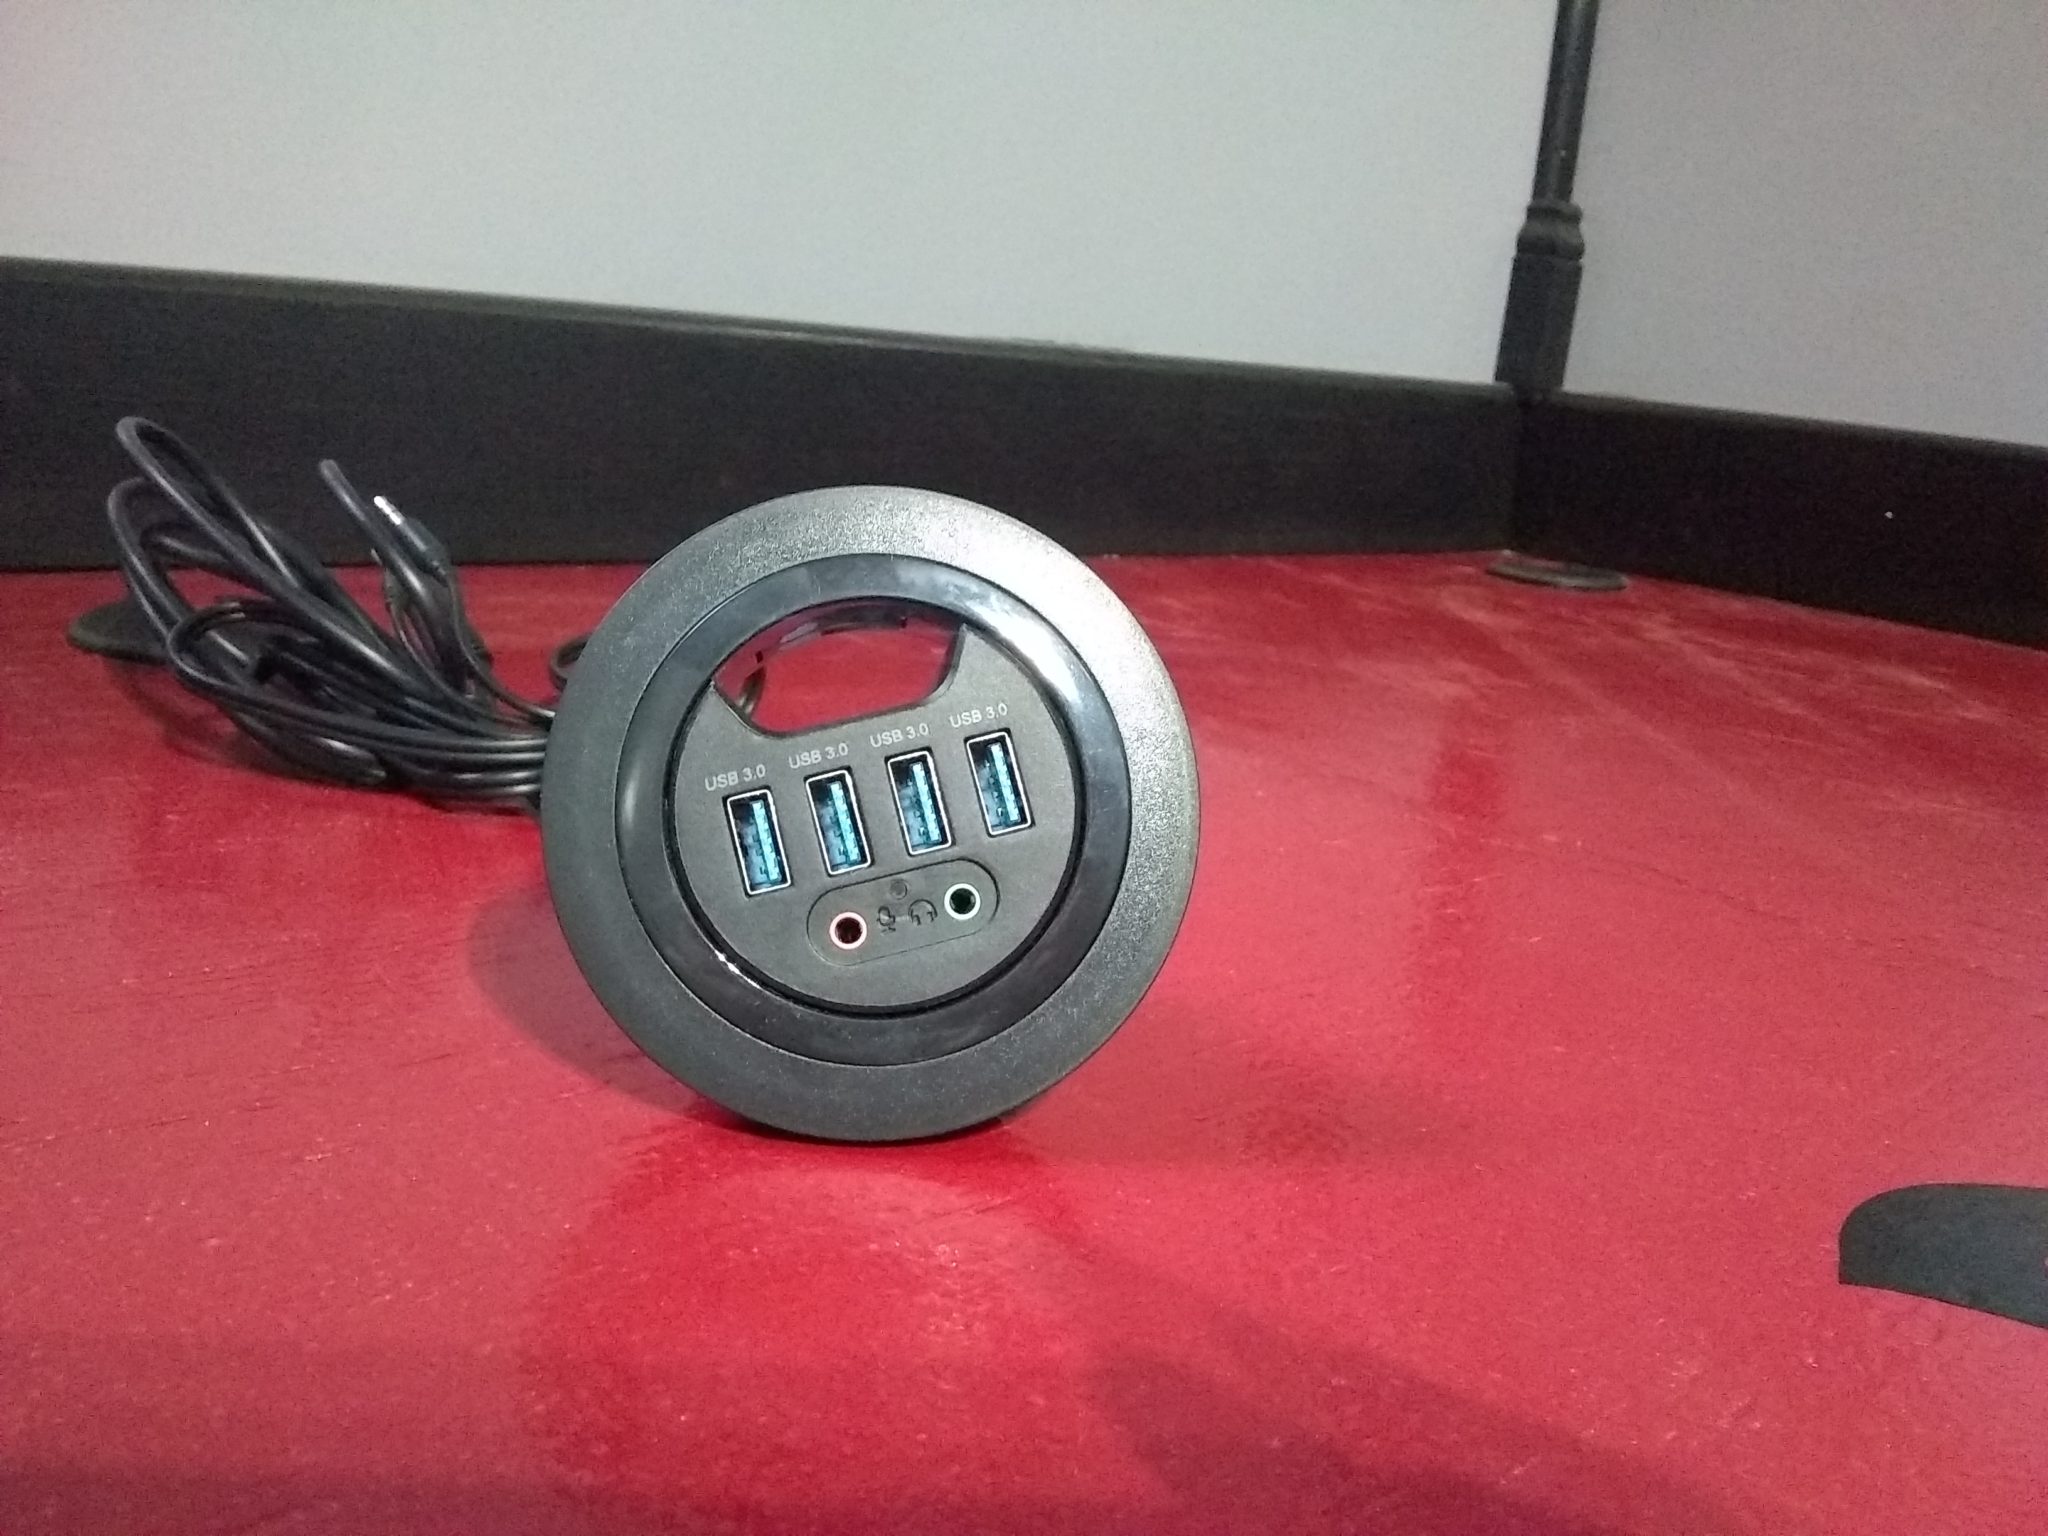
USB/Audio Port 
USB/Audio Port Installed 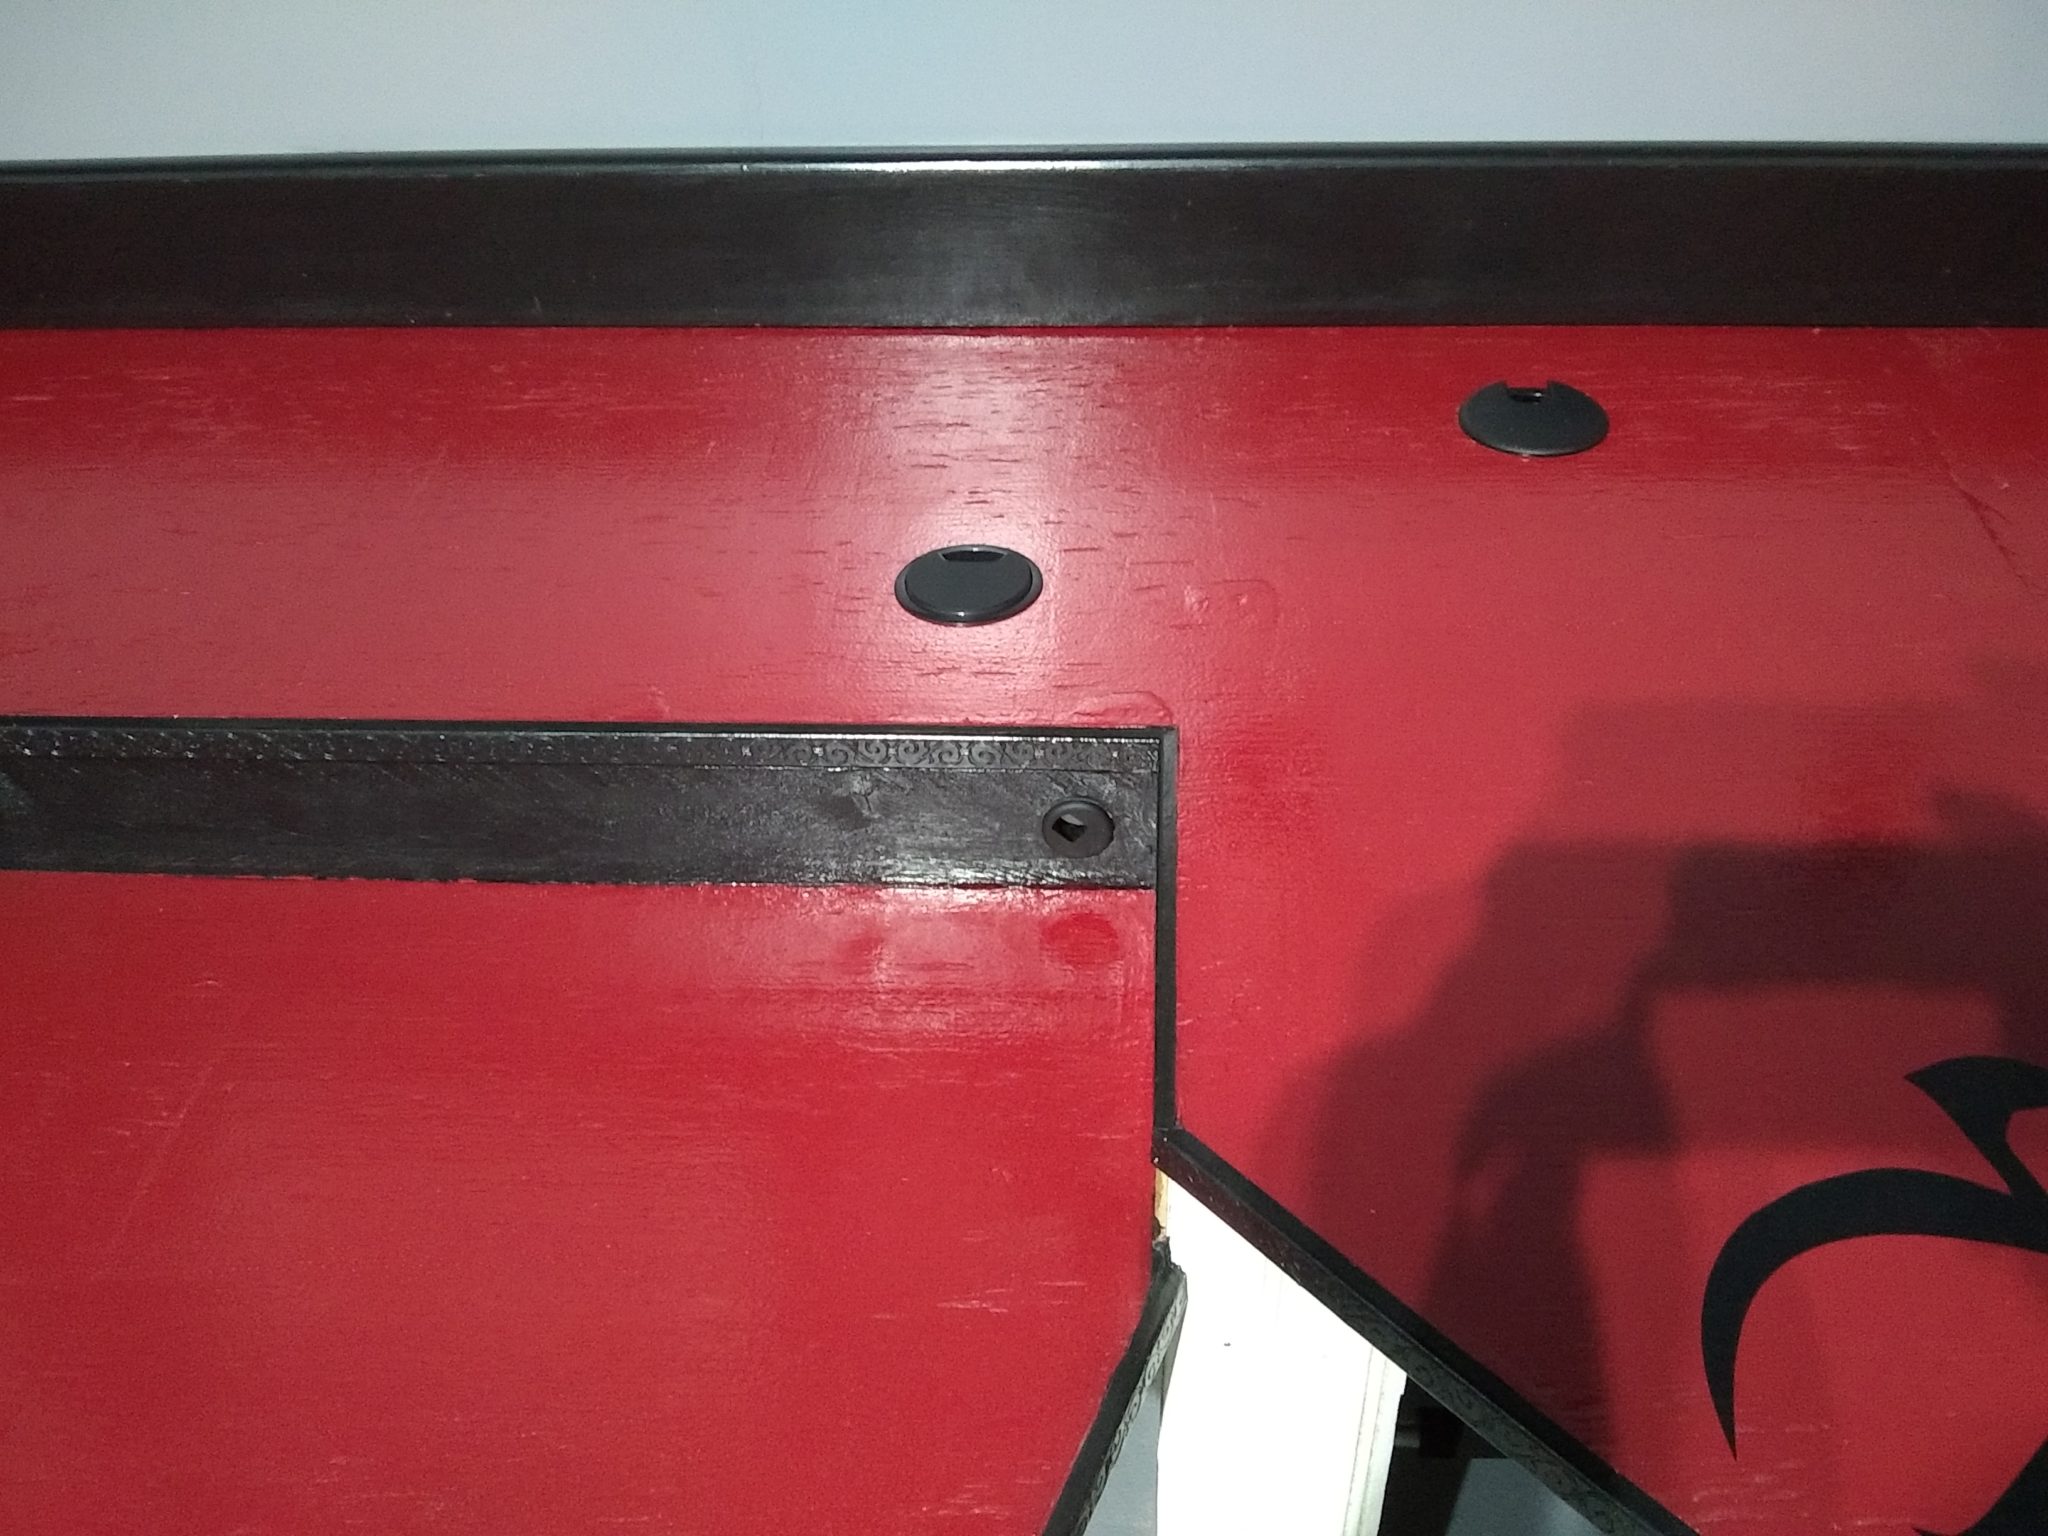
Ports Closeup 
Ports Overview 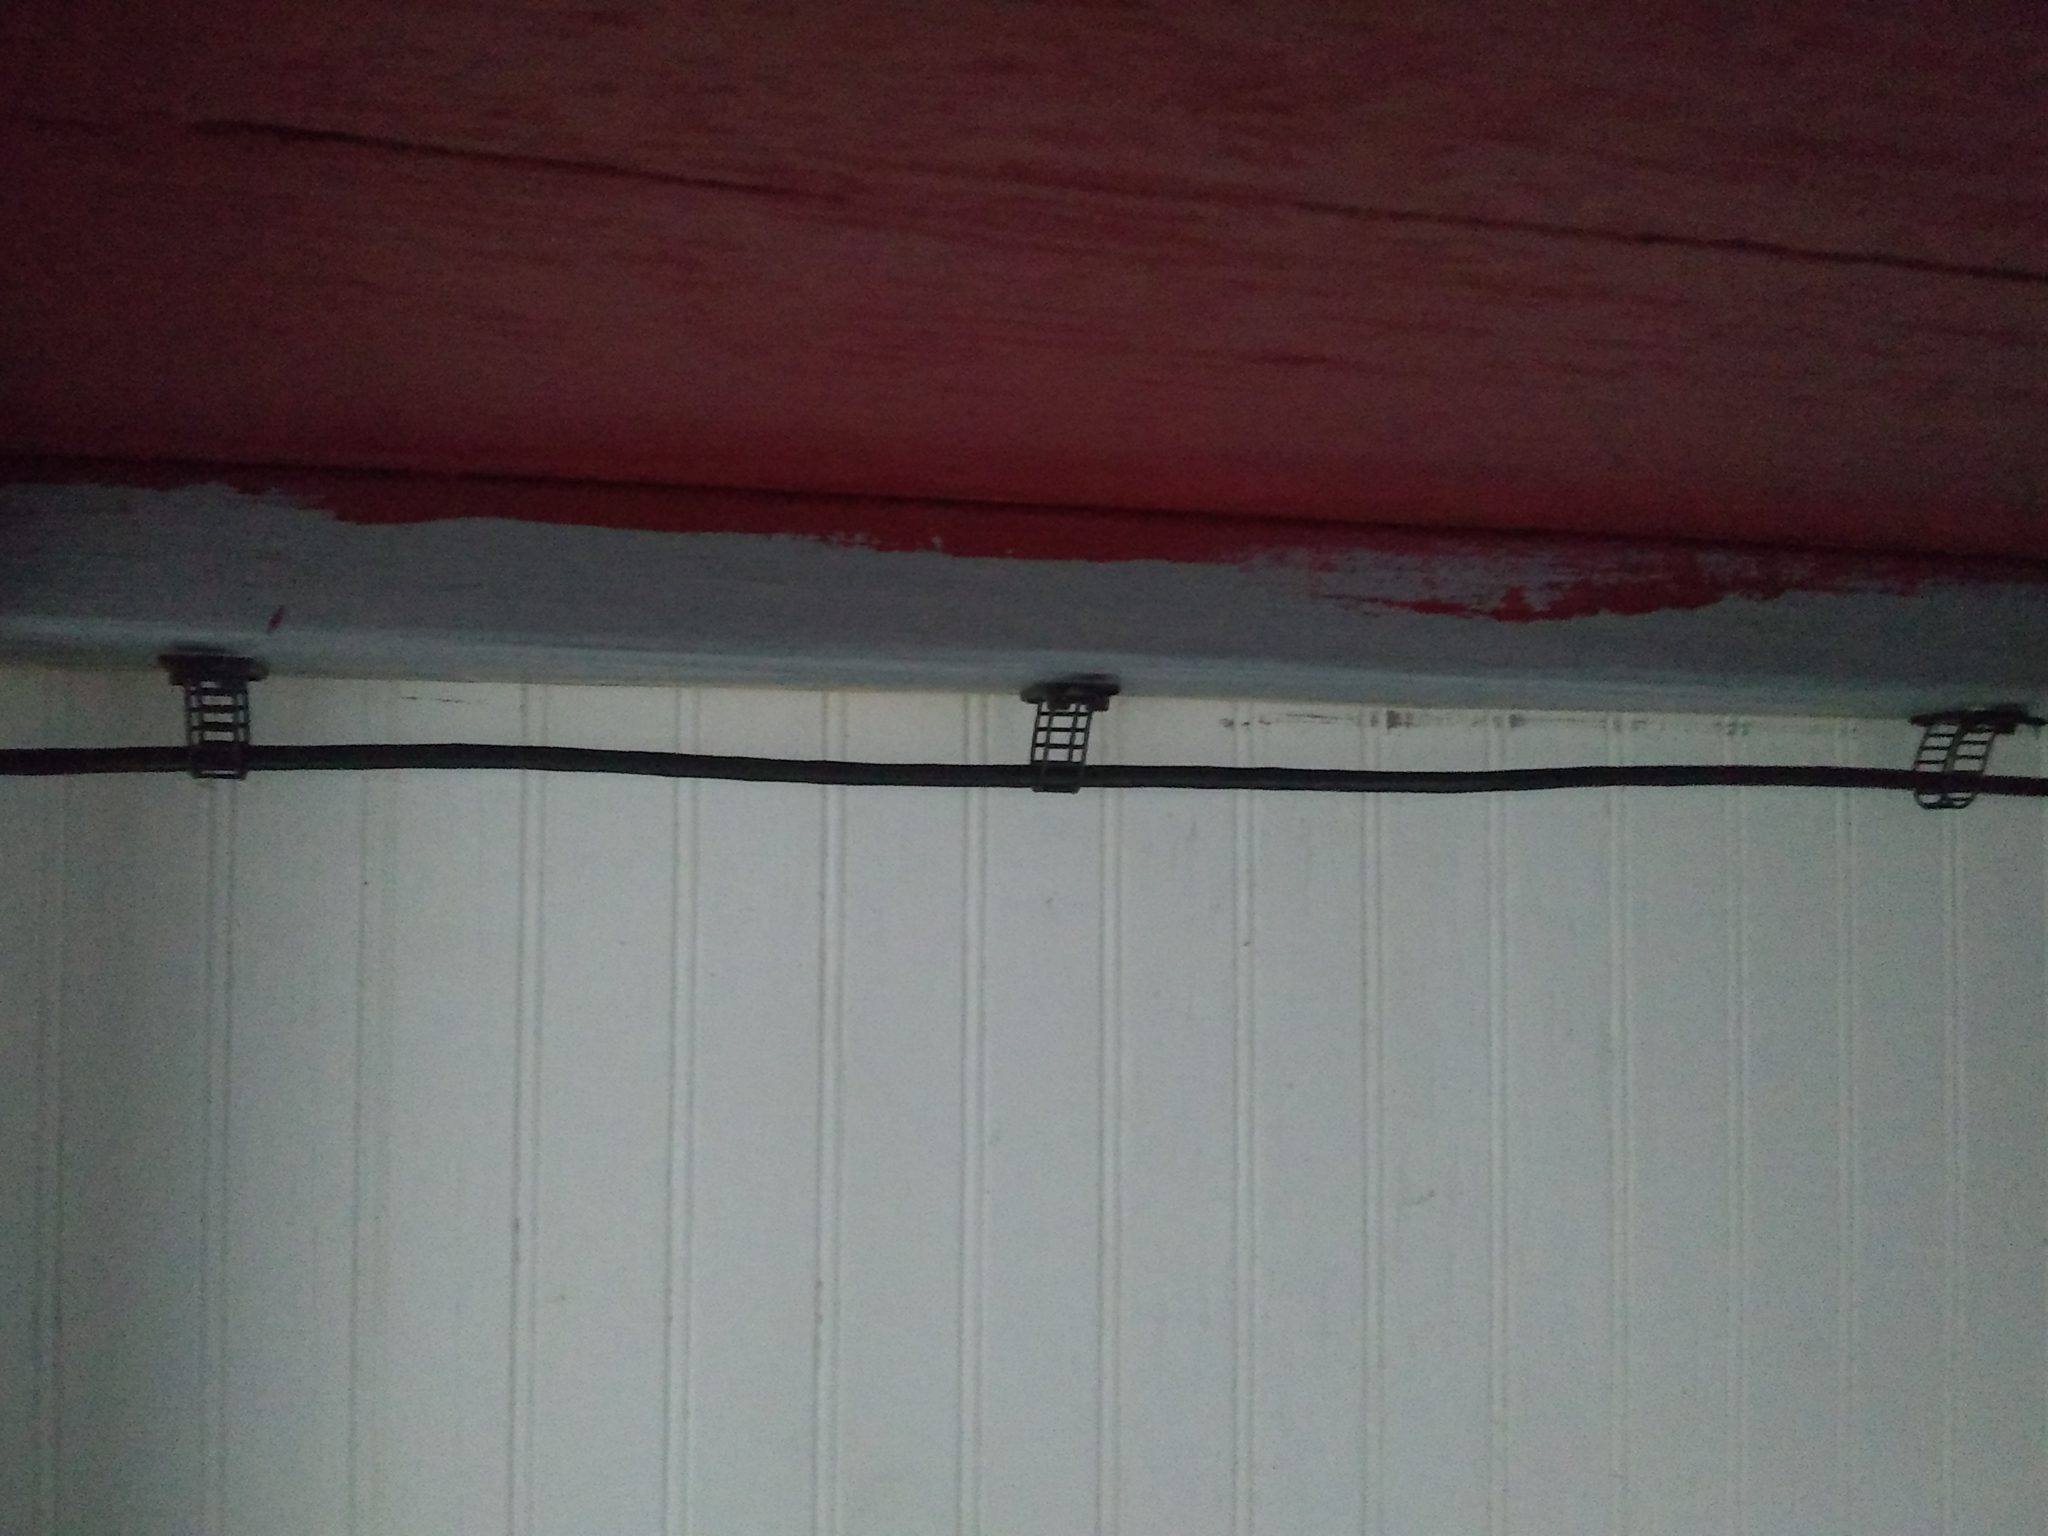
Under Desk Cable Management 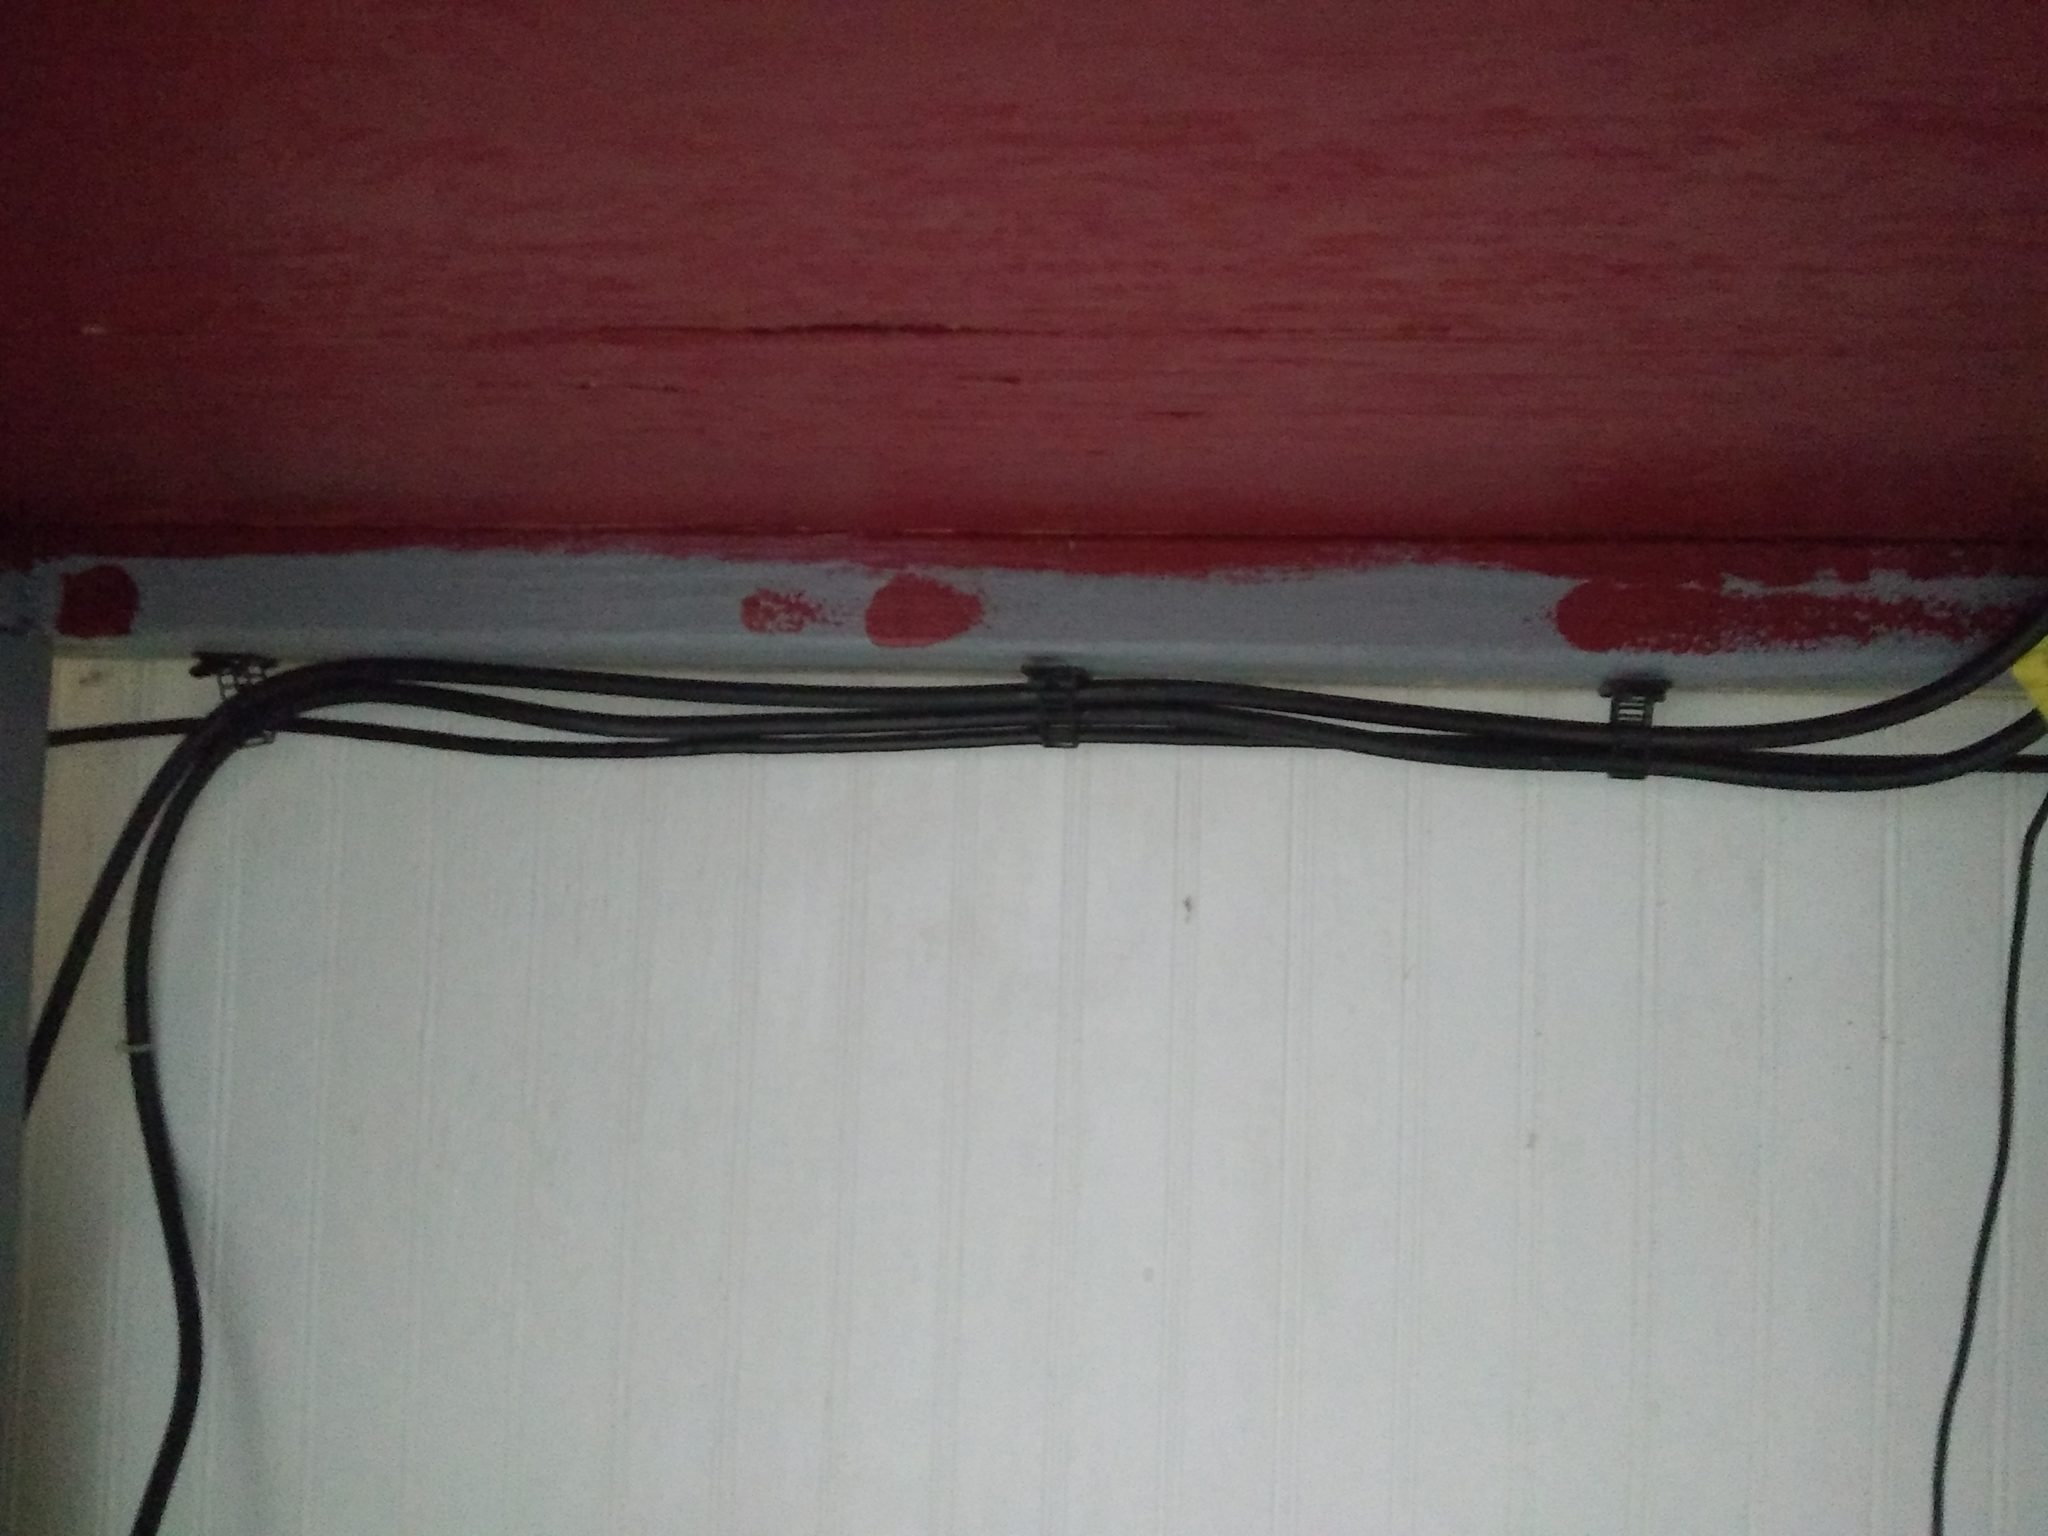
Under Desk Cable Management 
Desktop J-Channel 
Cable Port in use
Initial Command Station Rollout
I won’t lie – I got to the point where I could move the computers in, and just… did. It has made the rest of the work slightly more awkward, but it is worth it, to enjoy the fruits of my labors in the meantime.
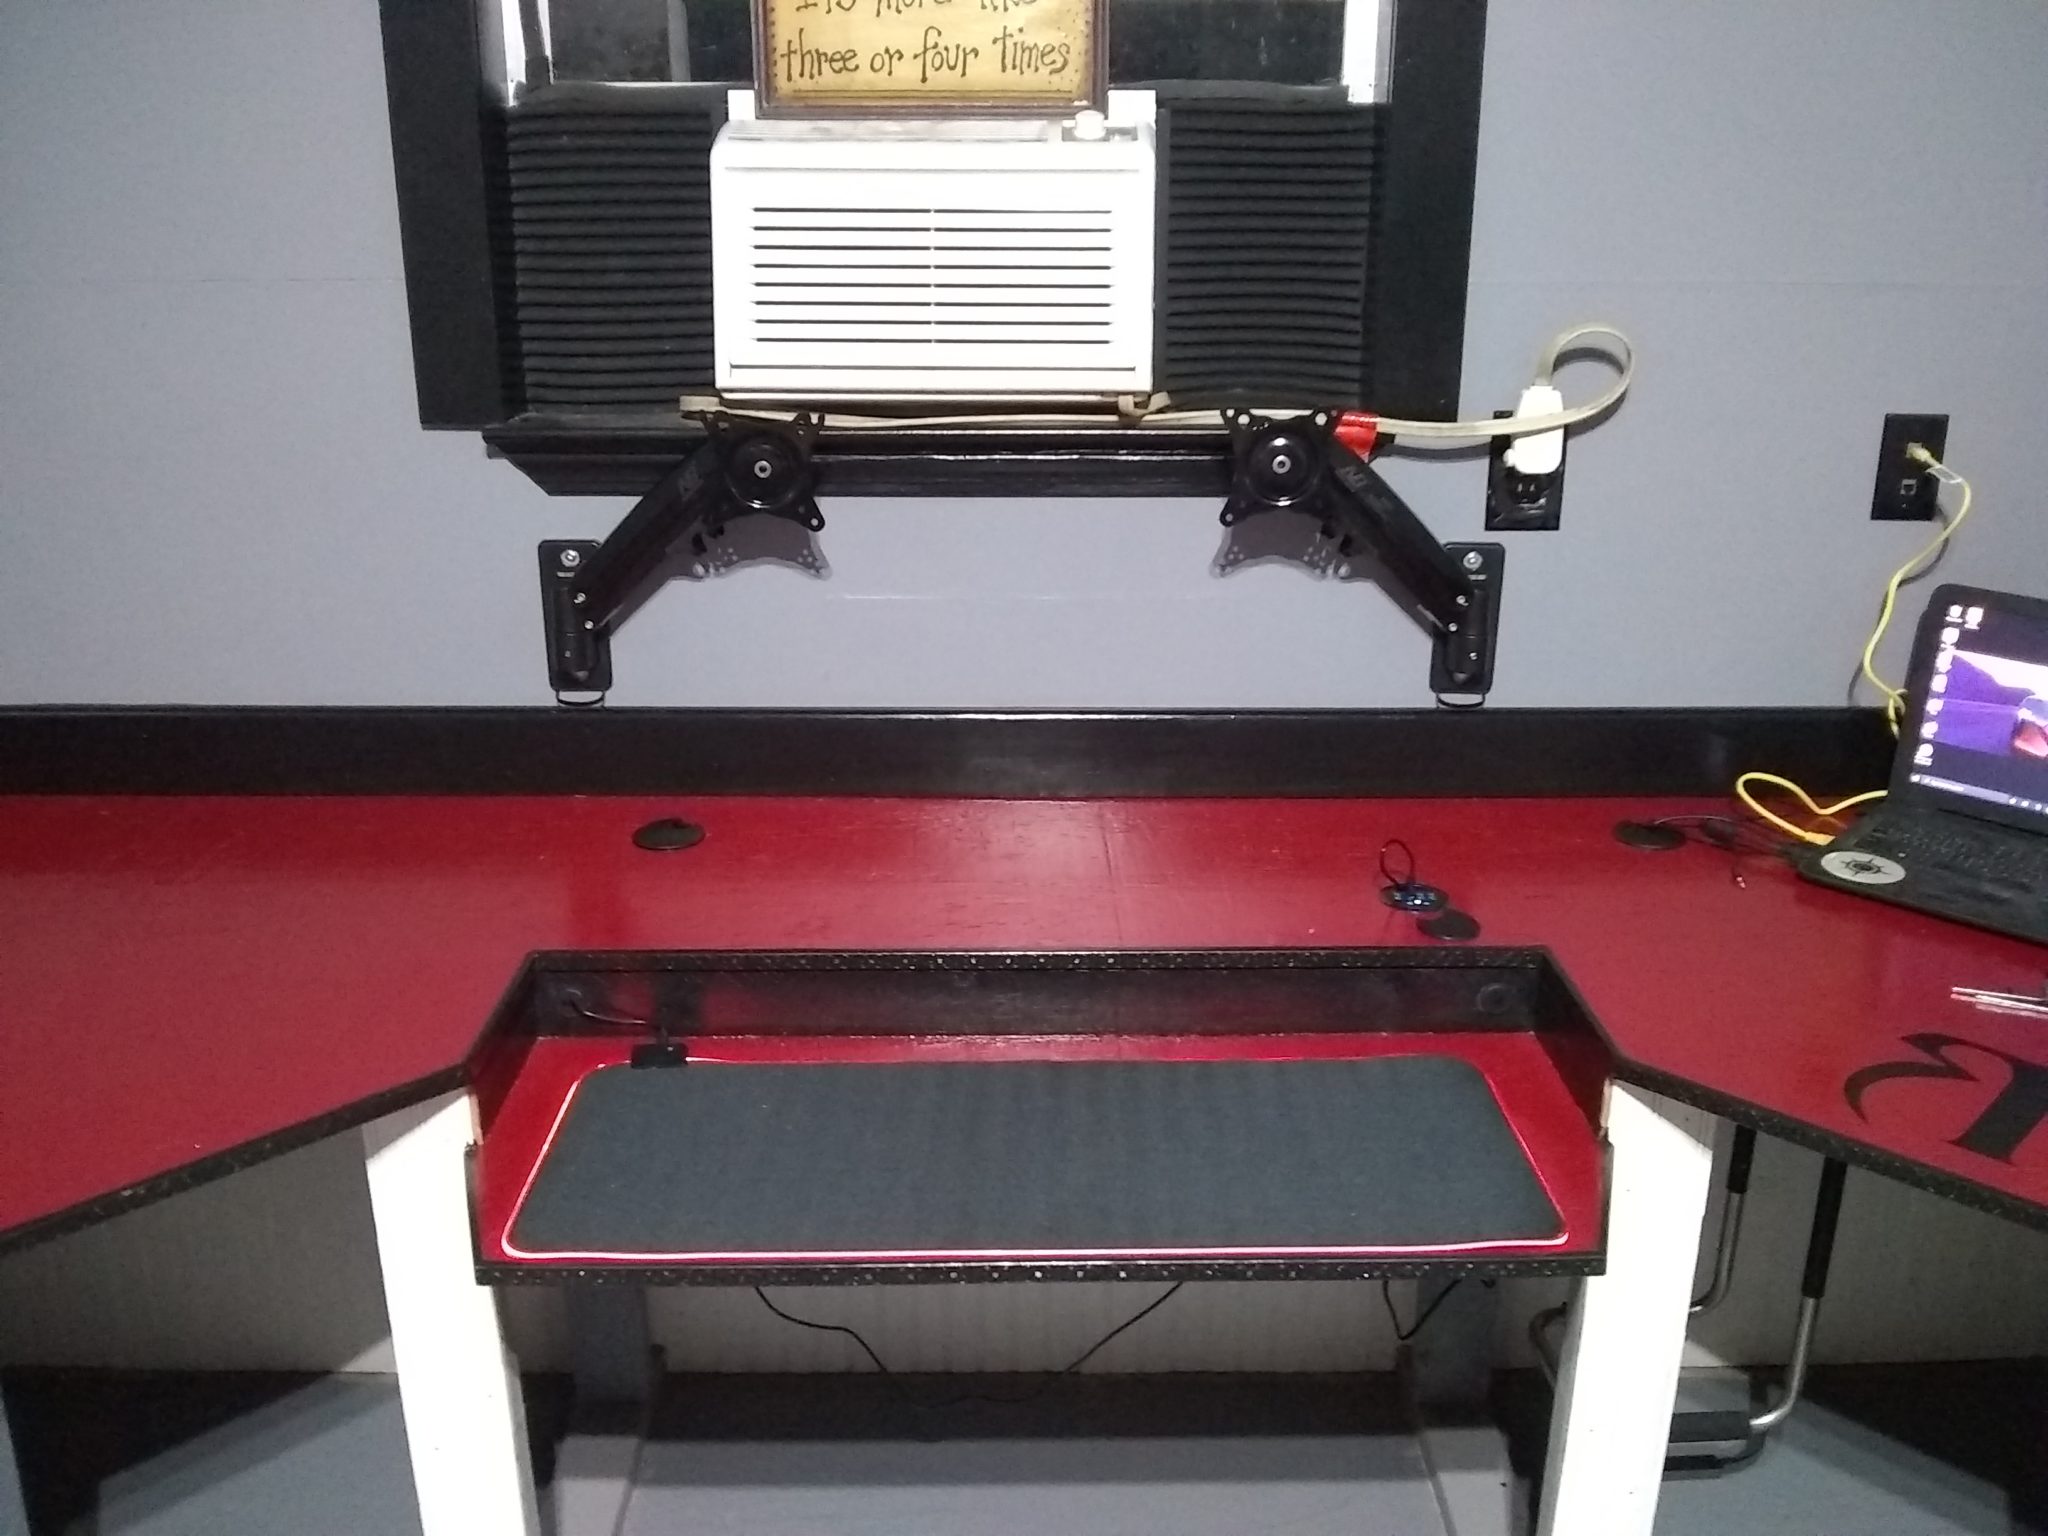
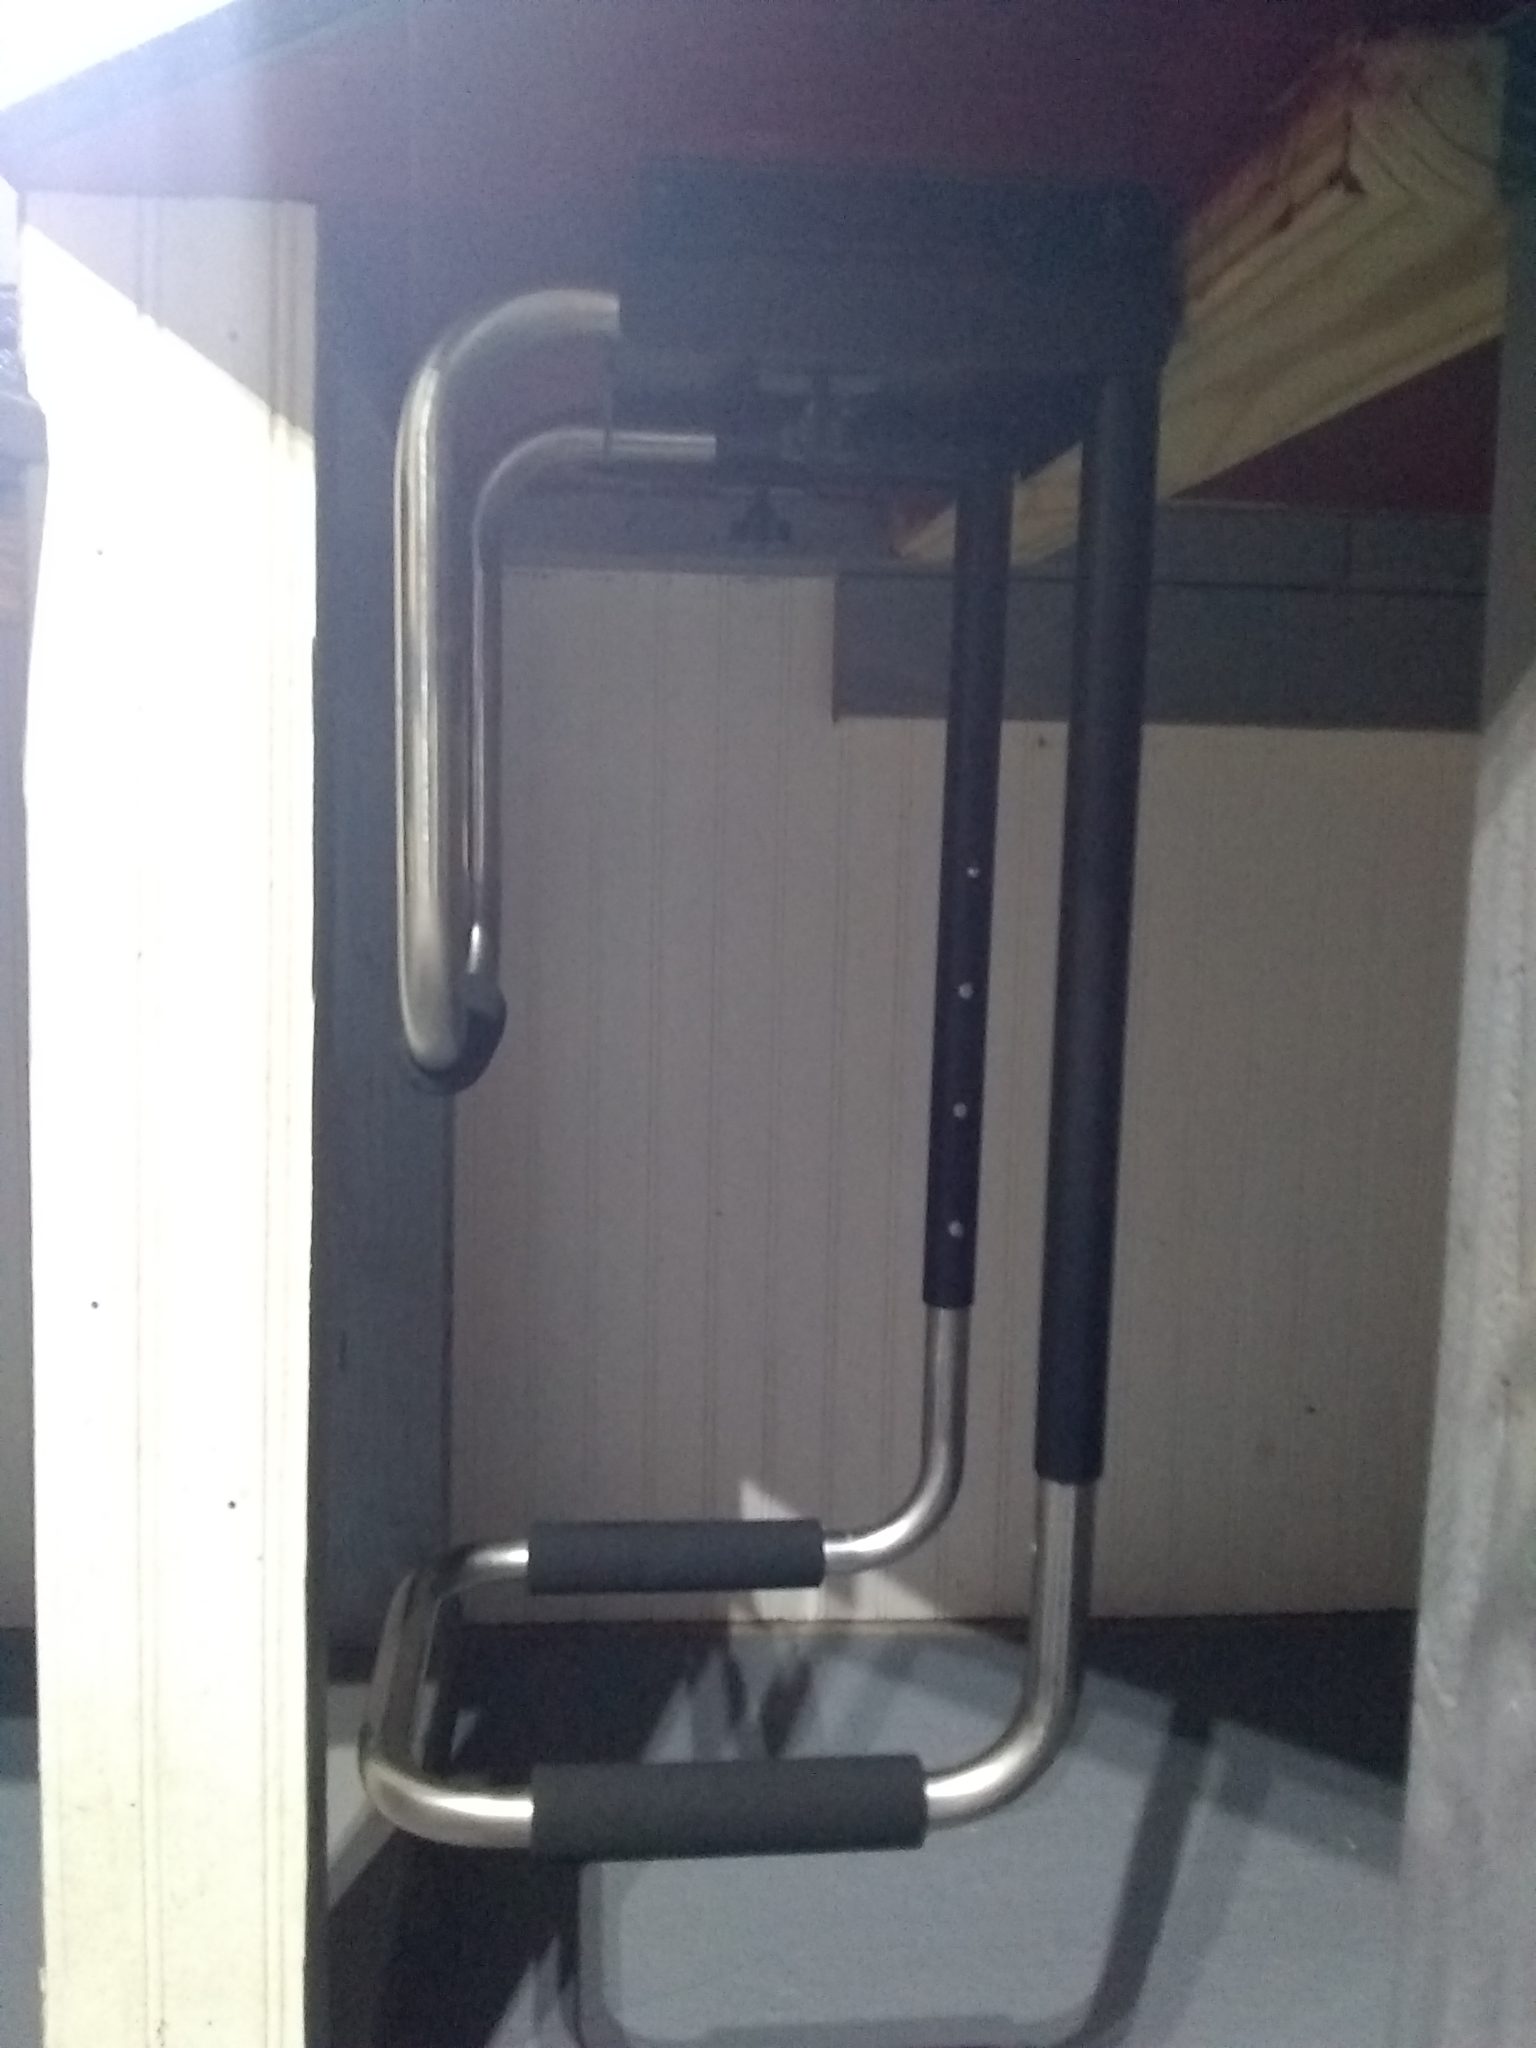
Outer Monitor Arms Installed 
Oversized Keyboard/’Mousepad & mini cable port 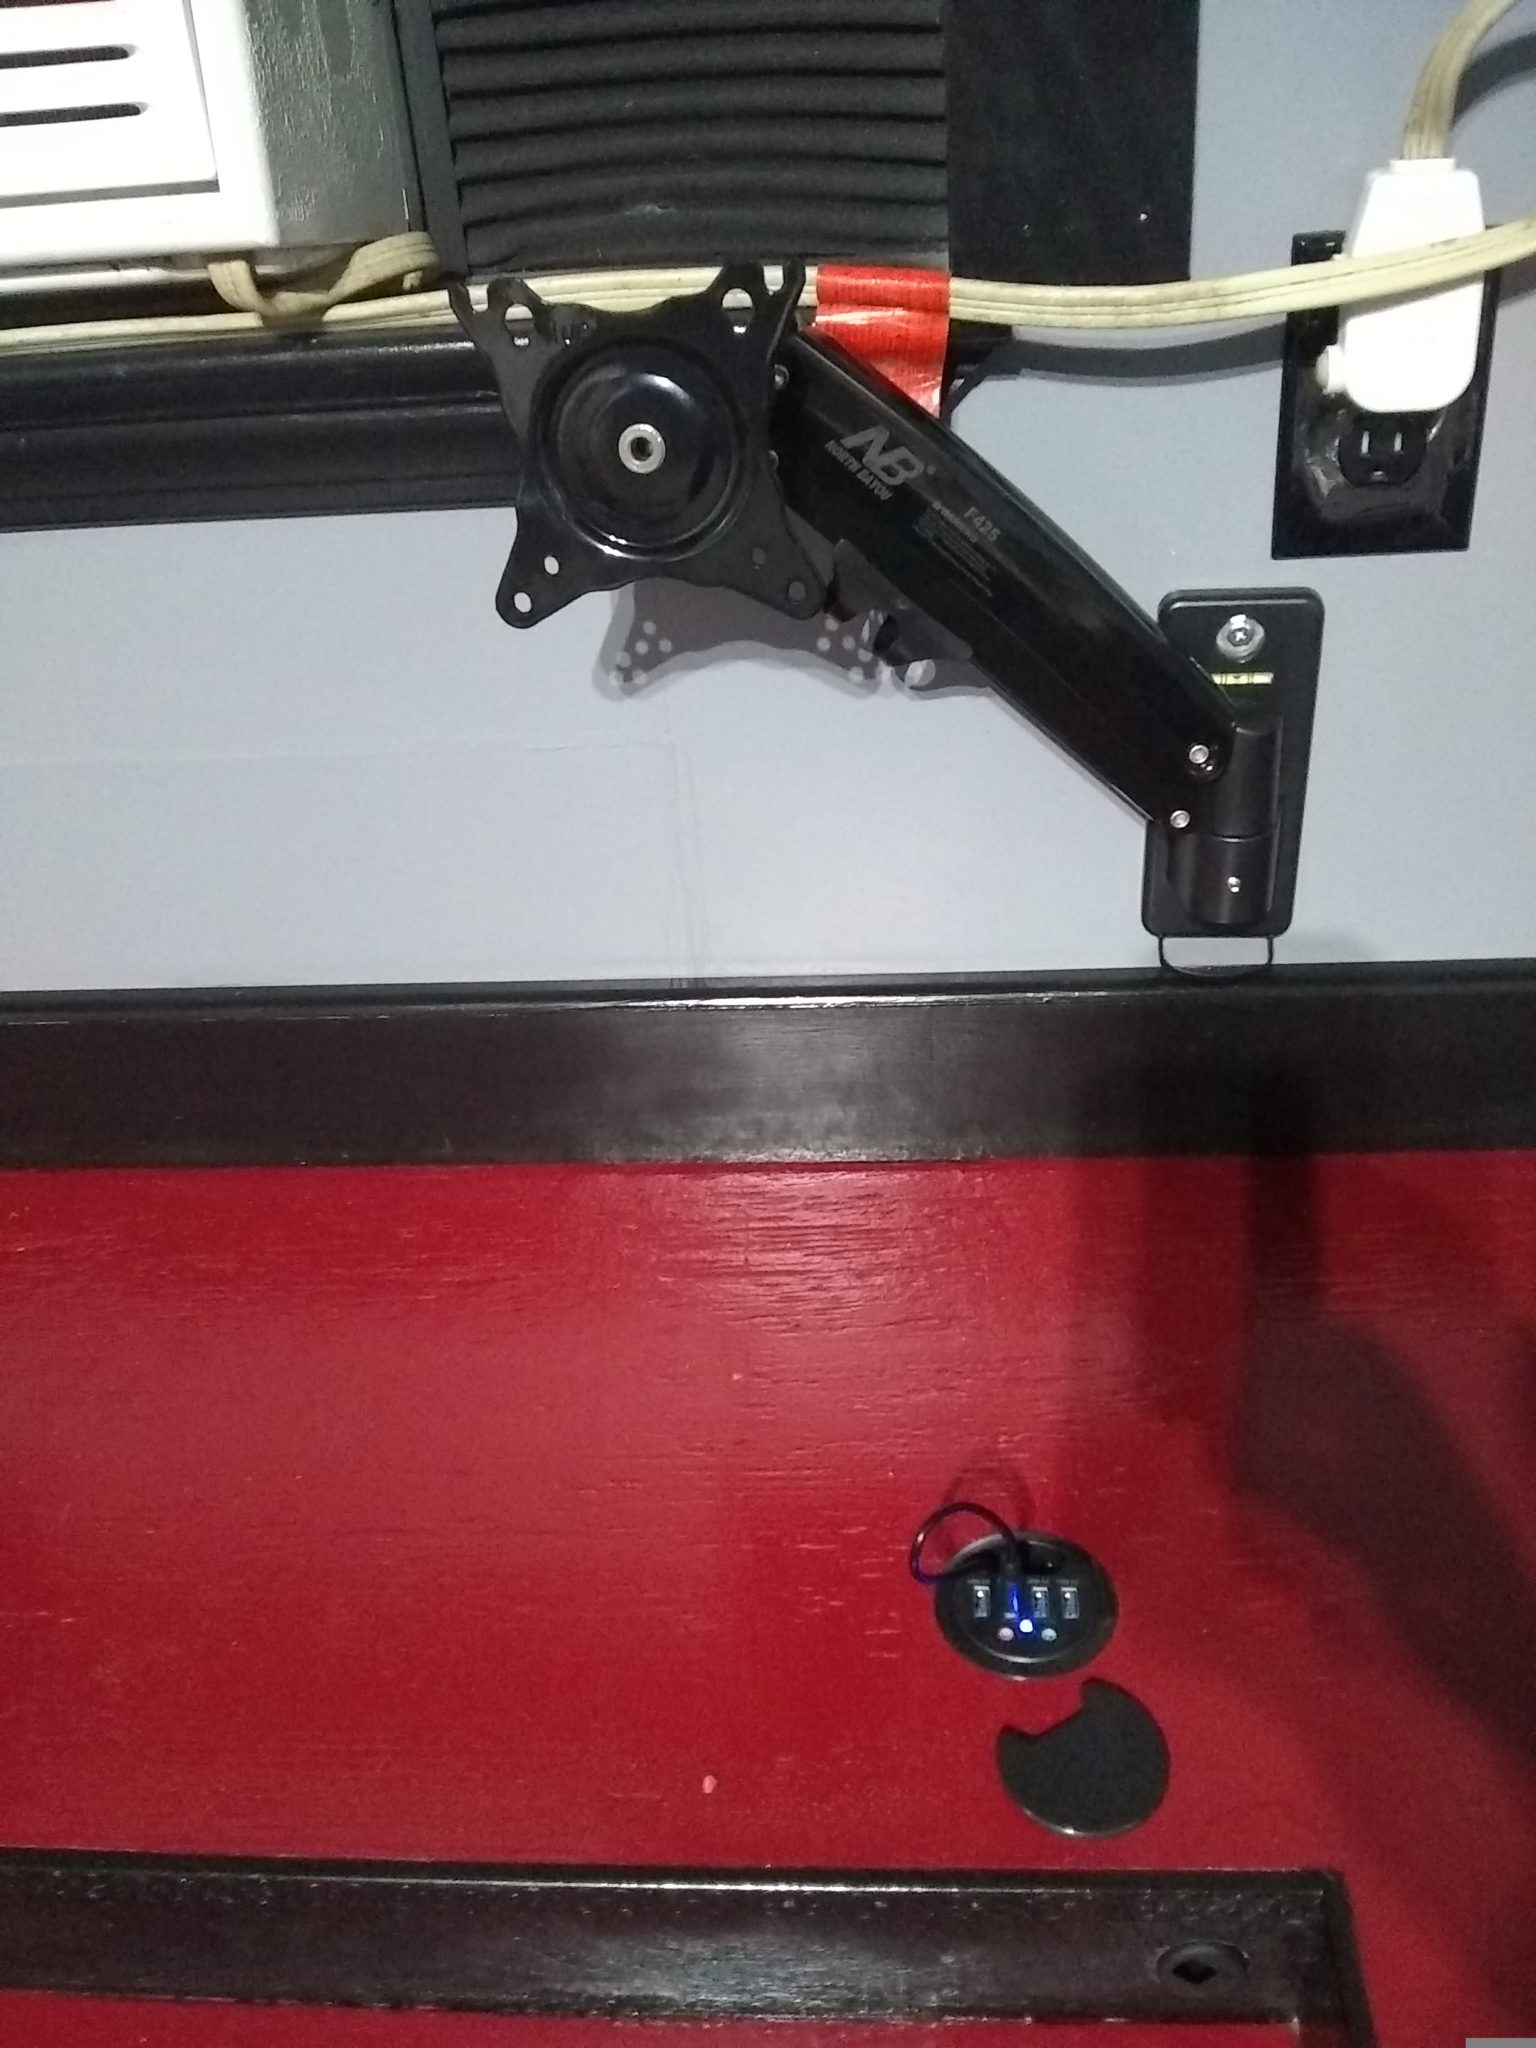
Angle 2 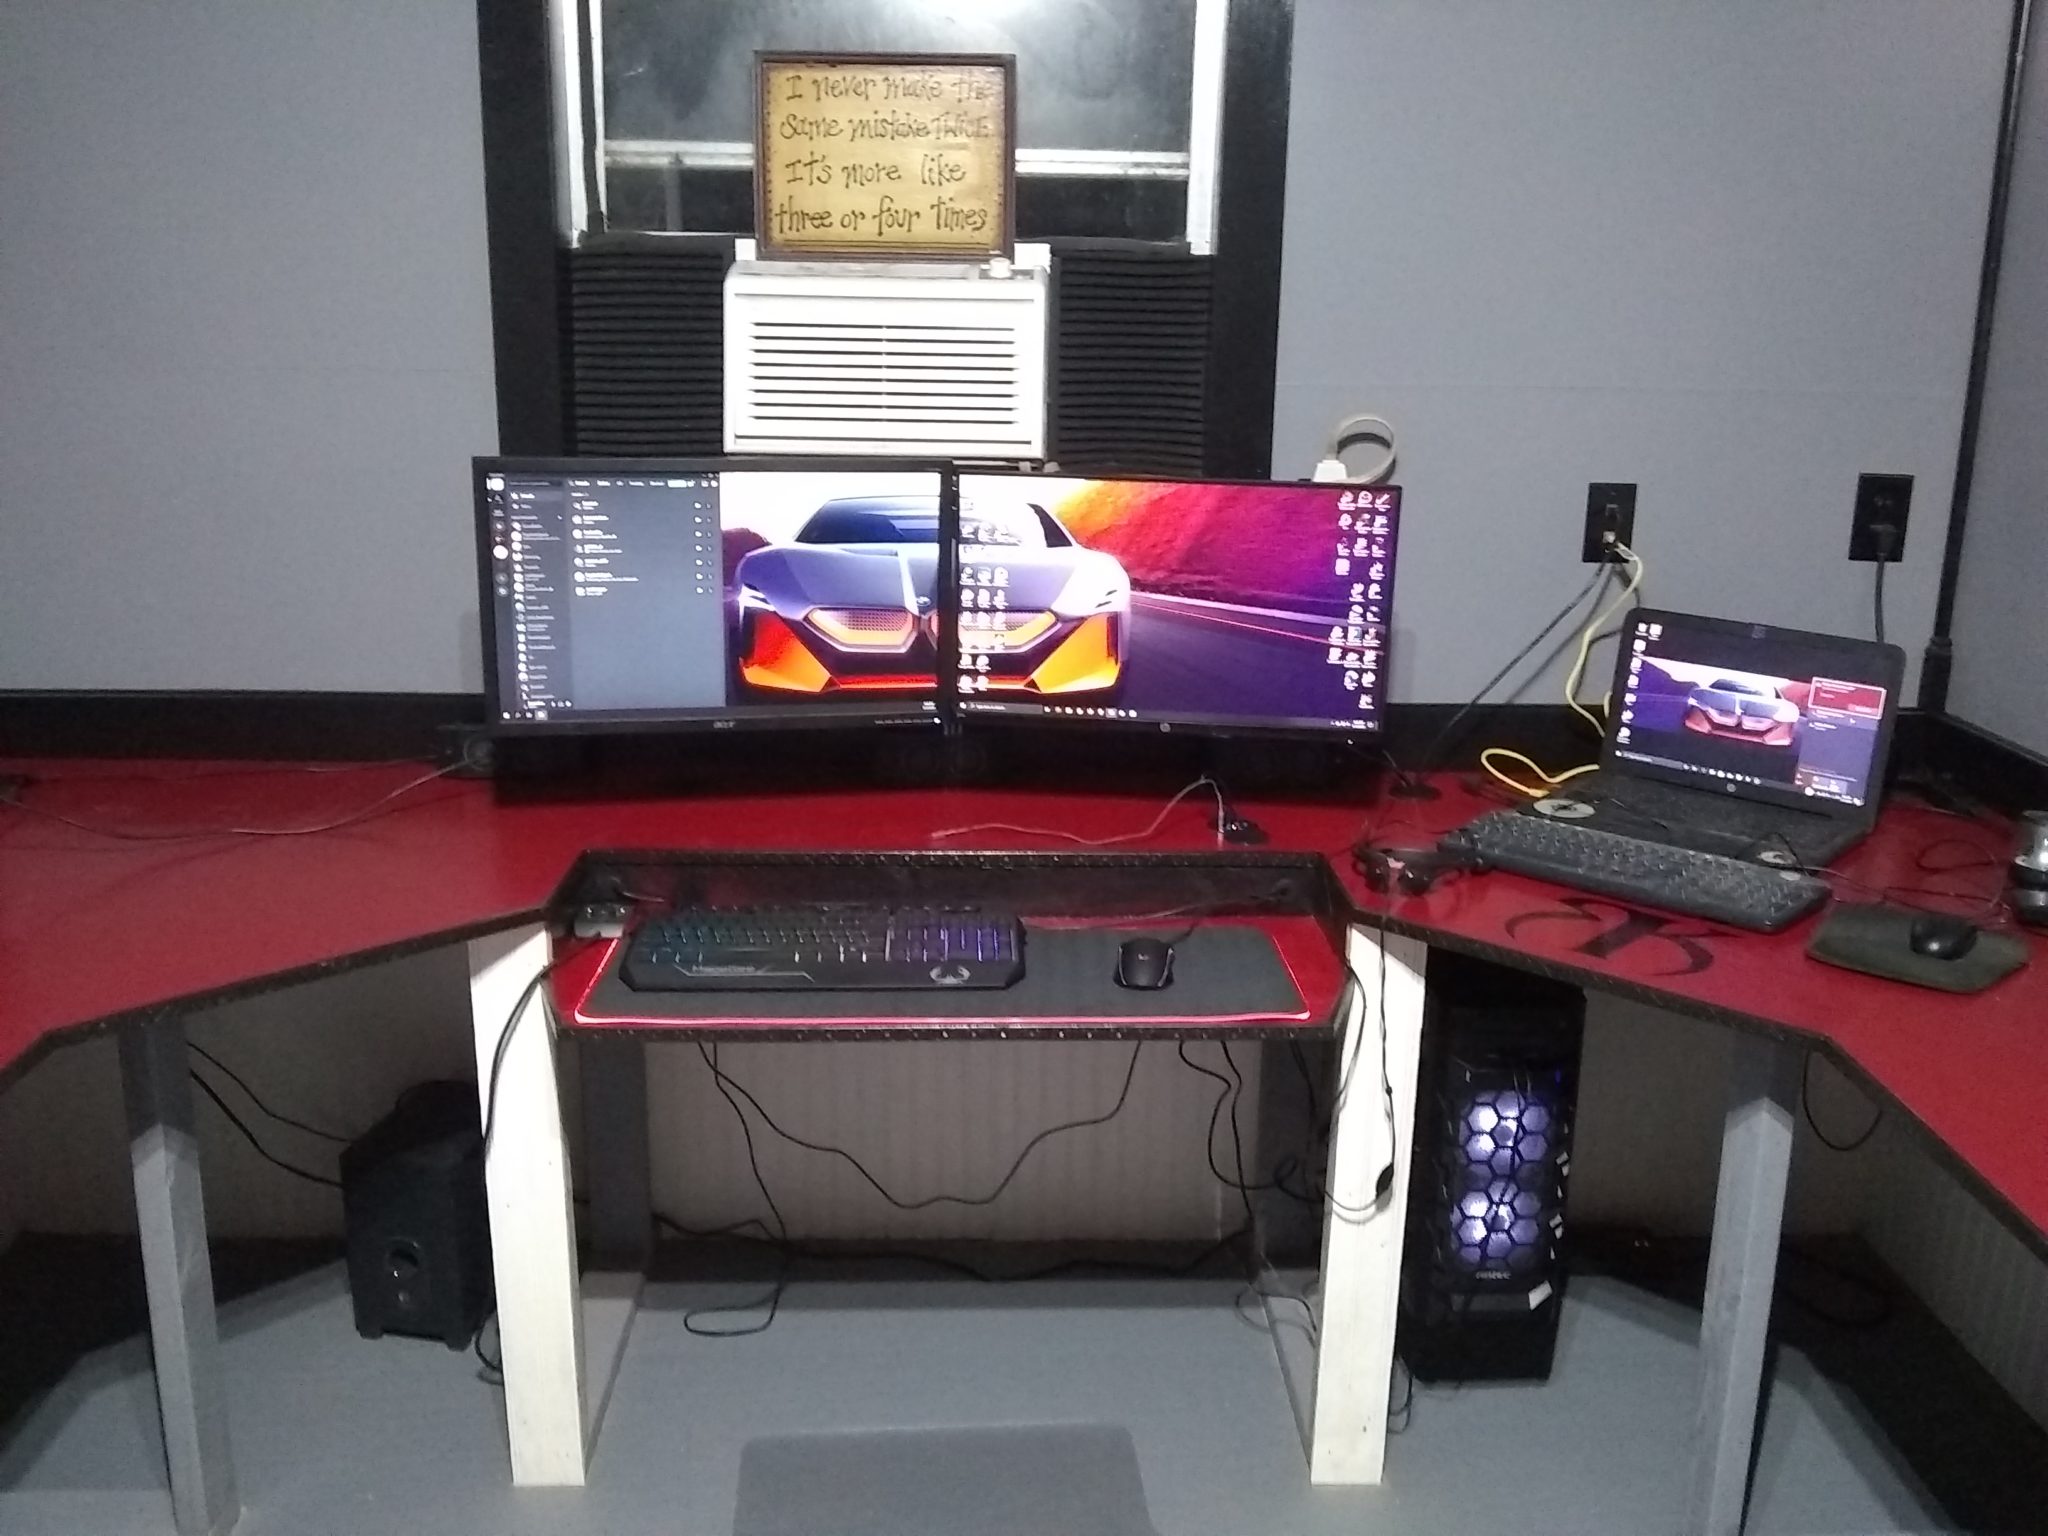
Initial Setup, with laptop in future Rackmount space 
New Chair, w/all the comforts
Cabinets, Storage and Shelving
As I mentioned, there were two salvaged cabinets still in the room when we began this project. Before I started, I removed them both. One was made of an MDF or something similar and was falling apart. The only solid wood in it was the two shelves. Those were salvaged and will be used for shelving beneath the desk. The other cabinet was mostly solid wood, save for the backing, which was still serviceable, nonetheless. I sanded the cabinet down and repainted it the same color as the wainscoting. The cabinet is now mounted against the ceiling to the right of the door. Currently, that space is being utilized for two chest freezers. I will add a narrow standing storage cabinet to the left of those freezers, about their same height.
The underdesk shelving in the other stations is the only major thing I’ve added to the original plan, as I realized that I don’t need more legroom, and to do otherwise was a waste of space. The two back corner areas were always supposed to get shelves. Funnily enough, those are the ones I haven’t installed yet, as I want to make sure everything else is accommodated correctly, first.


Eventually, I will build a workbench to replace my (salvaged kitchen countertop) workbench outside, once there is sufficient space elsewhere to move the freezers. In the meantime, I’ve begun to install a pegboard in the space between the cabinet and the desk area, to hang my cords, tools, and toolbelt. This will probably get expanded soon, as it is already crowded.

The space beneath the desk will have 1×12 shelving from rear wall towards the front leg(s). Above the desk, there will be 8 foot of 1×12 shelving approximately 18 inches above the desktop on the east side, but only 6 feet on the west side, to accommodate the server rack that will be in the west rear corner. I will also have (at least) 2 rolling cabinets that fit beneath the desk.
I prefer my computer towers off the desk when possible. My main computer’s tower is in a sliding under-desk mount in the niche between legs to the right of the drop tray. I have a garbage can beneath the desk in the matching niche to the left.


Phases 2 and 3
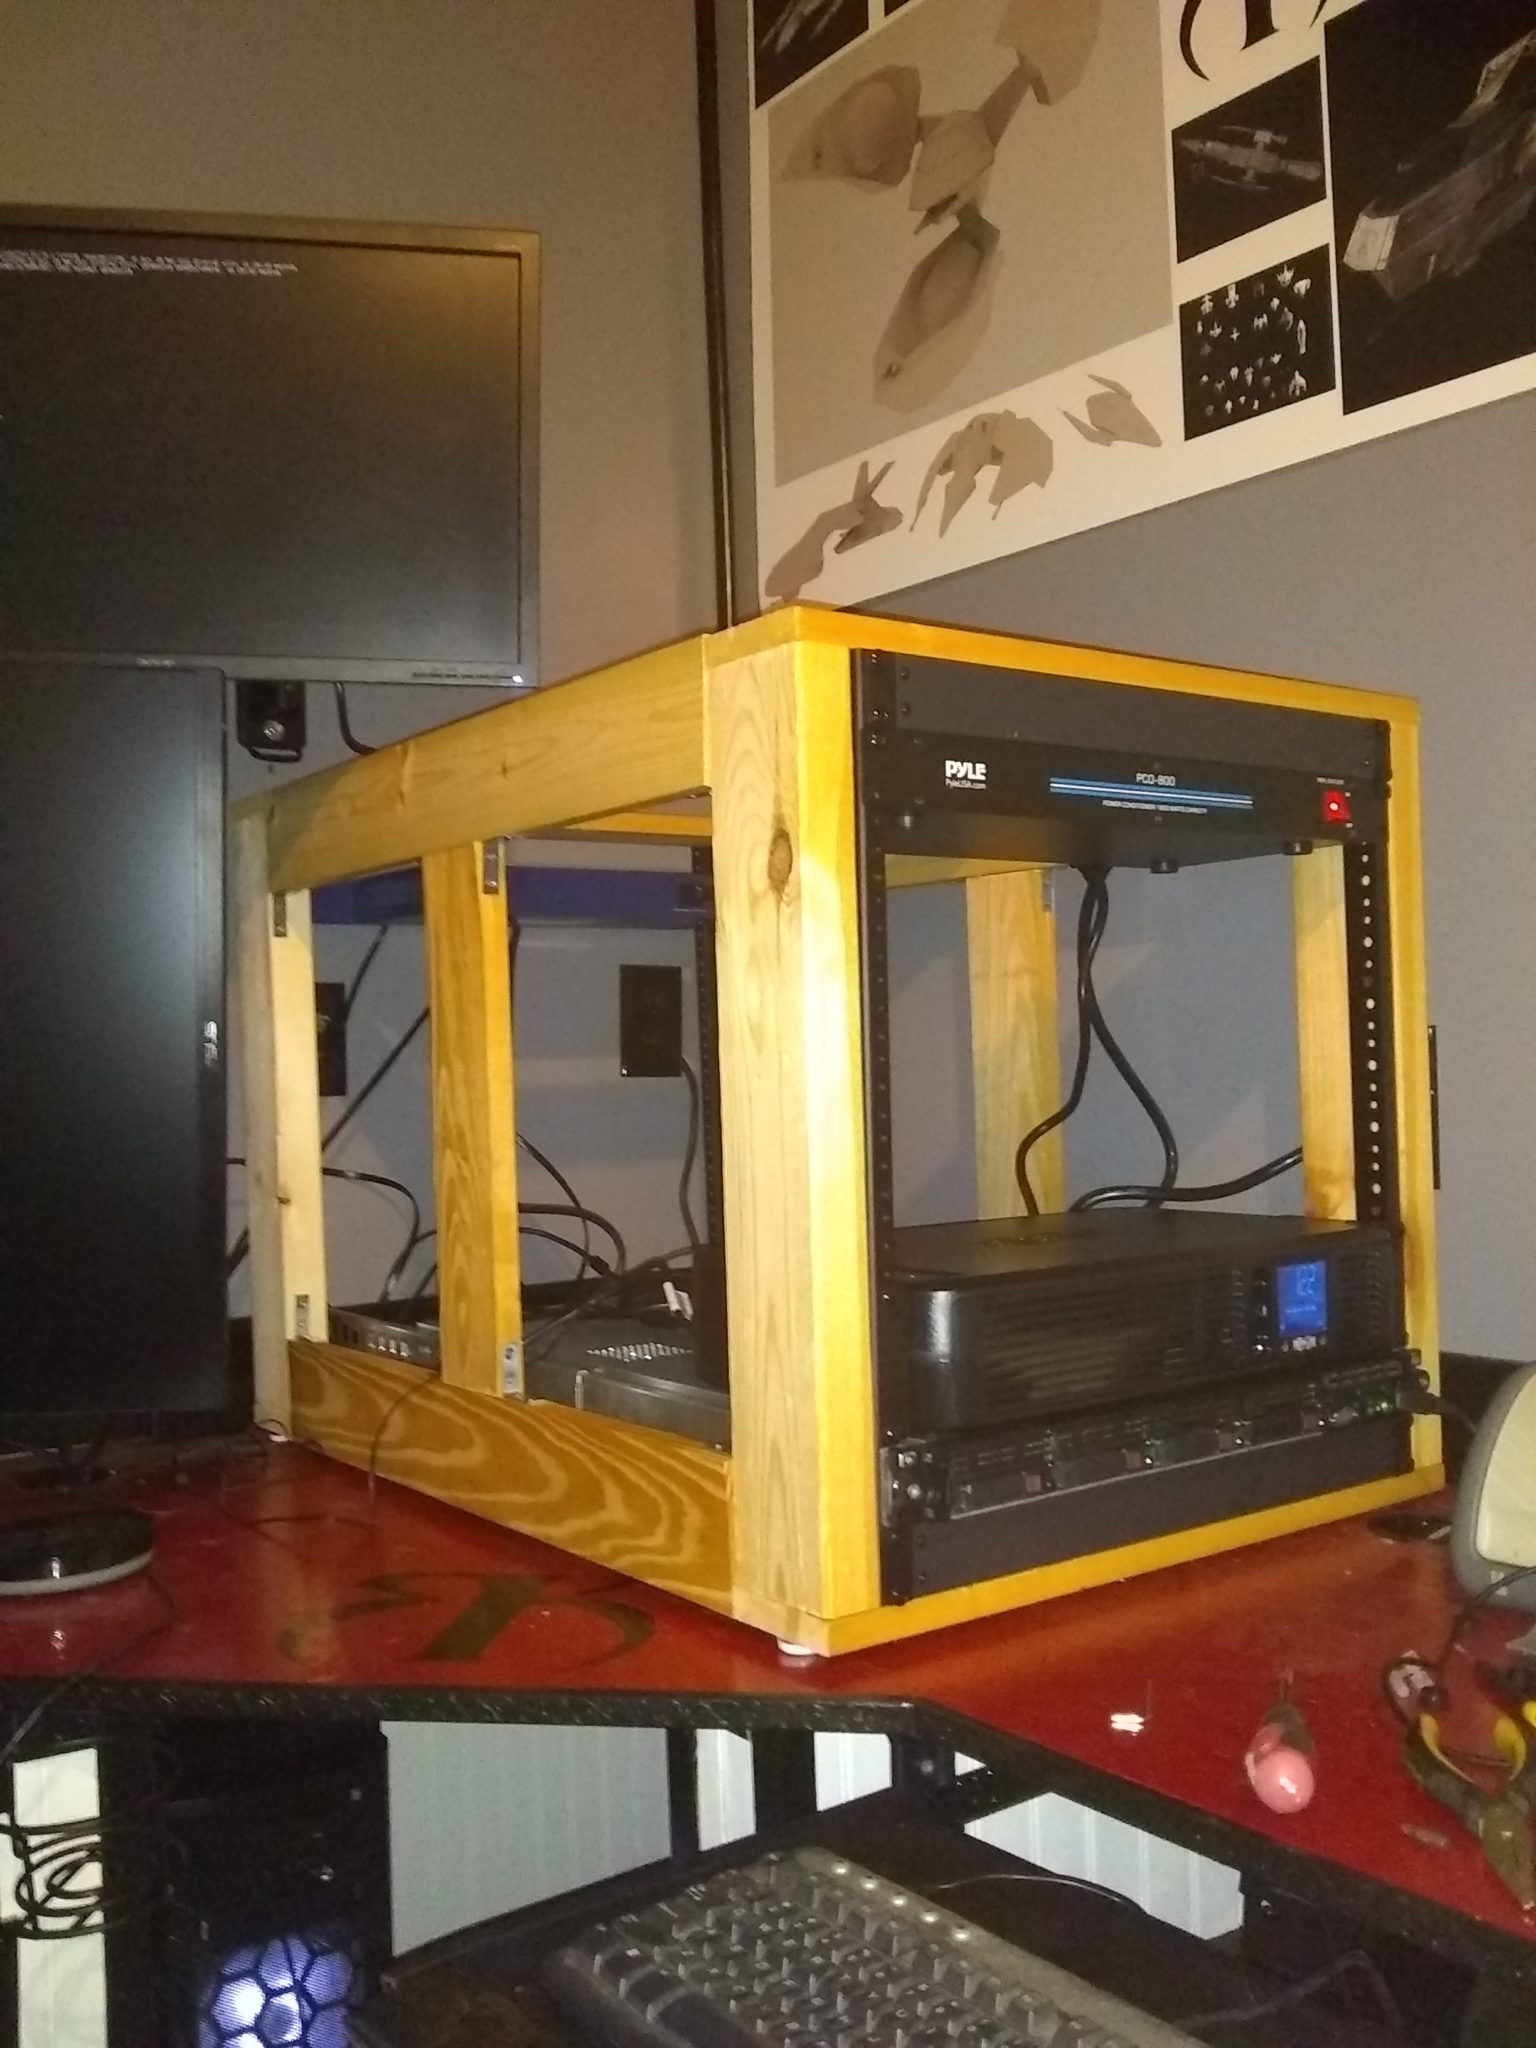
Phase 2: Server Station
As I mentioned in passing earlier, I plan to install a 12u rackmount system to the right of the command station. The pass-through cable port was installed with that in mind and will sit at the rear of the rack That wall also has the keystone LAN ports and the power outlets. It has a 1500 VA UPS, 8-outlet power conditioner/surge protector, 16-port gigabit switch, HP Proliant rack server, and secondary NAS system (tbd).
3/7/21
(New!) I’ve since started Phase 2. Unfortunately, Phase 2 got somewhat delayed by my own mistake. You see, I failed to do my due diligence when it came to the size of the server I bought. As I’m primarily familiar with rackmounted music equipment, I didn’t research the depth of the 1u server I picked. It comes in at a whopping 28 1/4″ deep. My rack is 16″ deep. So, what that means is that I’m going to build a custom server rack – and now I also have the Phase 3 rack early! I ordered front rails from Reliable Hardware along with some blanks for top and bottom – and I will build the rack’s body out of wood. It’s going to take up essentially the entire rear right corner of the desk now, but I can match all the colors and trim this way. That corner was always intended to house the rack anyway, so I’m not really losing anything – and it illustrates how overbuilding sometimes isn’t a bad thing!
The Server:
HP Proliant DL360 G7 – with 2×Quad-Core X5677 Xeon 3.46GHz CPUs + 72GB PC3-10600R RAM + 4×900GB 10K SAS SFF HDD, P410i RAID, 4×GigaBit NIC, 2×Power Supplies, NO OS. Bought the accompanying rails as well.
Mounted a surplus Acer 24″ LCD as a dedicated monitor for the rack, and have a kb/mouse in the slideout keyboard tray for workstation 3 that I use for the server when I am not simply using ssh from my primary desktop.
The Stack:
- Pyle PCO800 15Amp, 1800W power conditioner/surge protector/suppressor
- Tripp Lite 1500VA, 900W rackmount UPS
- Netgear 16-port gigabit unmanaged switch (mounted rear) (this is why I ran all cat-7 – also note that the server NICs are all gigabit as well)
- CyberPower CPS-1215 12-outlet, surge suppressor power strip with 6 exterior, 6 interior outlets
- ProCool SX340 1u Fan – intake (mounted rear)
- ProCool SX340E 1u Fan – exhaust
- Raising Electronics 2u lockable drawer
- NavePoint 1u cable management raceway duct panel (mounted rear)
Custom Rack:
Initially, there was a snafu or two when it came to the hardware to build this. I ordered a set of rails for the server when I ordered the server – but they were missing the interior sections which attached to the server body. The folks at Info-Tech were quick to respond after I explained the issue – but Amazon was entirely unhelpful in that process. Apparently, Amazon has a policy which deletes every image, url and even email address from conversations between buyers and sellers. So, when the seller asked me to provide pictures of the item as it was received – I could not do via Amazon’s messaging system. That policy made the replacement process take nearly a week, as various exchanges fell victim to their stealth edits. I finally contacted the seller’s company via phone, got a valid email address, and exchanged the necessary information outside Amazon entirely – which begs the question of why we were using Amazon in the first place. This reminds me why I’ve been seriously thinking of getting rid of Amazon as a service provider – and also encourages me to do so in the future. The second issue happened when my rack screw package mysteriously disappeared in a hand-off between Amazon and the USPS – with Amazon saying they handed it over, and the USPS saying they hadn’t received it. Between you and me, I believe the USPS. I canceled and reordered, and the second package arrived promptly. Those are actually the only shipping issues I’ve had with this entire project – and they happened within days of each other.
When I surmised that it would take up that entire corner, I wasn’t kidding! The rack’s frame measures out to 34 3/4″ deep x 22 1/4″ wide x 22 3/4″ high. It has now been enclosed, and fans are installed. All the blanks, a wire management panel, and a drawer have been ordered, received, and installed. The server is on bottom, above a rear-mounted 1u Procool intake fan panel, with the 30lb Tripp-Lite UPS above it in front. The power conditioner is on top, below another 1u Procool exhaust fan panel, a CyberPower power strip/suppressor mounted below the power conditioner, and above the drawer – with the Netgear switch mounted in the rear, above a NavePoint cable management raceway. I also have cable management in the box now, and everything is routed. The trim is complete!
Usage:
Currently, the rackserver primarily manages my Jellyfin home media server, and was revamped to run proxmox as the base OS, with my main server OS in the primary VM. I will add additional VMs as test environments for my active VPS setups as needed.


Phase 3: Music Corner
Currently, I have this area to the left of the door set up to accommodate small kids. Indoor/outdoor carpet, beanbags, a small wall-mounted TV with a FireStick. It has messy cable management currently, but it is a temporary setup.

Once they’re a bit older, however, I’ll expand this section to include a rolling rackmount for music equipment that will double as a gig system. In the meantime, I have a static rack for equipment as I acquire it.


I already have my primary guitar hanging on the wall, an amp (Peavey Minx 110) on the floor beneath the last desk station on that side, and space for my pedalboard – but I have plans for that to be a mini-stage area with a playing stool, I/O for computer interfaces, wall space for a half dozen guitars, and easy workbench access for guitar repairs and mods.
Current Amenities
I have a color-matched coffee maker and microwave, a mini-fridge with freezer compartment (New!), a weight-activated coffee warmer for my oversized mug, a cupholder mounted to the desk for when a cold drink is preferable; a bottle rack for when I just need a splash of something, a headphone holder, a controller rack, deformable 8,000 lumen 3-panel LED overhead lighting, color-matched leather gaming chair, adjustable footrest, 7.1 sound system, Thrustmaster HOTAS for flight simulators, display hangers for 3 swords, 2 bows, a rifle, and my trusty hockey stick. (I used to play. Don’t judge.) I also have lots of room for posters and other media – which I’m sure I will add to in time.


Weight-activated coffee warmer 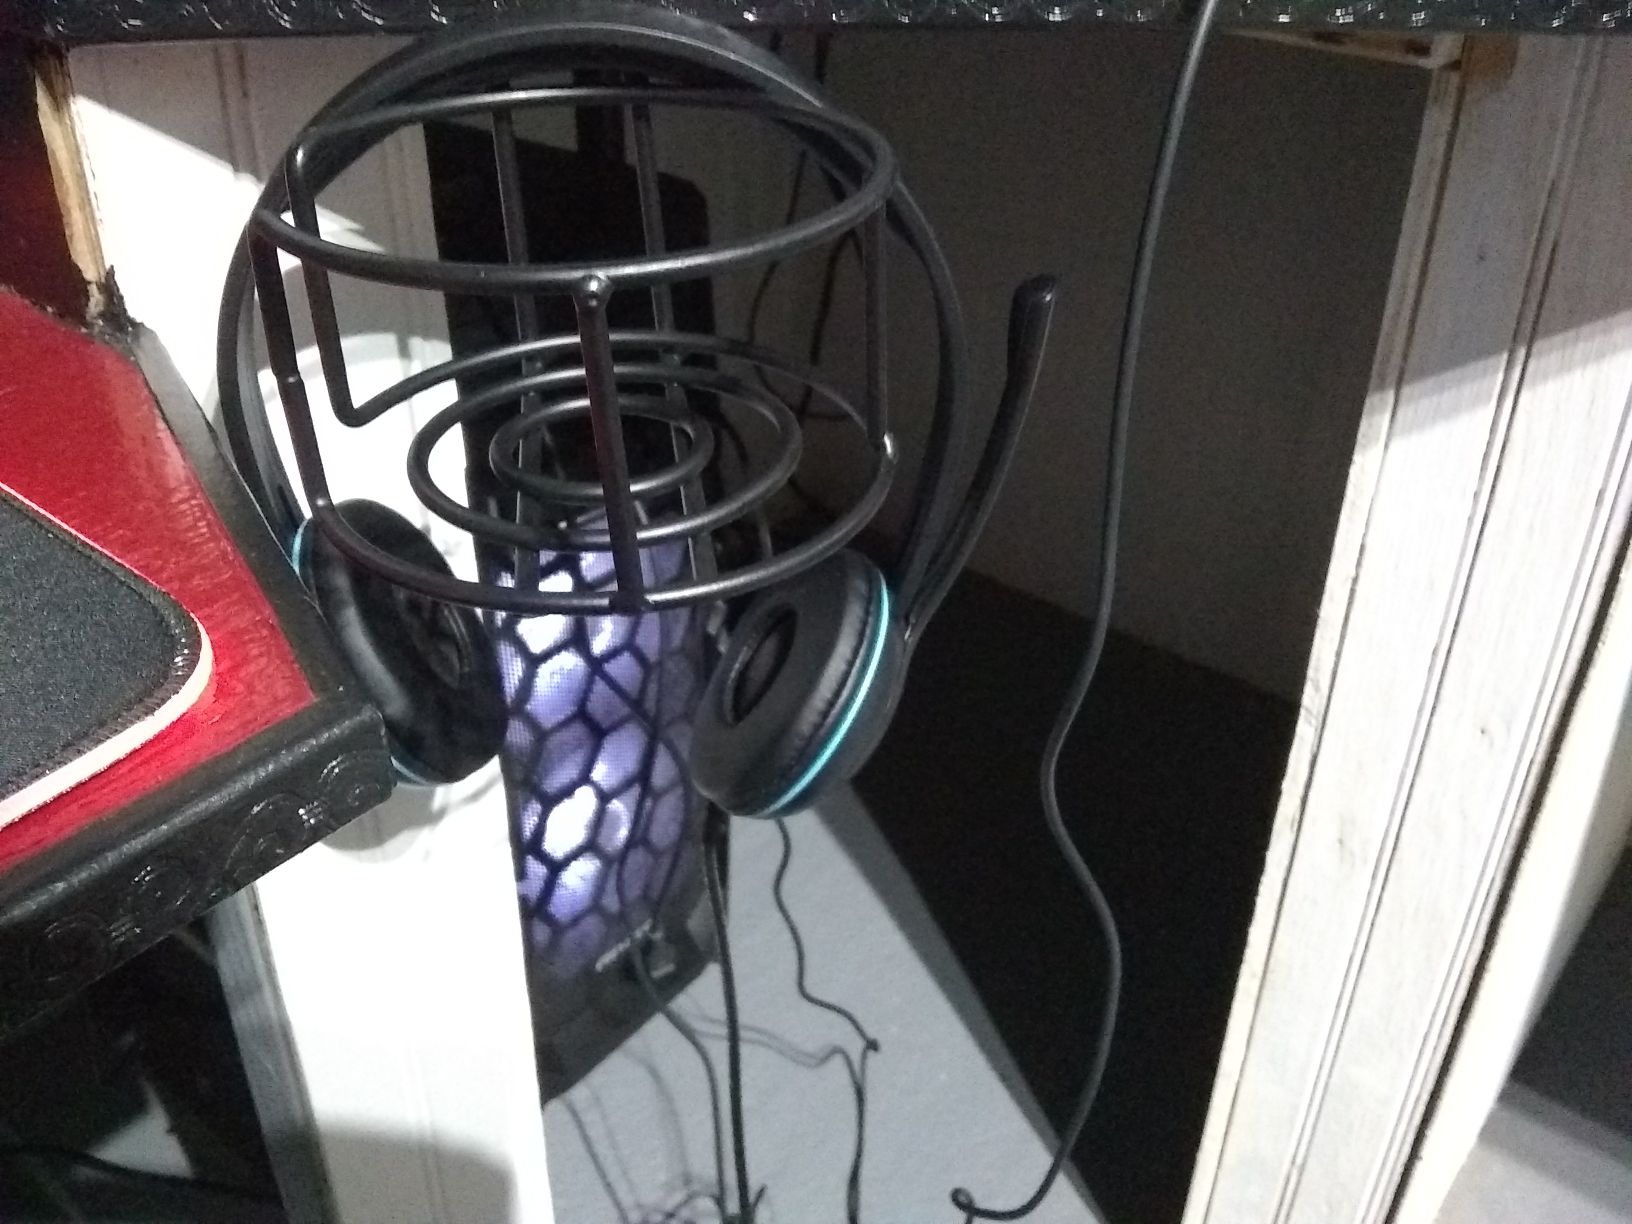
Wireframe desk-mounted drink holder 
Adjustable footrest
Command Computer Specs
As I’ve alluded to, the command station is served by a 32″ LED monitor (LG 32QK500-C, QHD, IPS, 75Hz, DP, mDP, 2xHDMI) flanked by 2×24″ LED monitors (Asus VA24EHE 23.8”, 1080P, IPS, 75Hz, HDMI D-Sub DVI-D) – all on North Bayou F425 wall-mounted full-motion hydraulic monitor arms. (New!) The computer itself is in an Antec GX202 case with twin front led fans, currently utilizing an MSI B450 Tomahawk Max mobo, AMD Ryzen 3 3200G CPU, 32GB (New!) G.SKILL Ripjaws V DDR4 3200 RAM, 1TB PNY NVMe drive (New!), MSI GeForce GTX 1050Ti 4GB GDDR5 OC GPU (New!), powered by a Corsair VS650 PSU.
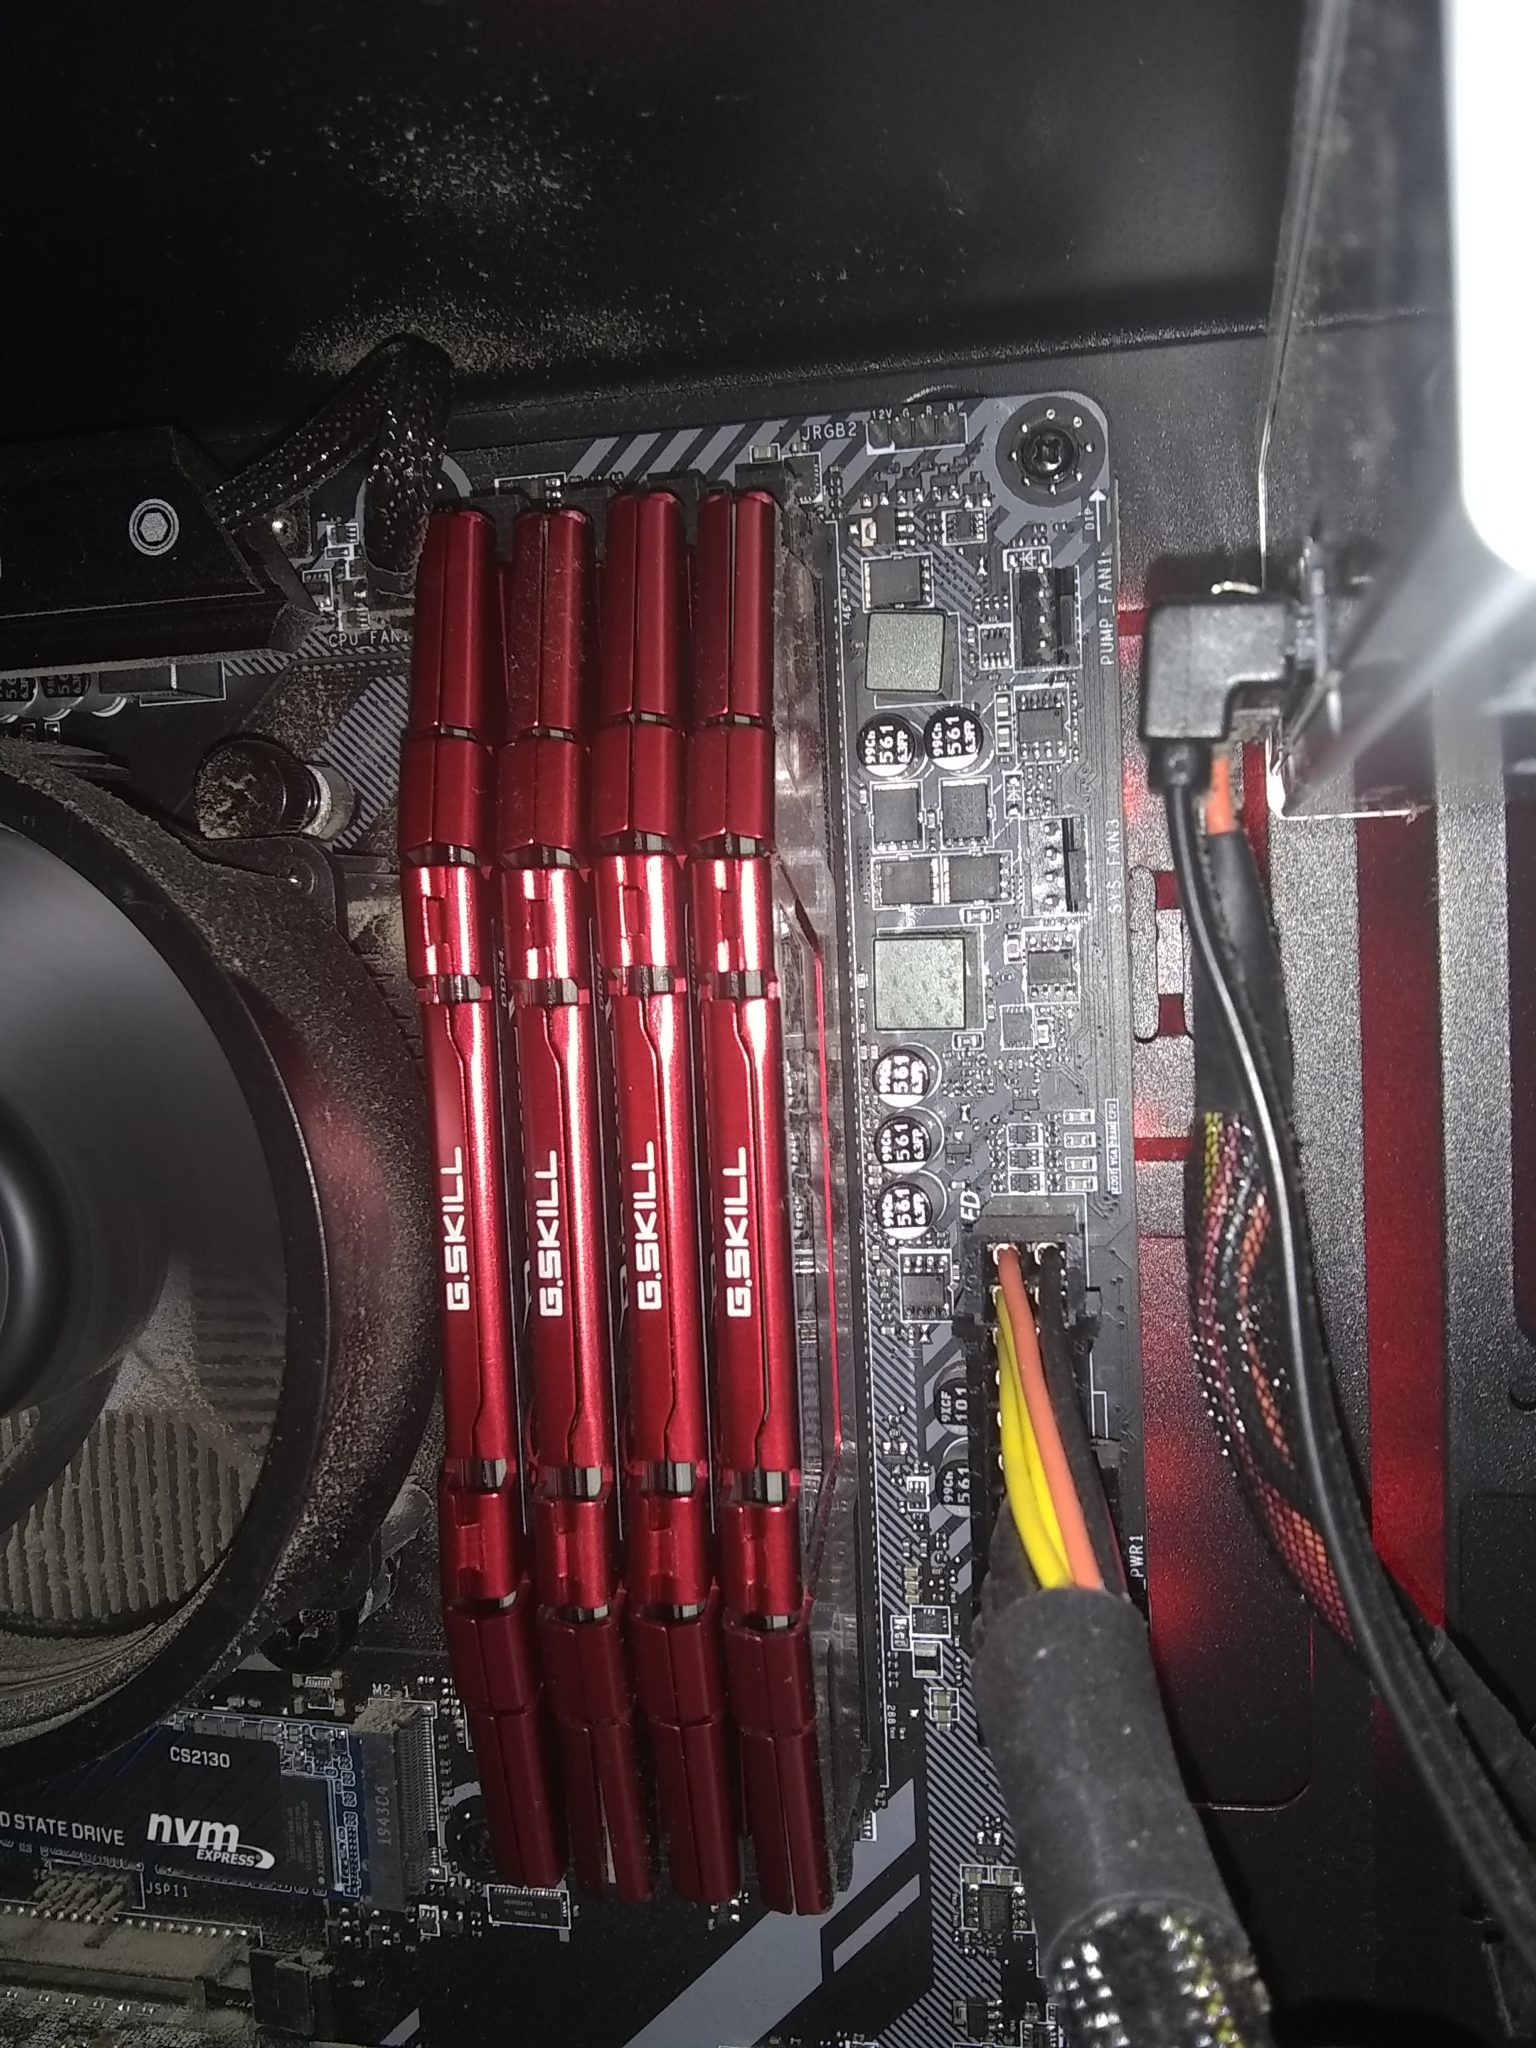
4x 8GB G.Skill DDR4 3200 
1TB PNY NVMe 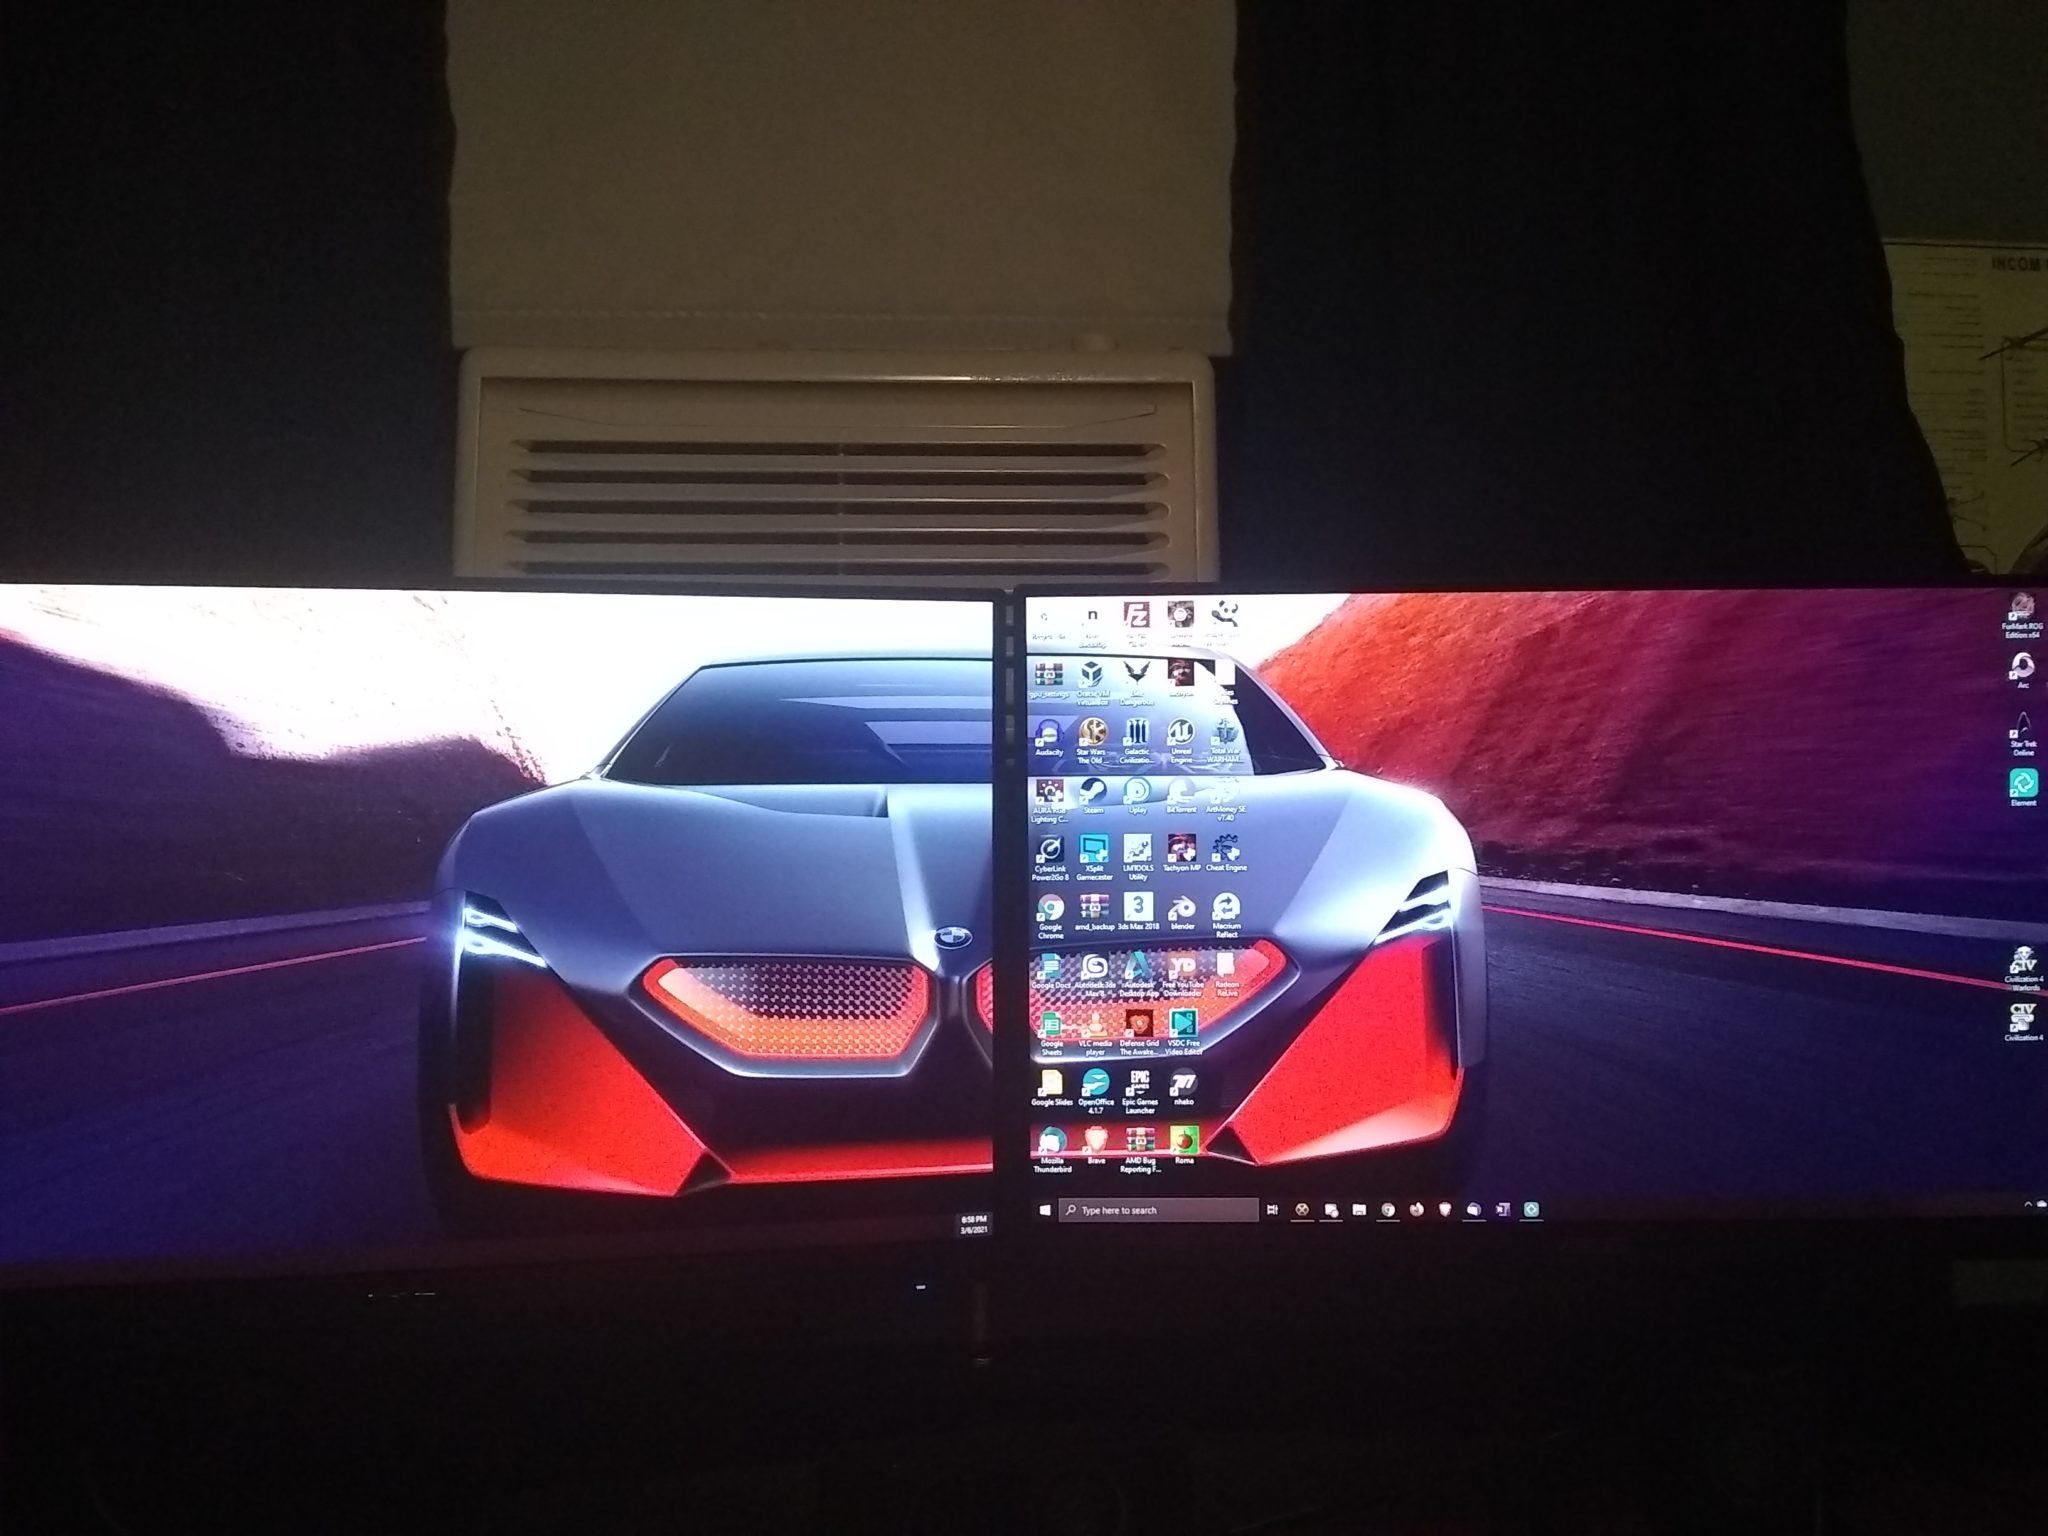
2x Asus VA24EHE 23.8”, IPS, 75Hz 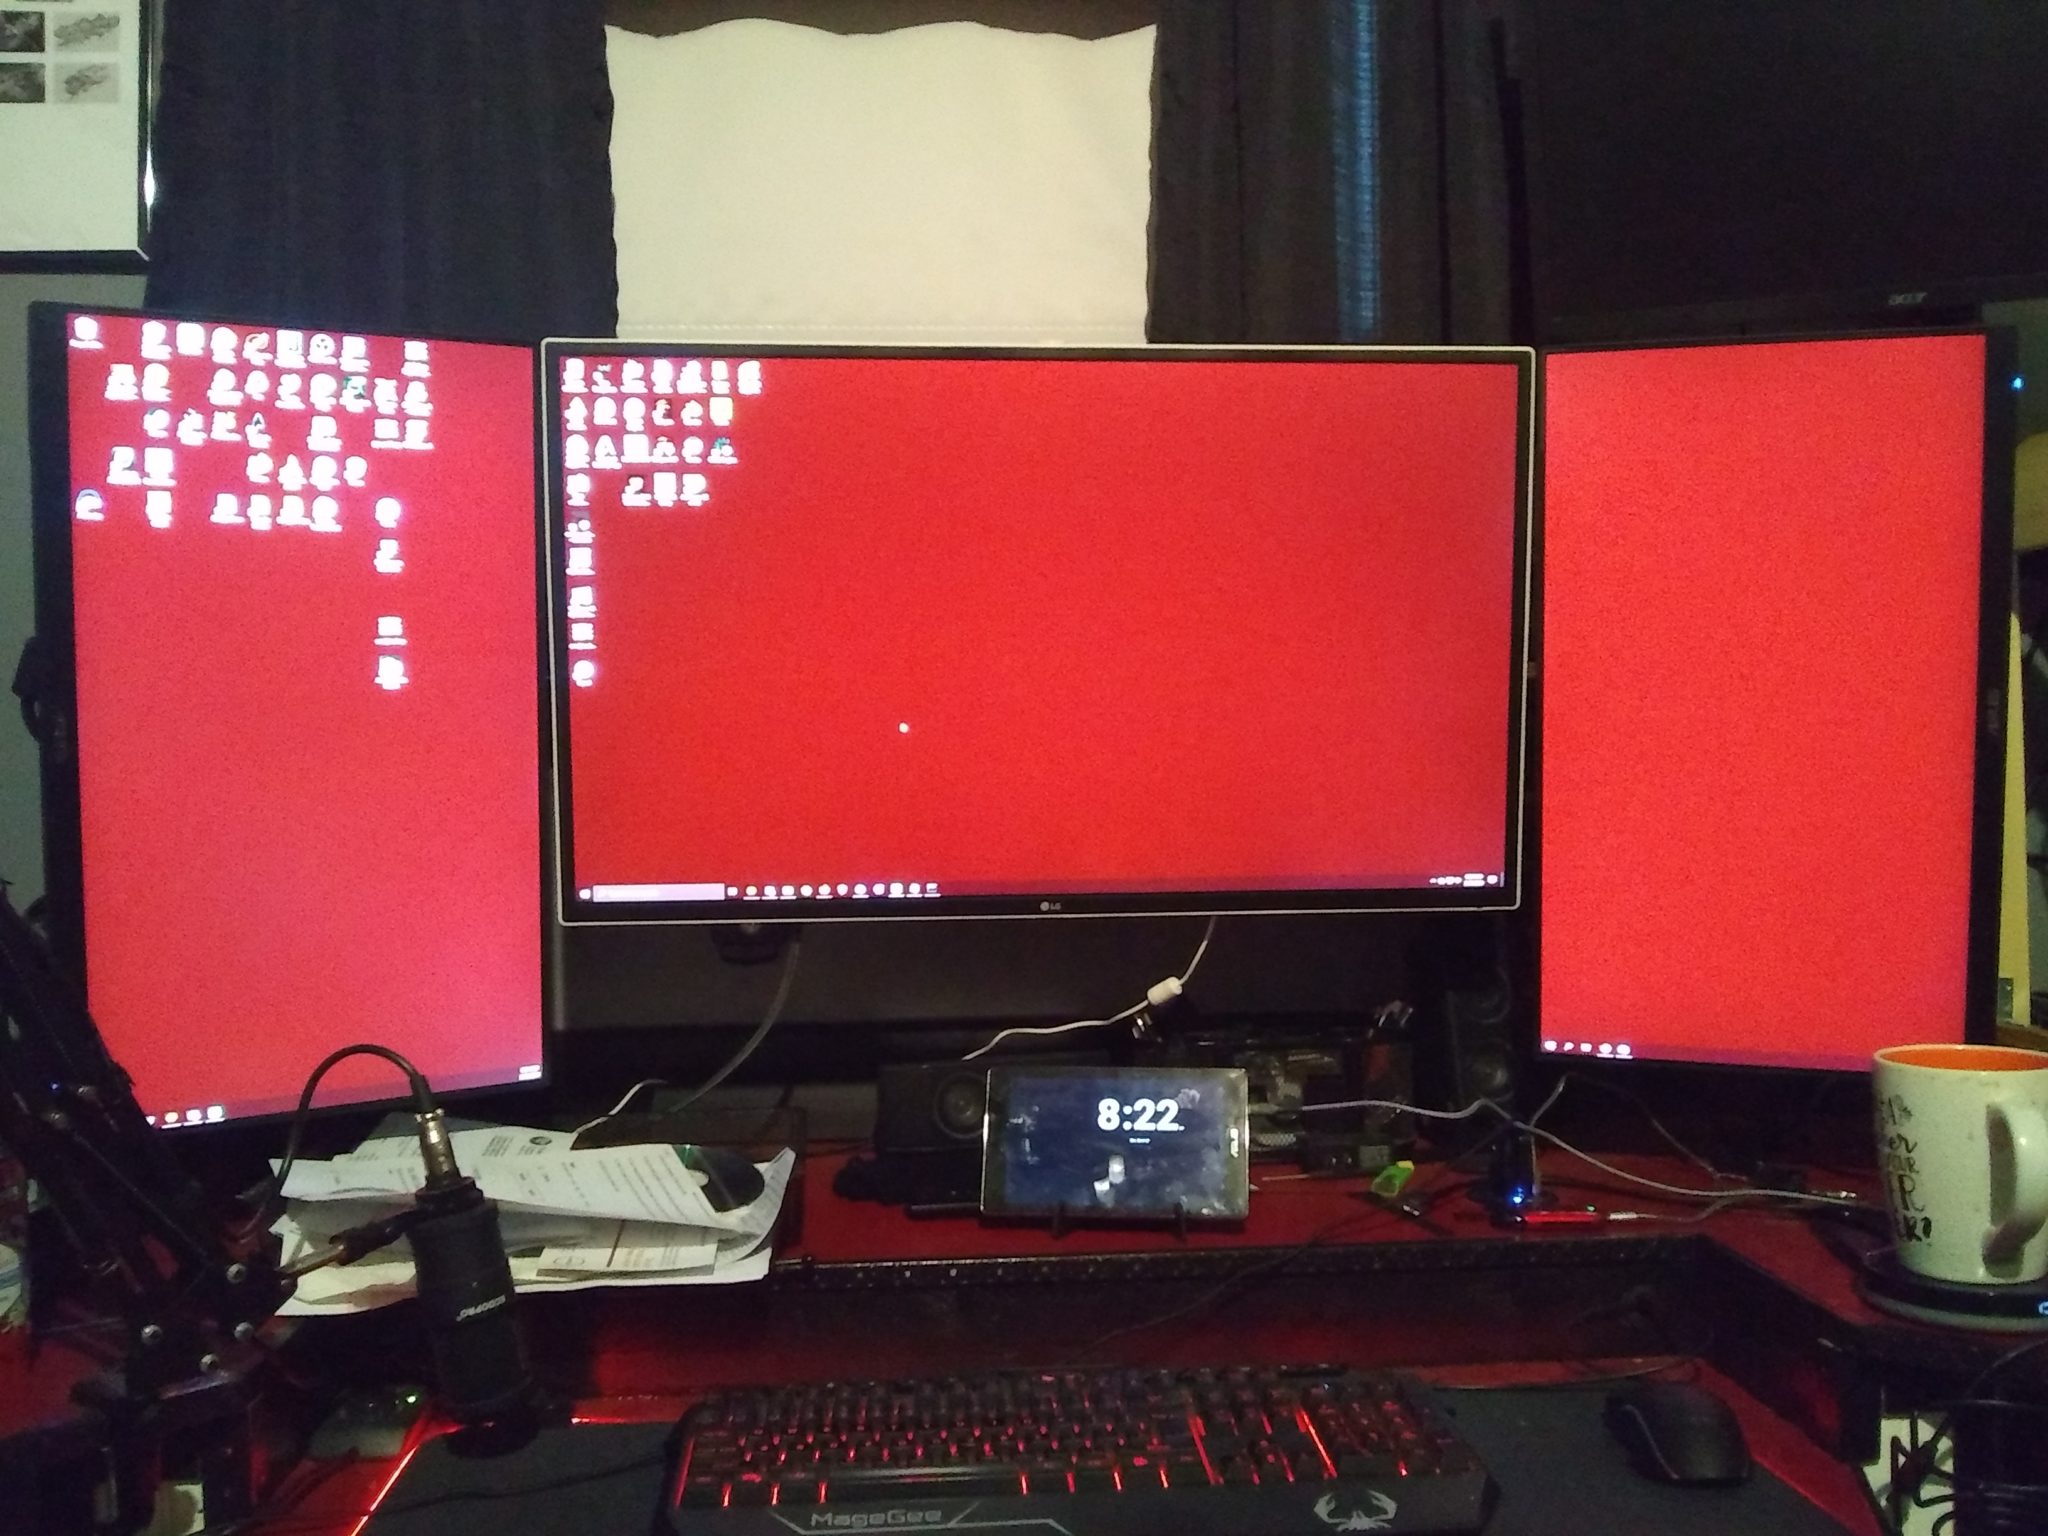
32″ LG QHD IPS 75hz
monitor
No comments